


Long time no post – the idea was to spend time taking photos during spring and summer and enjoy the underwater world vicariously by blogging in autumn and winter. However, something terrible happened on my only dive of 2025: my underwater housing sprung a leak! The housing was not flooded to an extent that it damaged my camera but it needed to be repaired before I could get back underwater. Unfortunately there is only one place that can do that, backscatter all the way in California, and even more unfortunately, U.S. customs decided to keep my package on a shelf for over a month. I have never seen an octopus in my decade of diving but of course people reported eight or so per dive last month so I was feeling very sorry for myself!* Anyway, I have been confined to the shoreline so far. To cope with that, I bought a weird chinese macro-wide angle lens to play with which I will post about later. I also used my ‘normal’ 60mm macro lens (sometimes with a Raynox lens attached to the front for extra magnification) and took some time to focus on periwinkles.
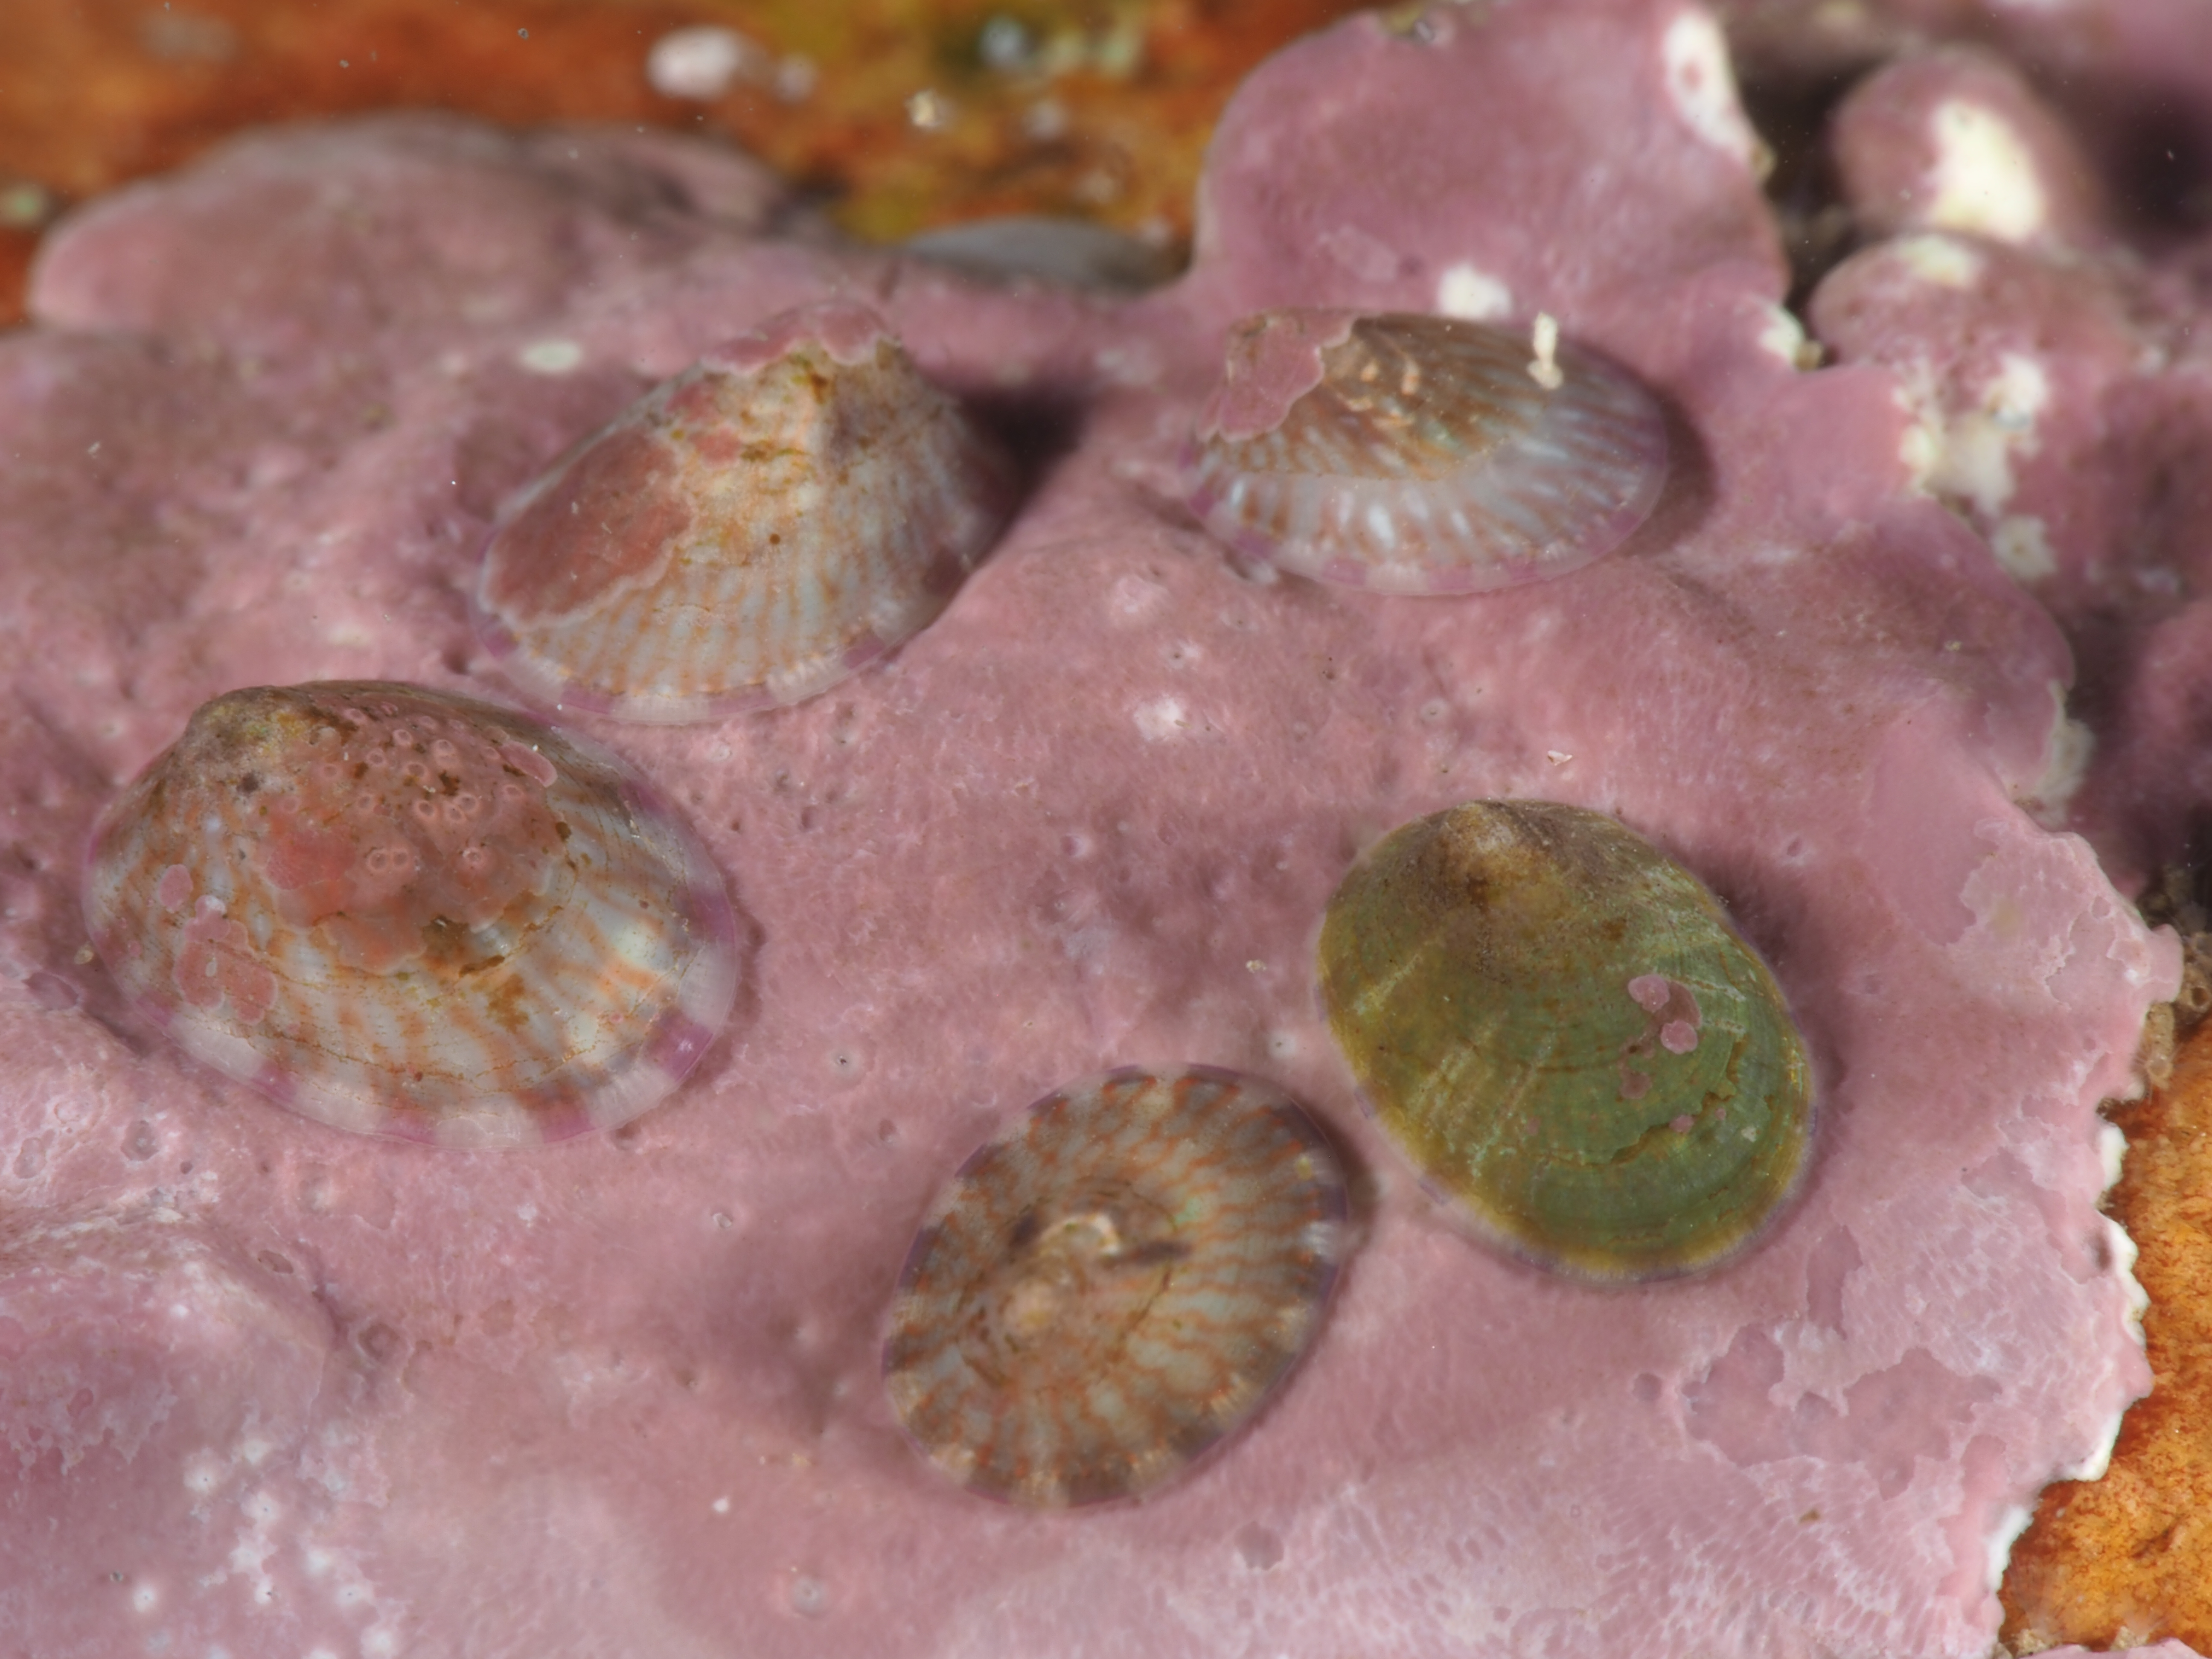
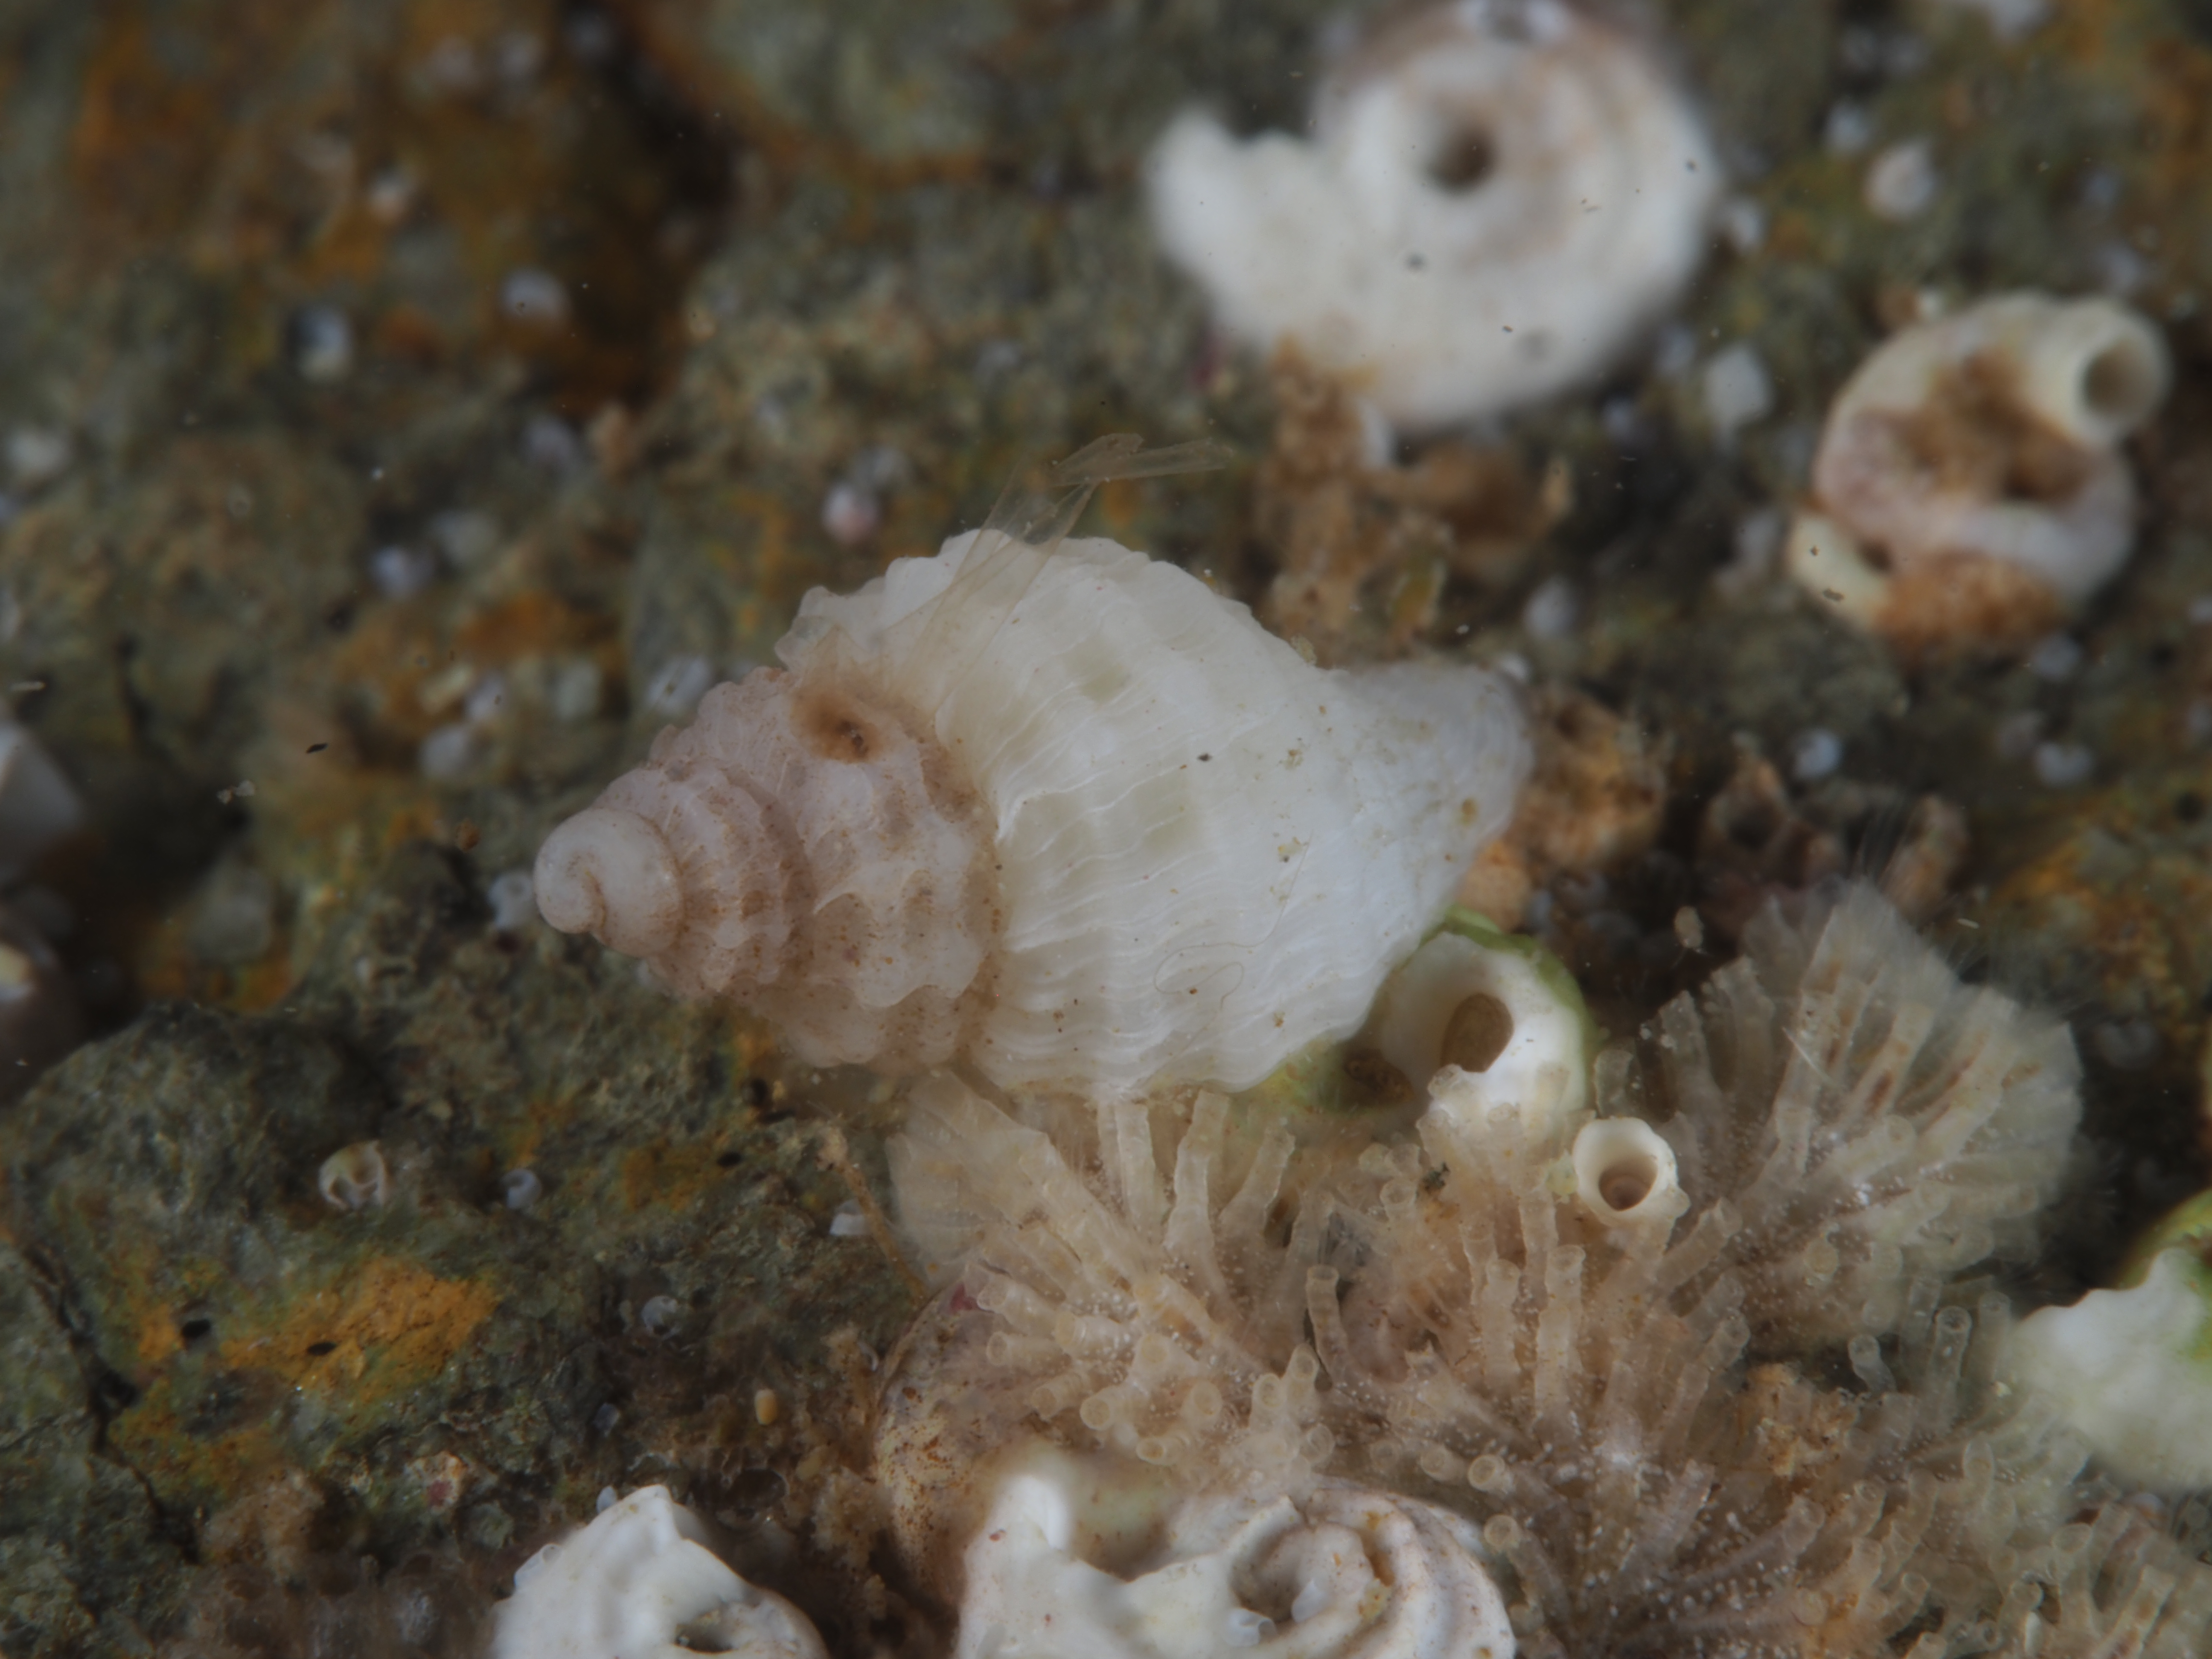
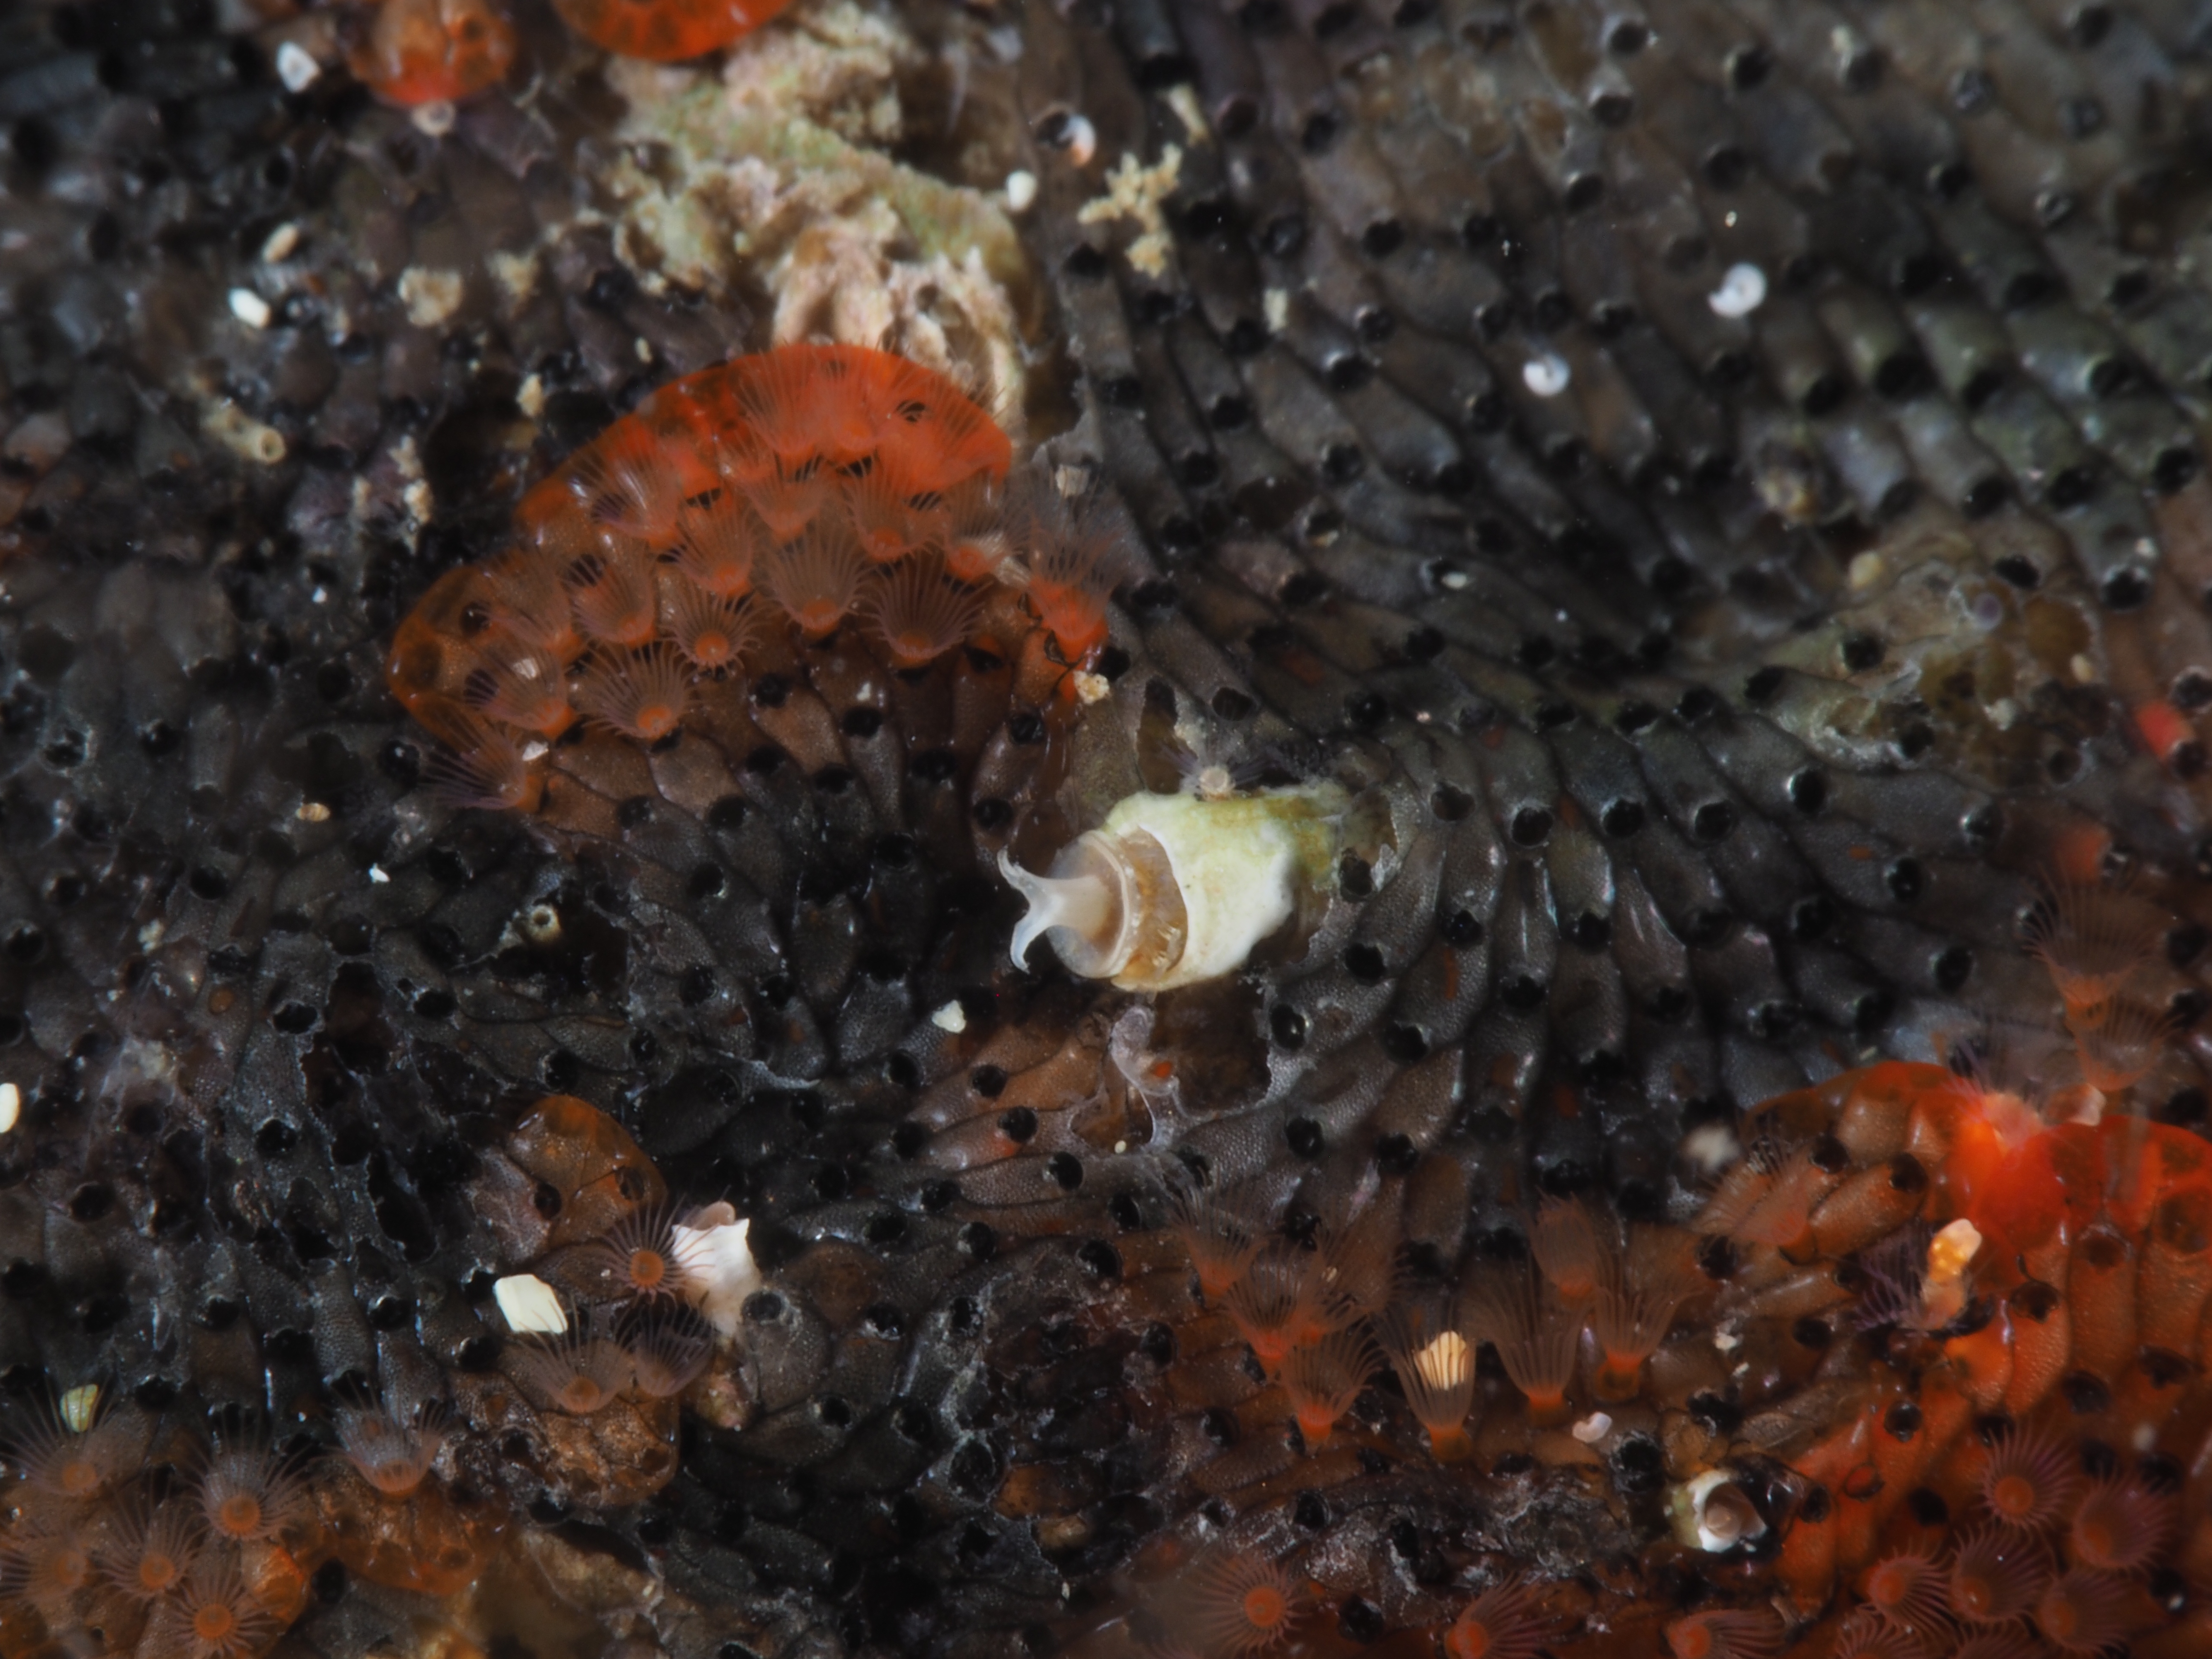
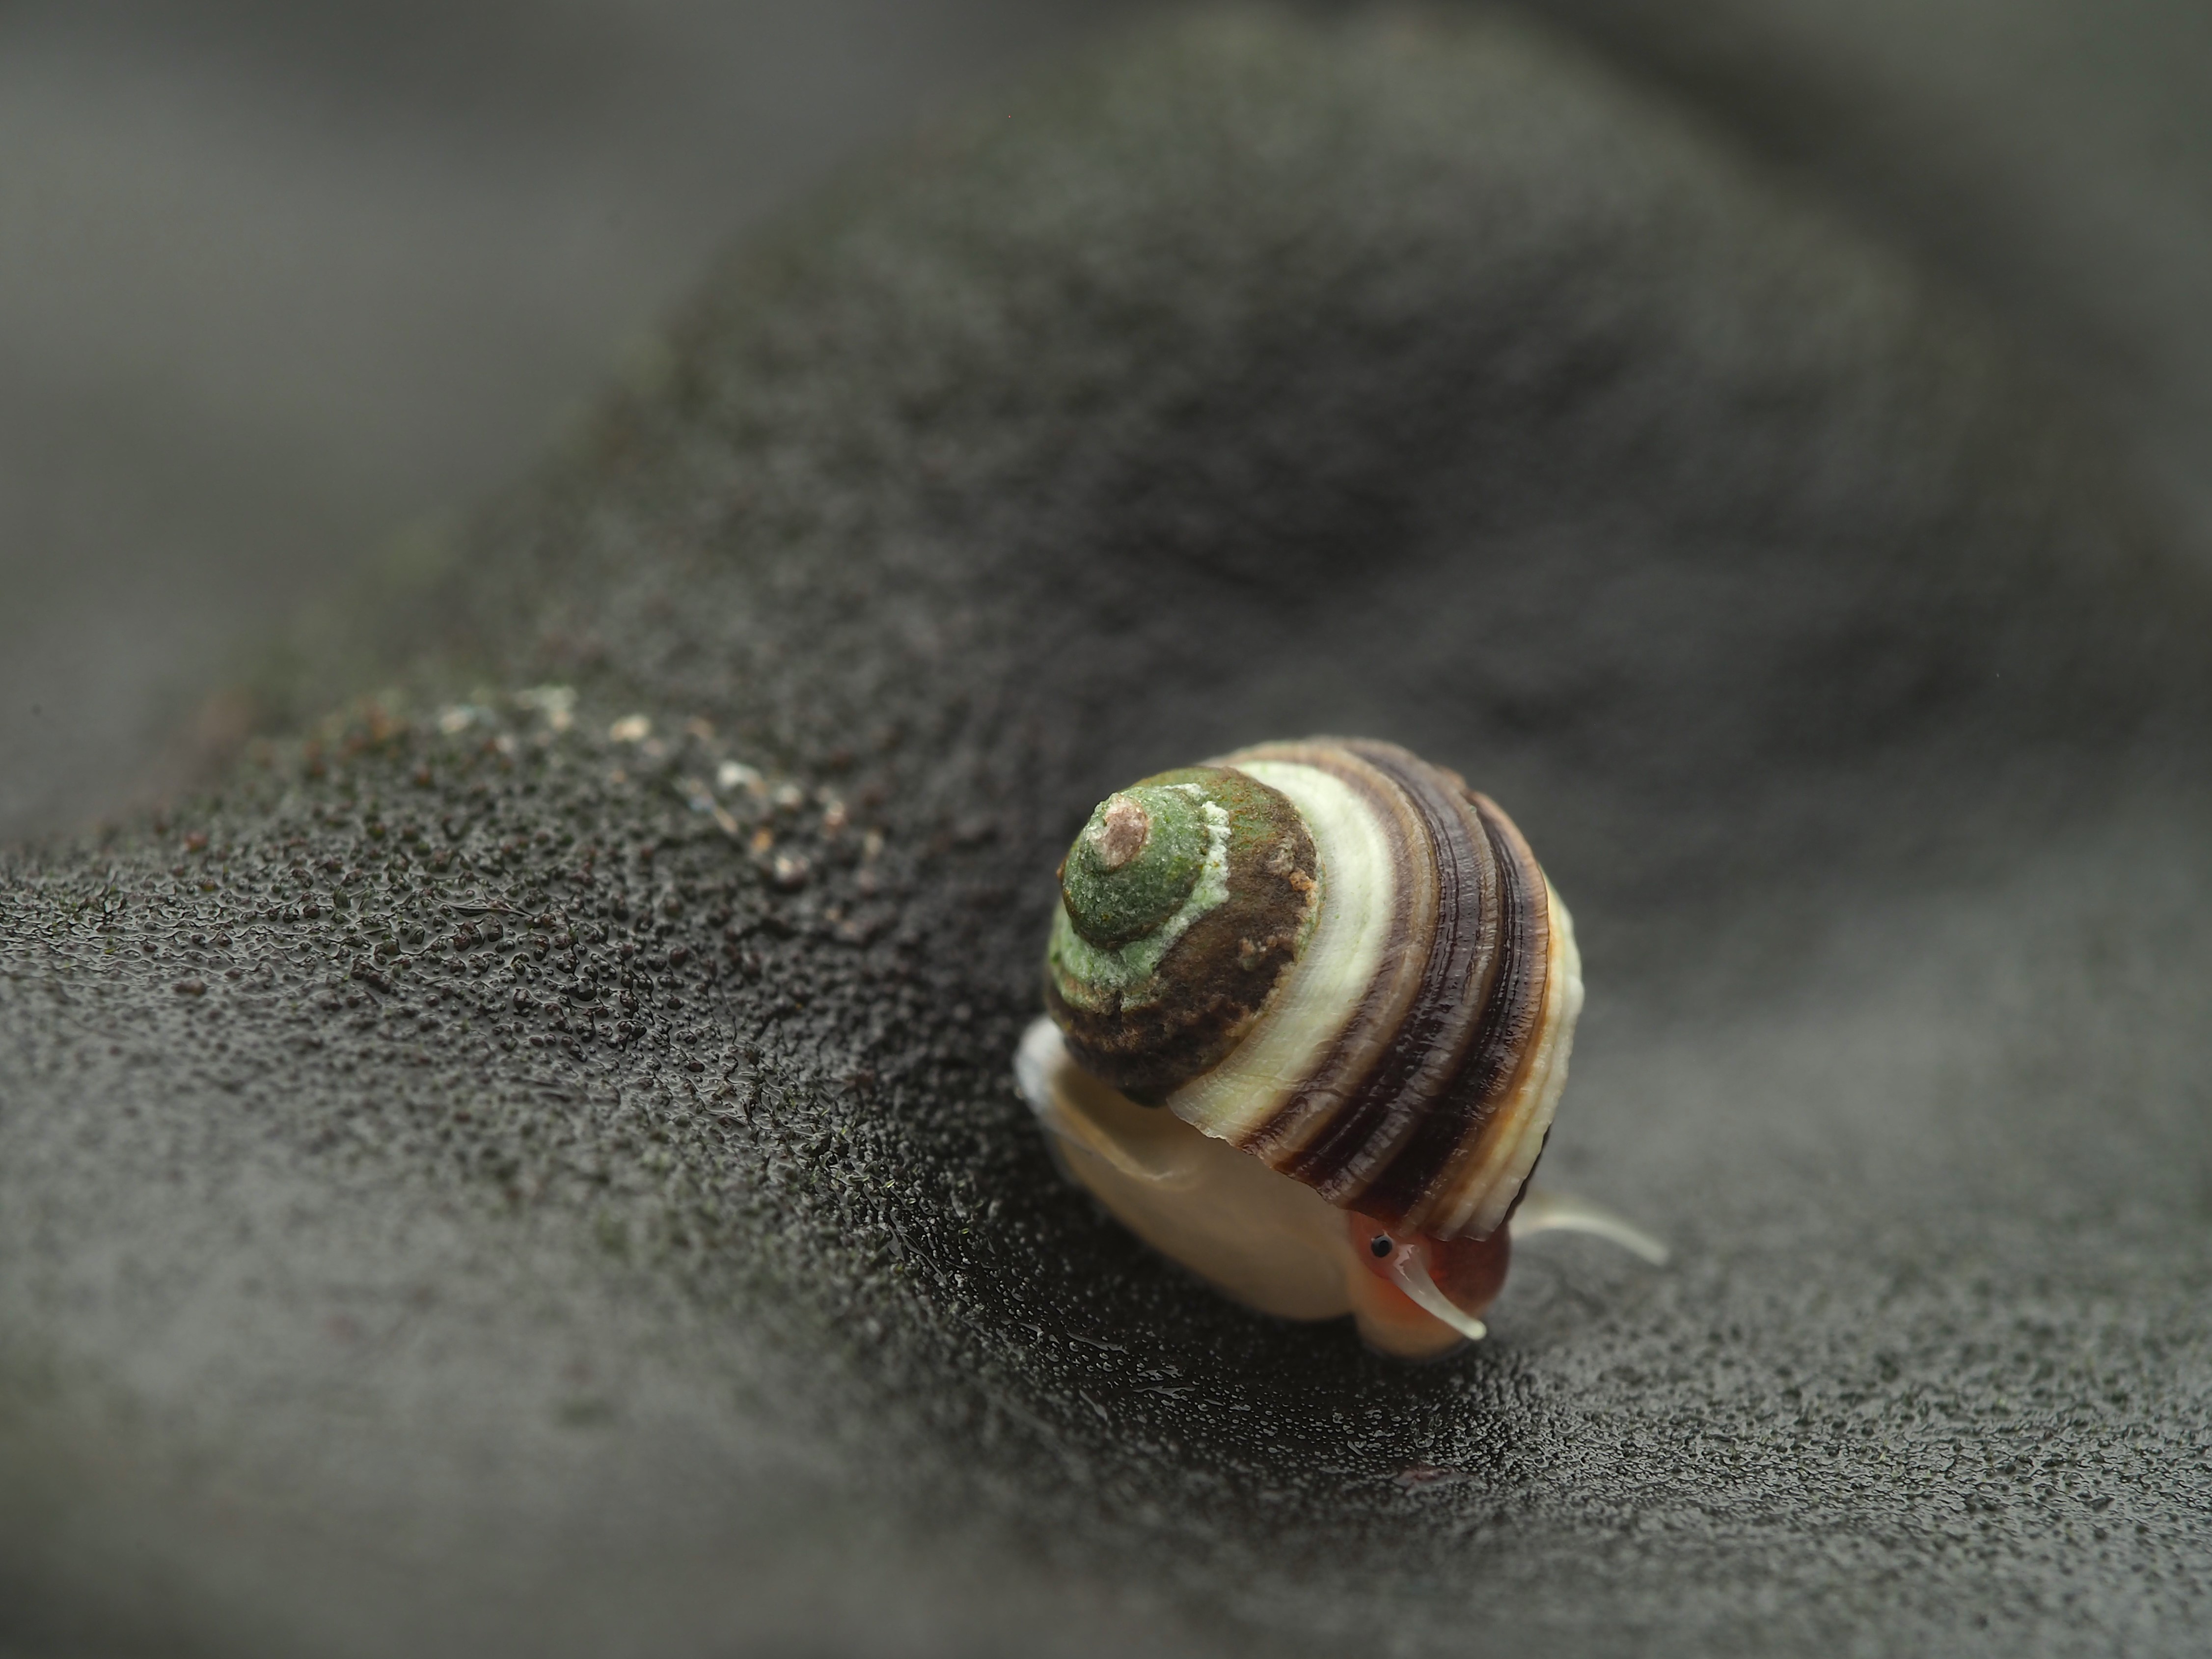
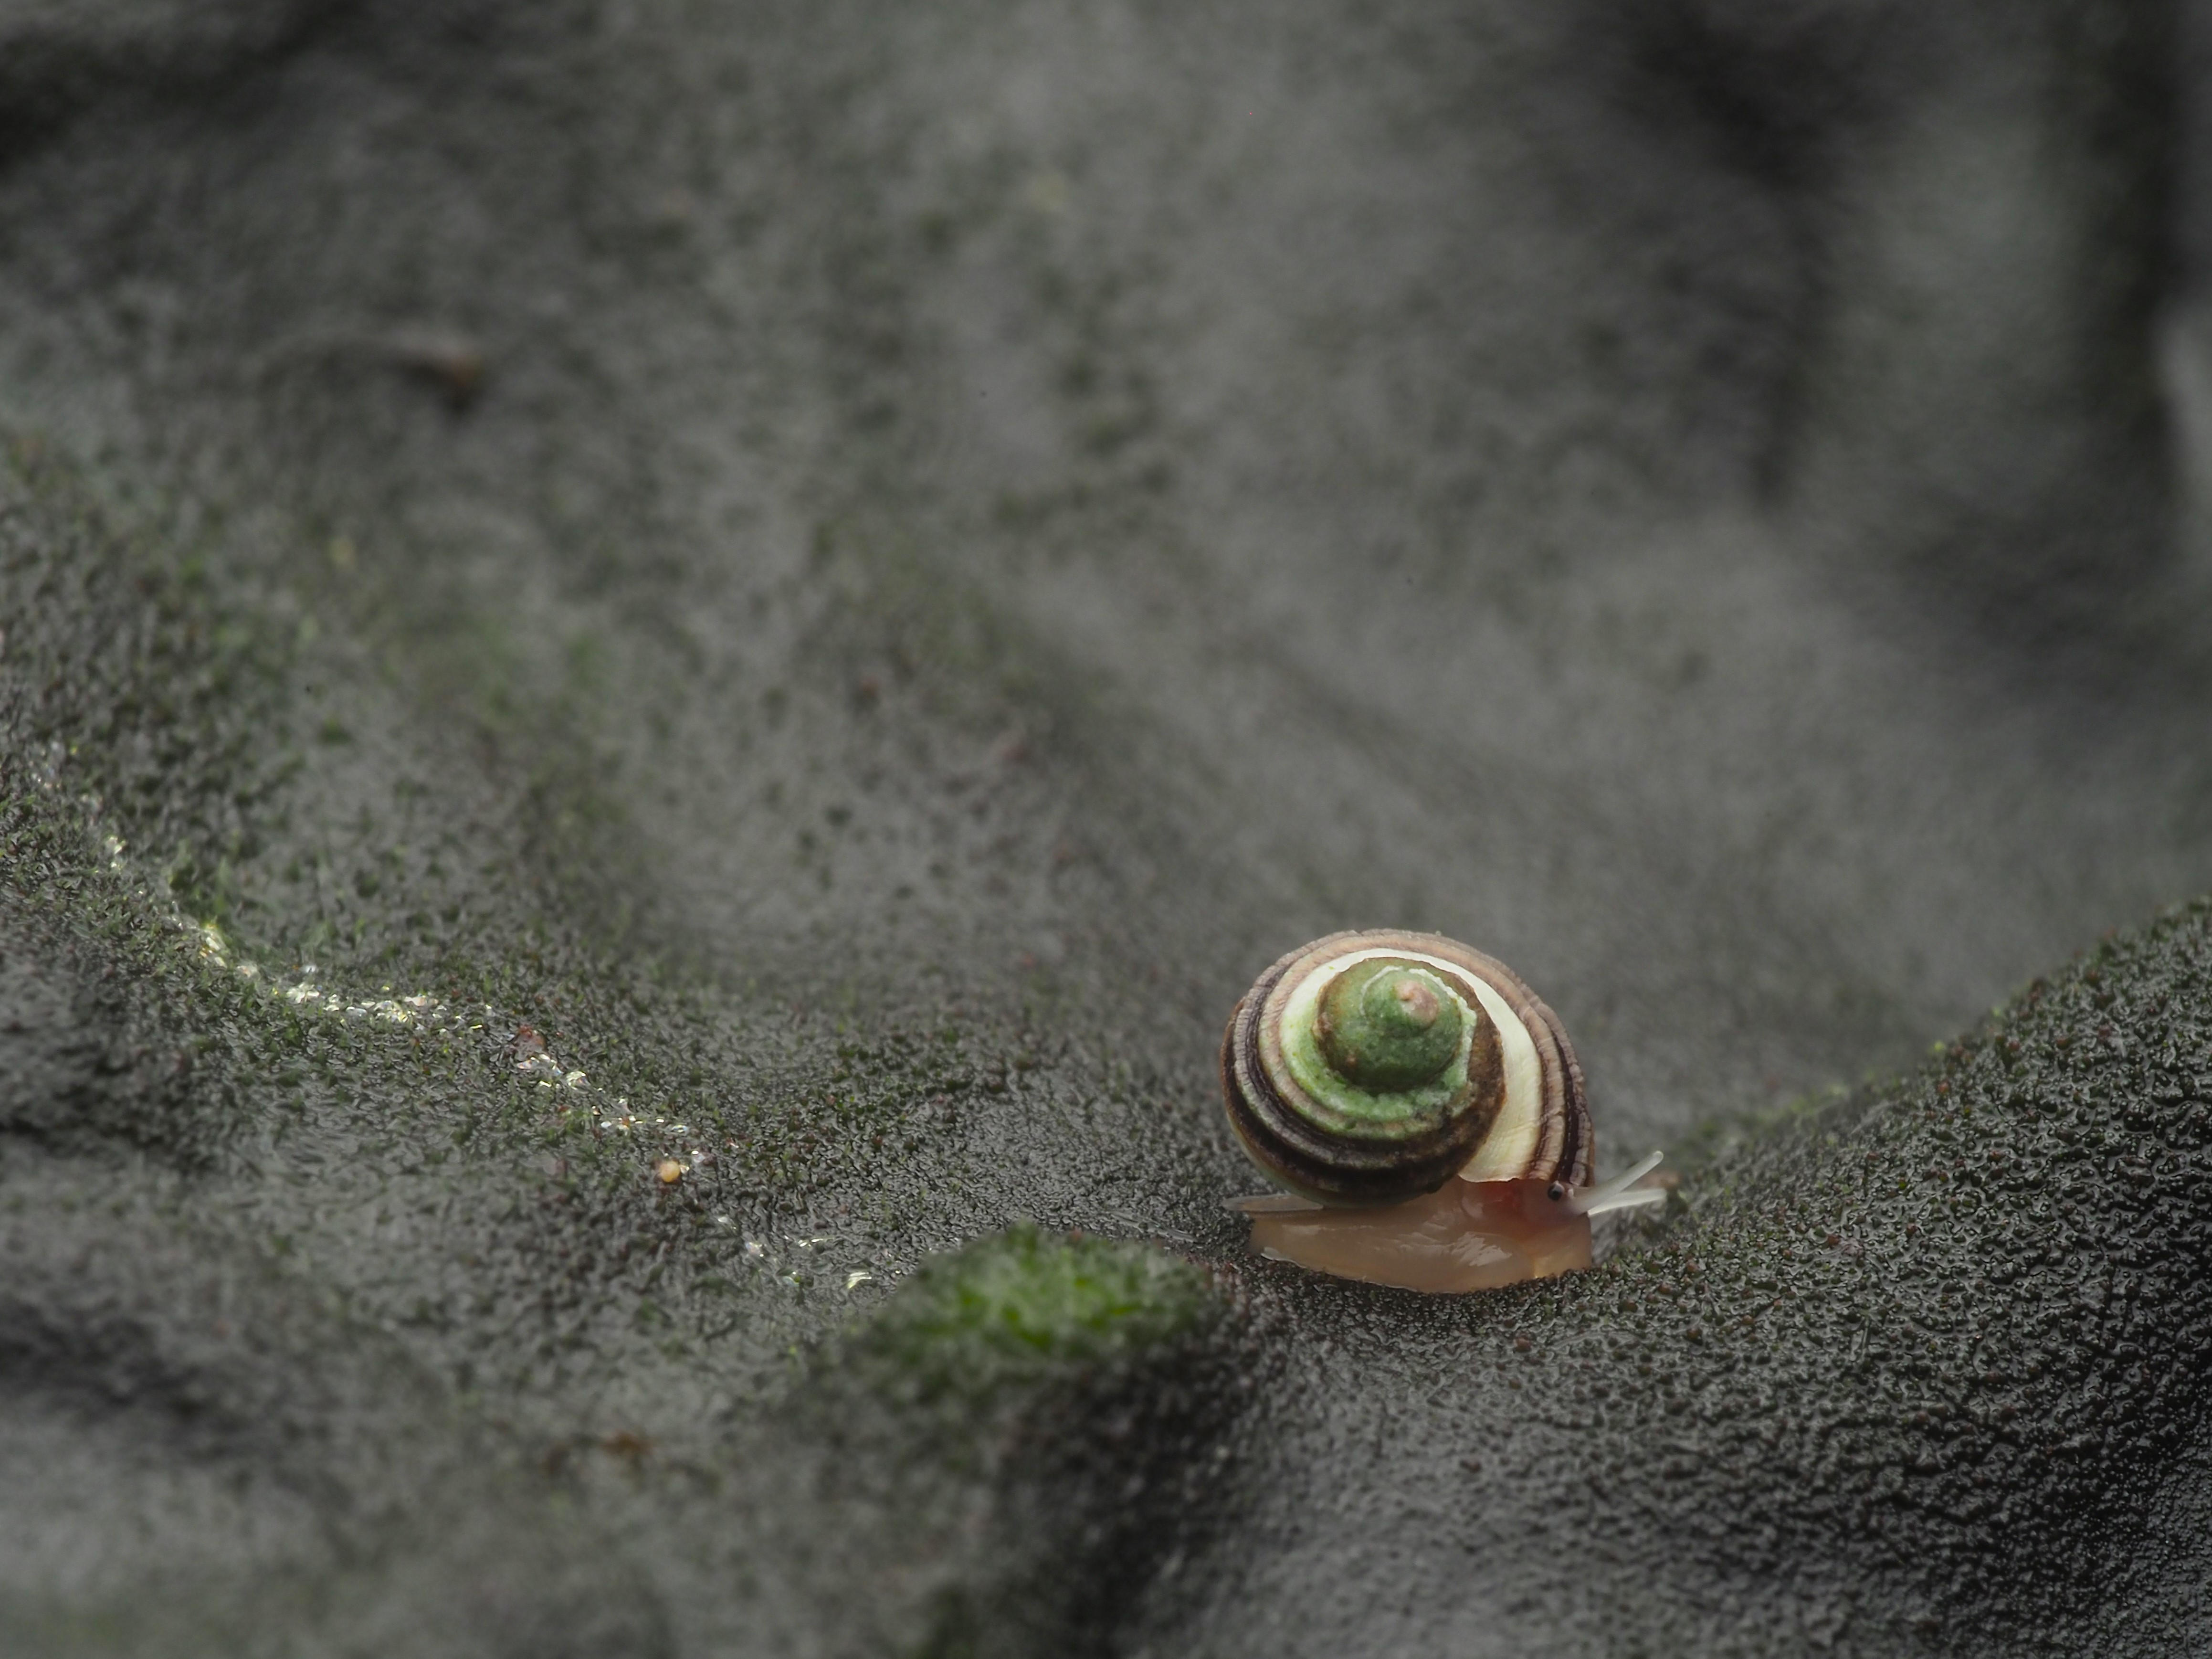
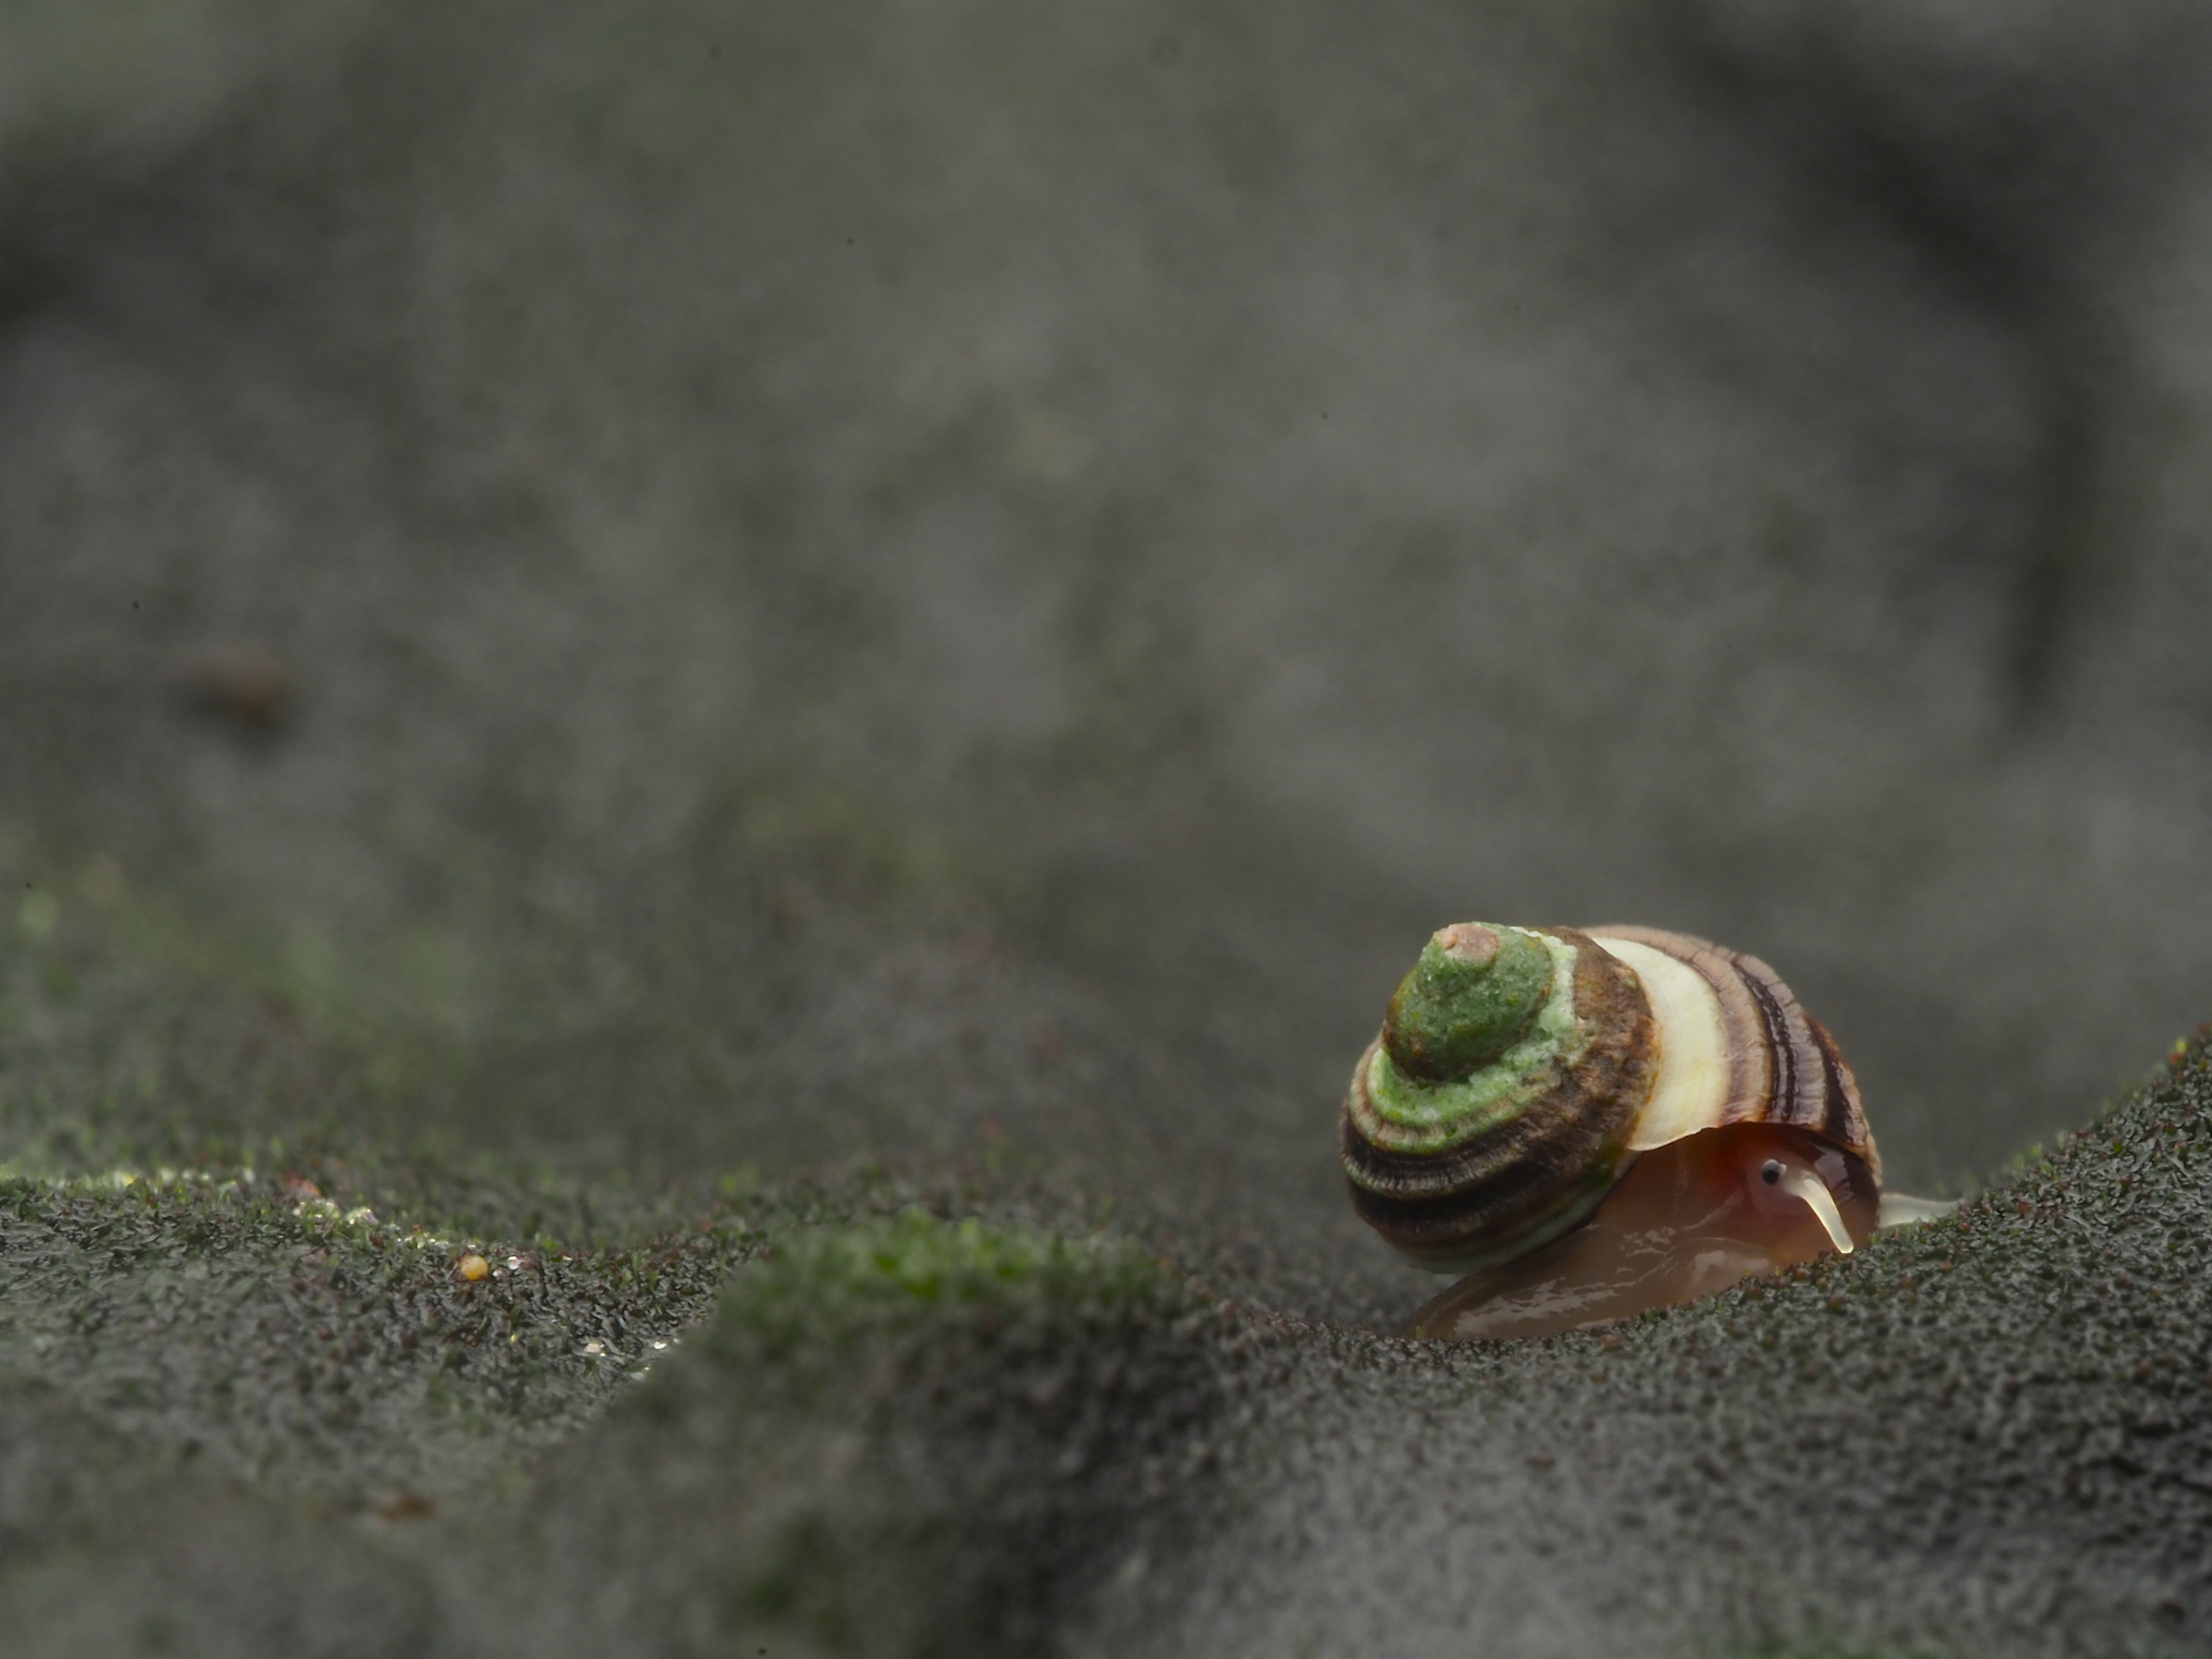
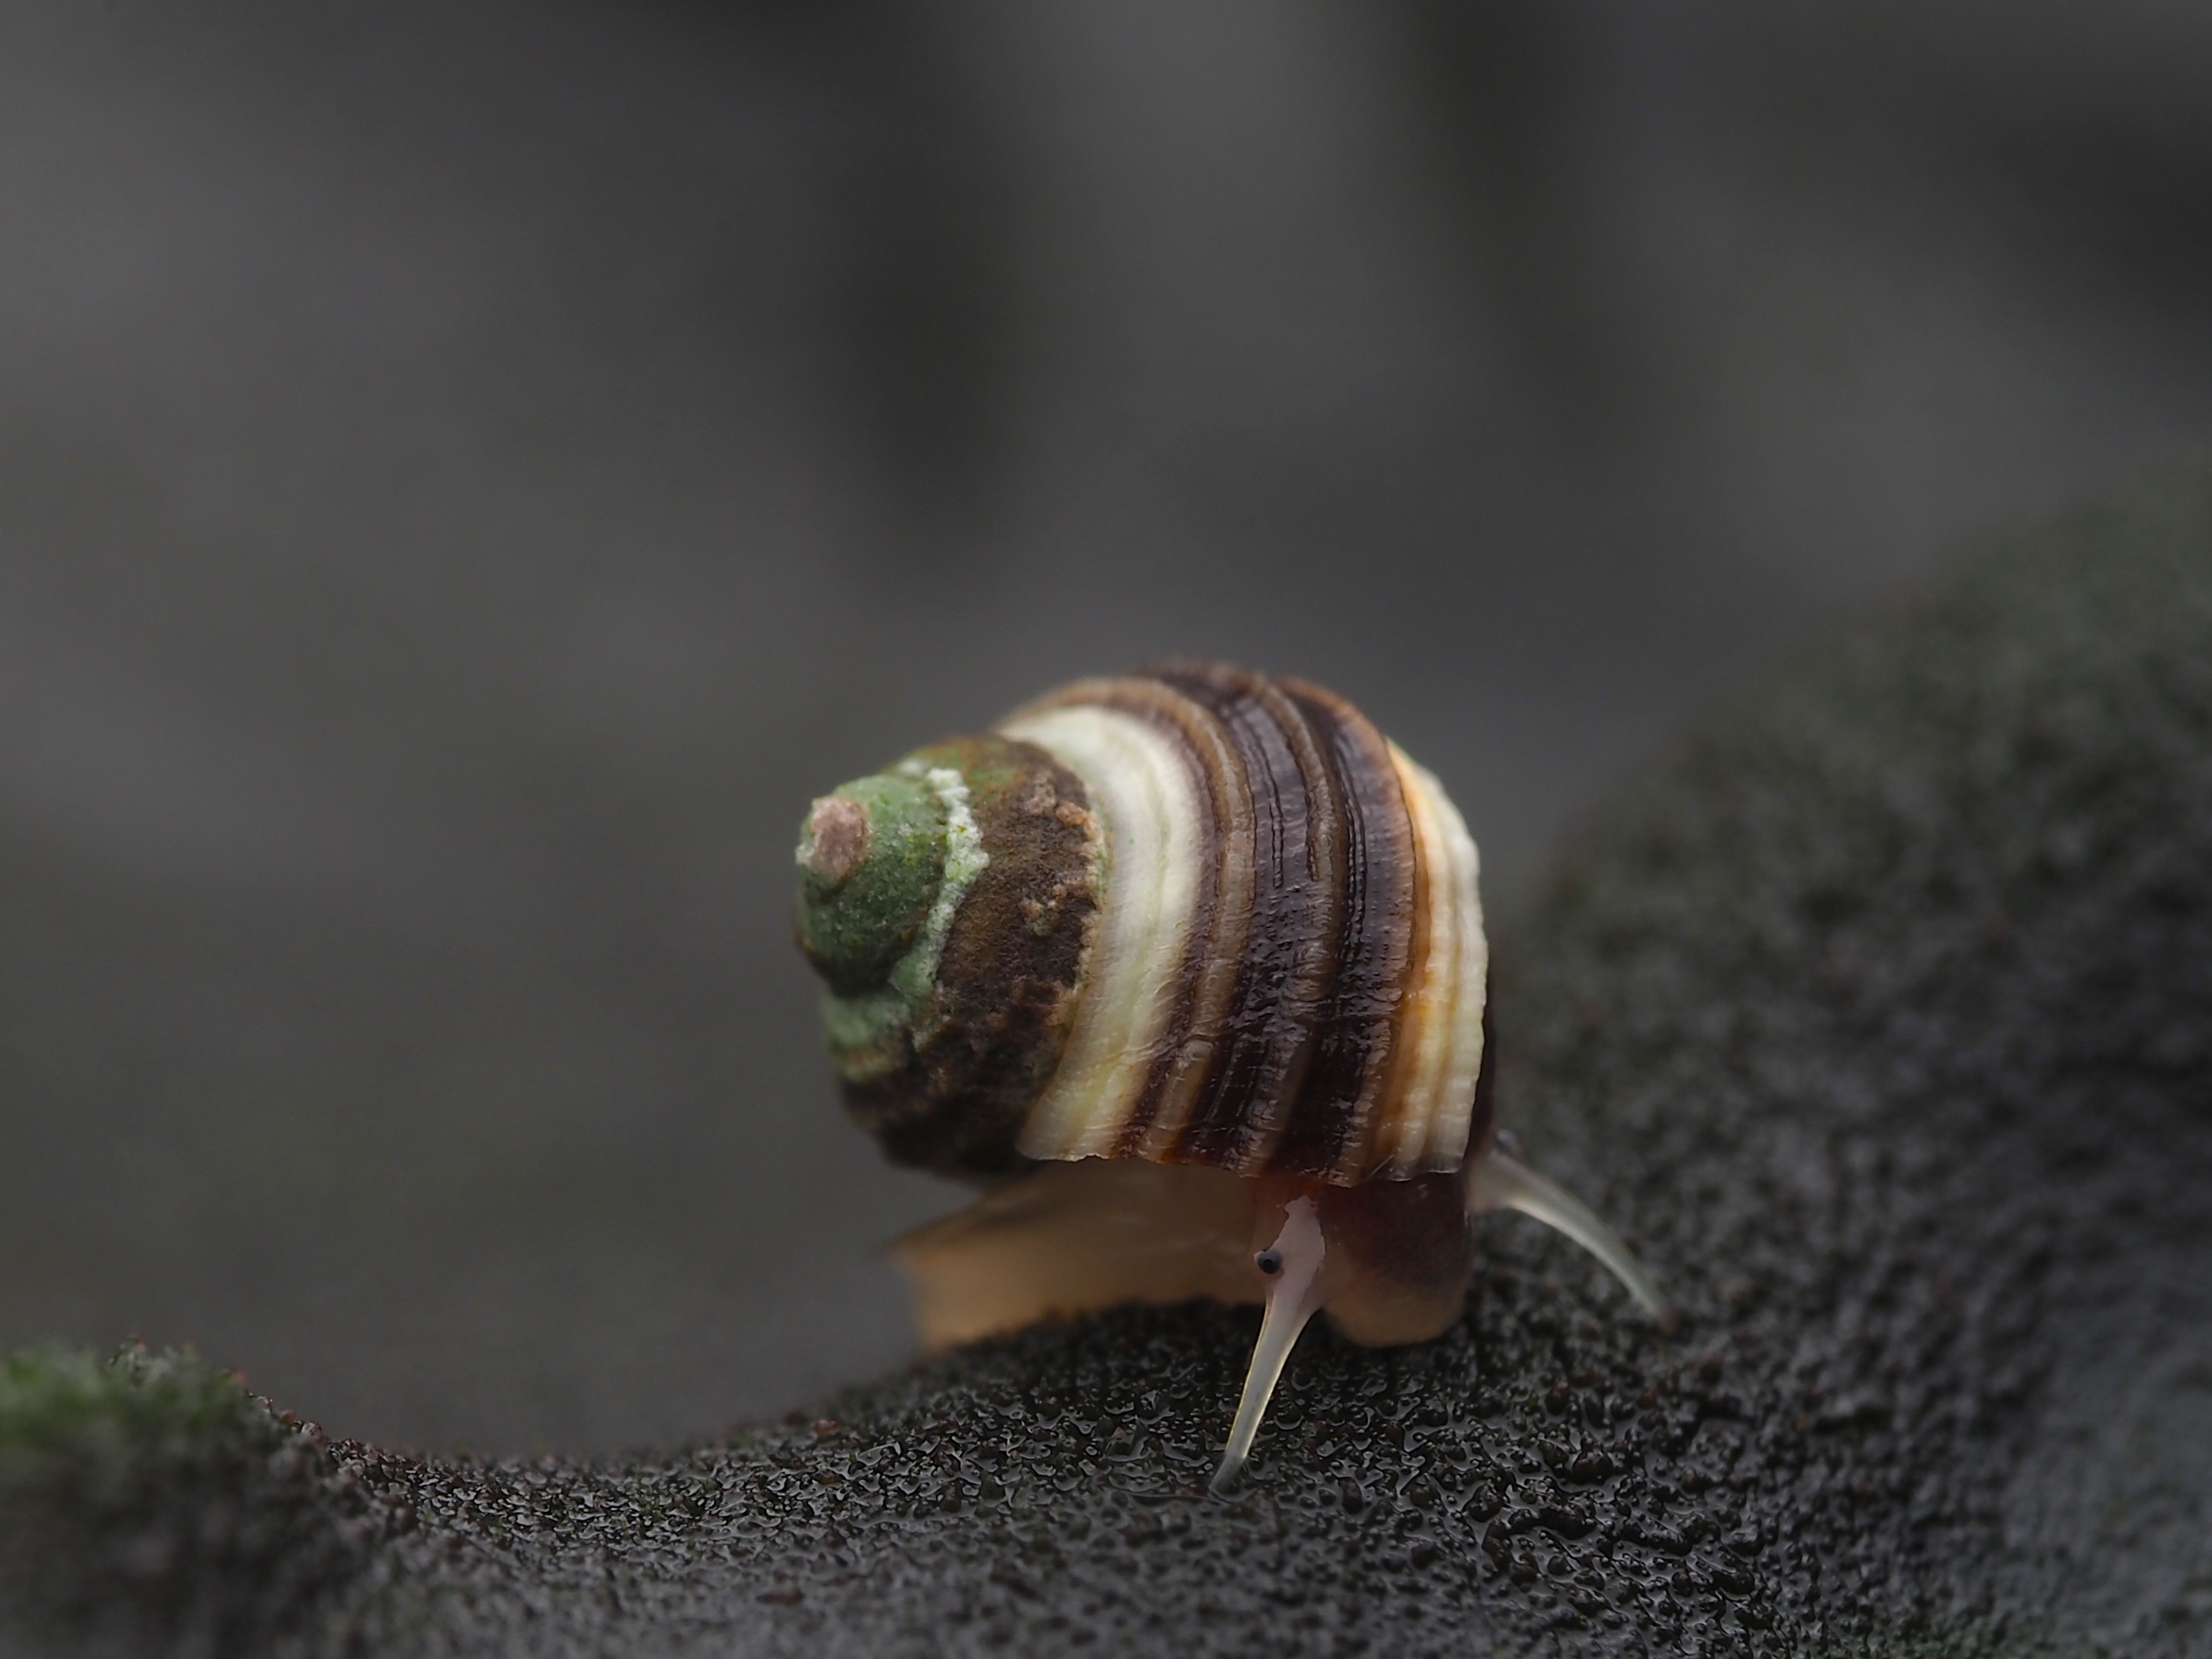
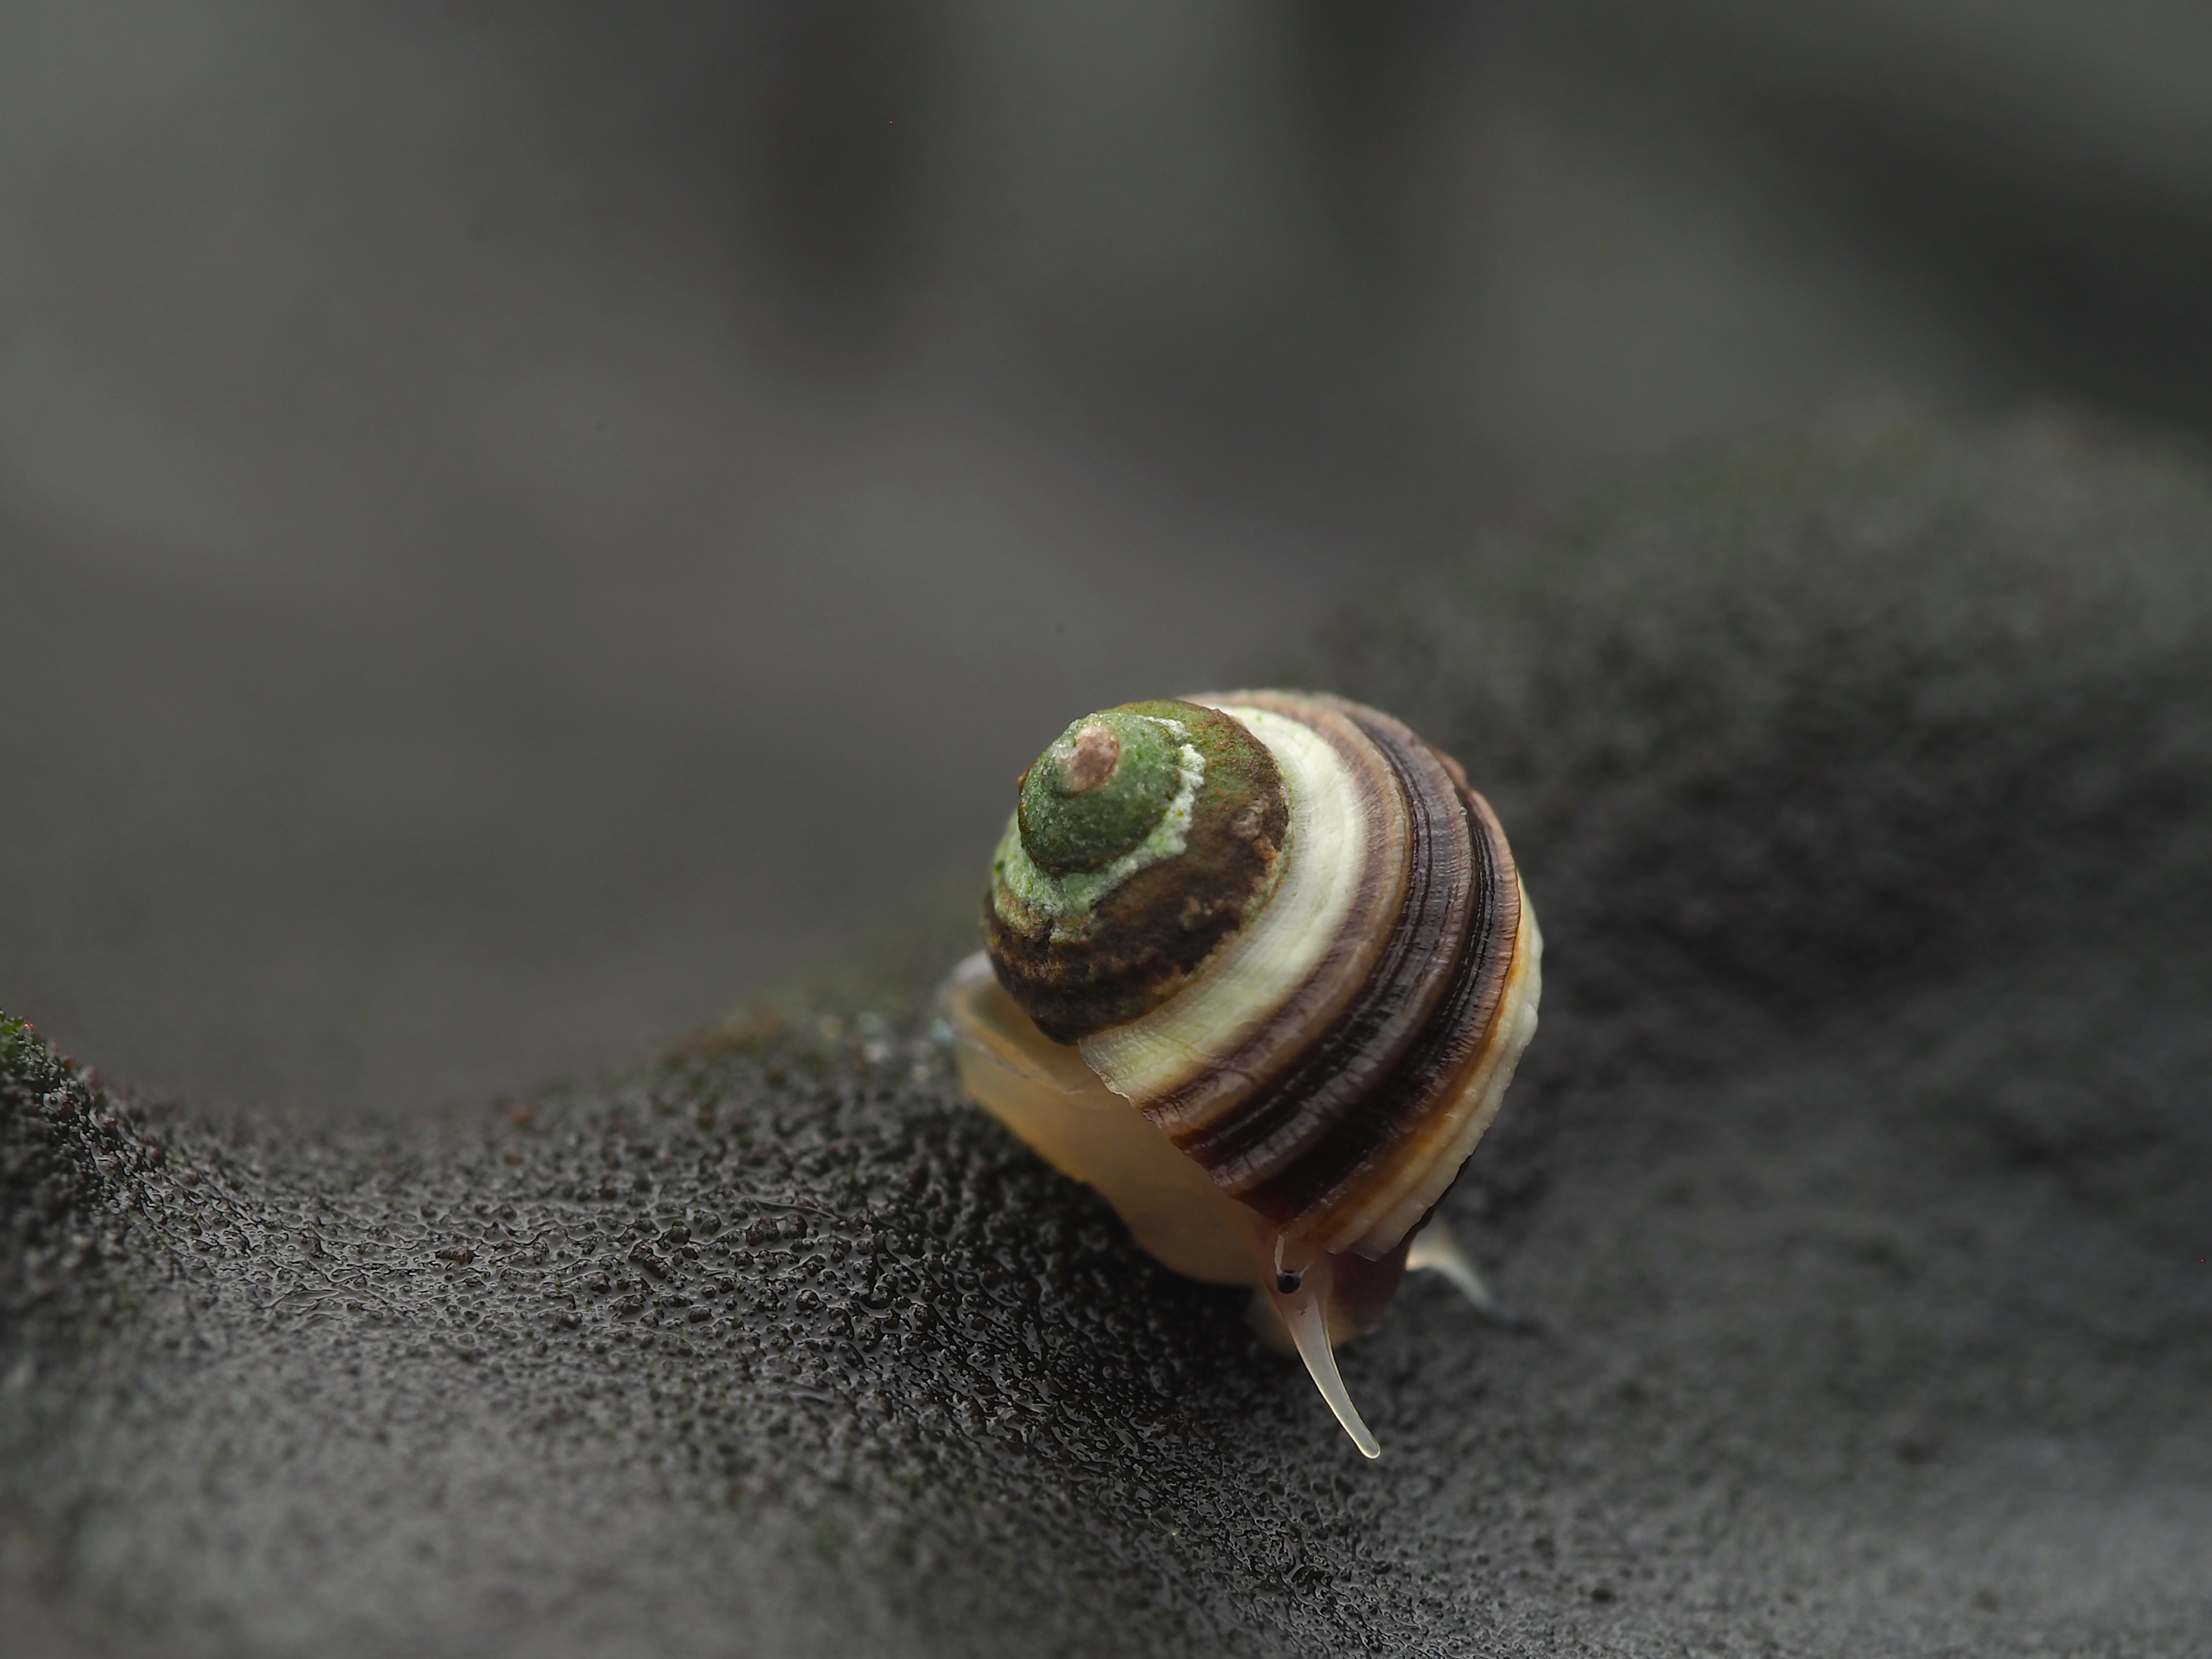
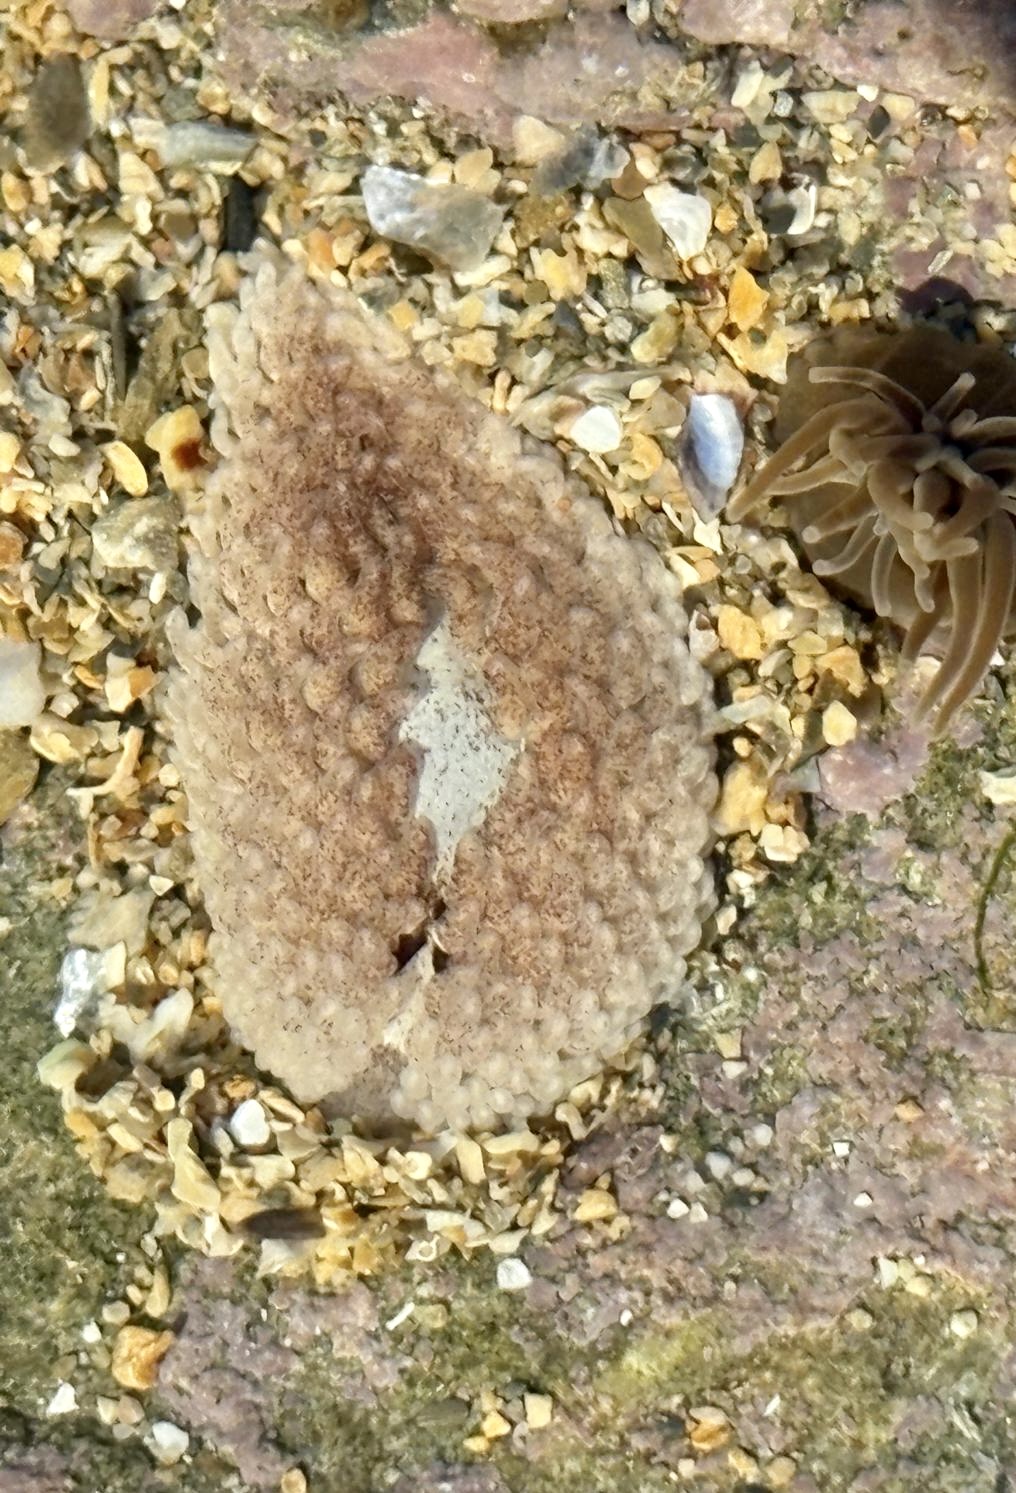
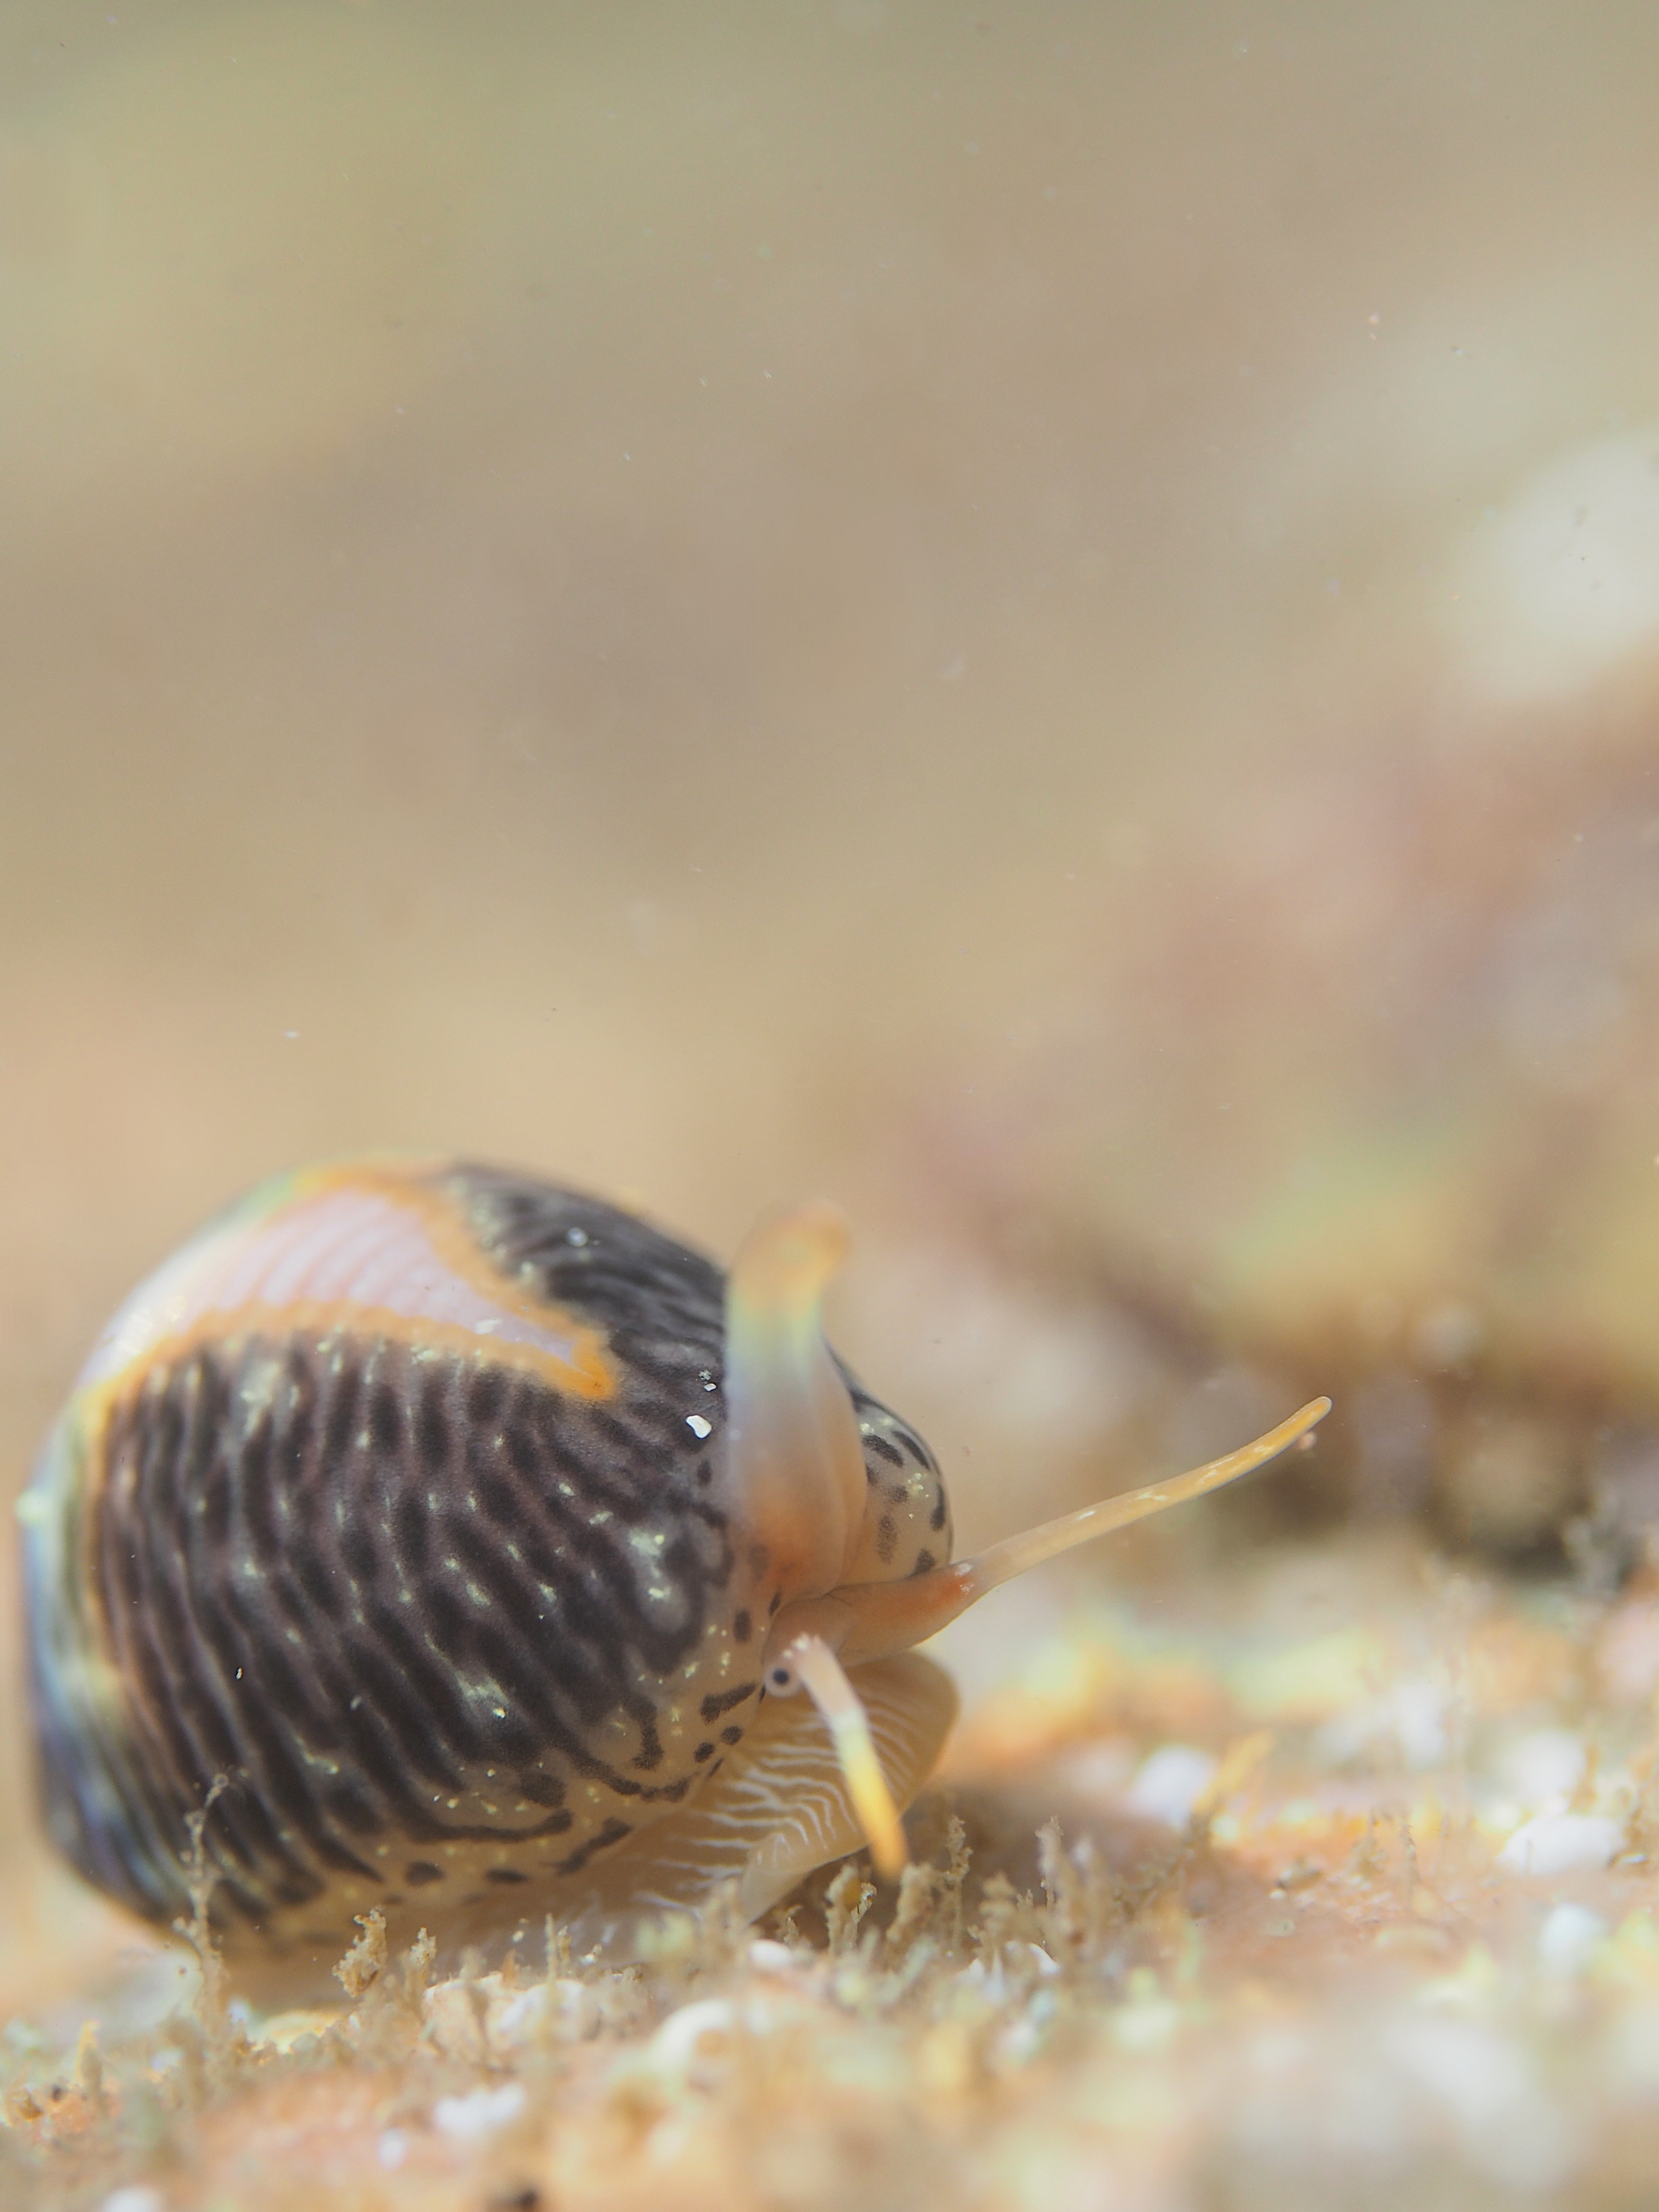
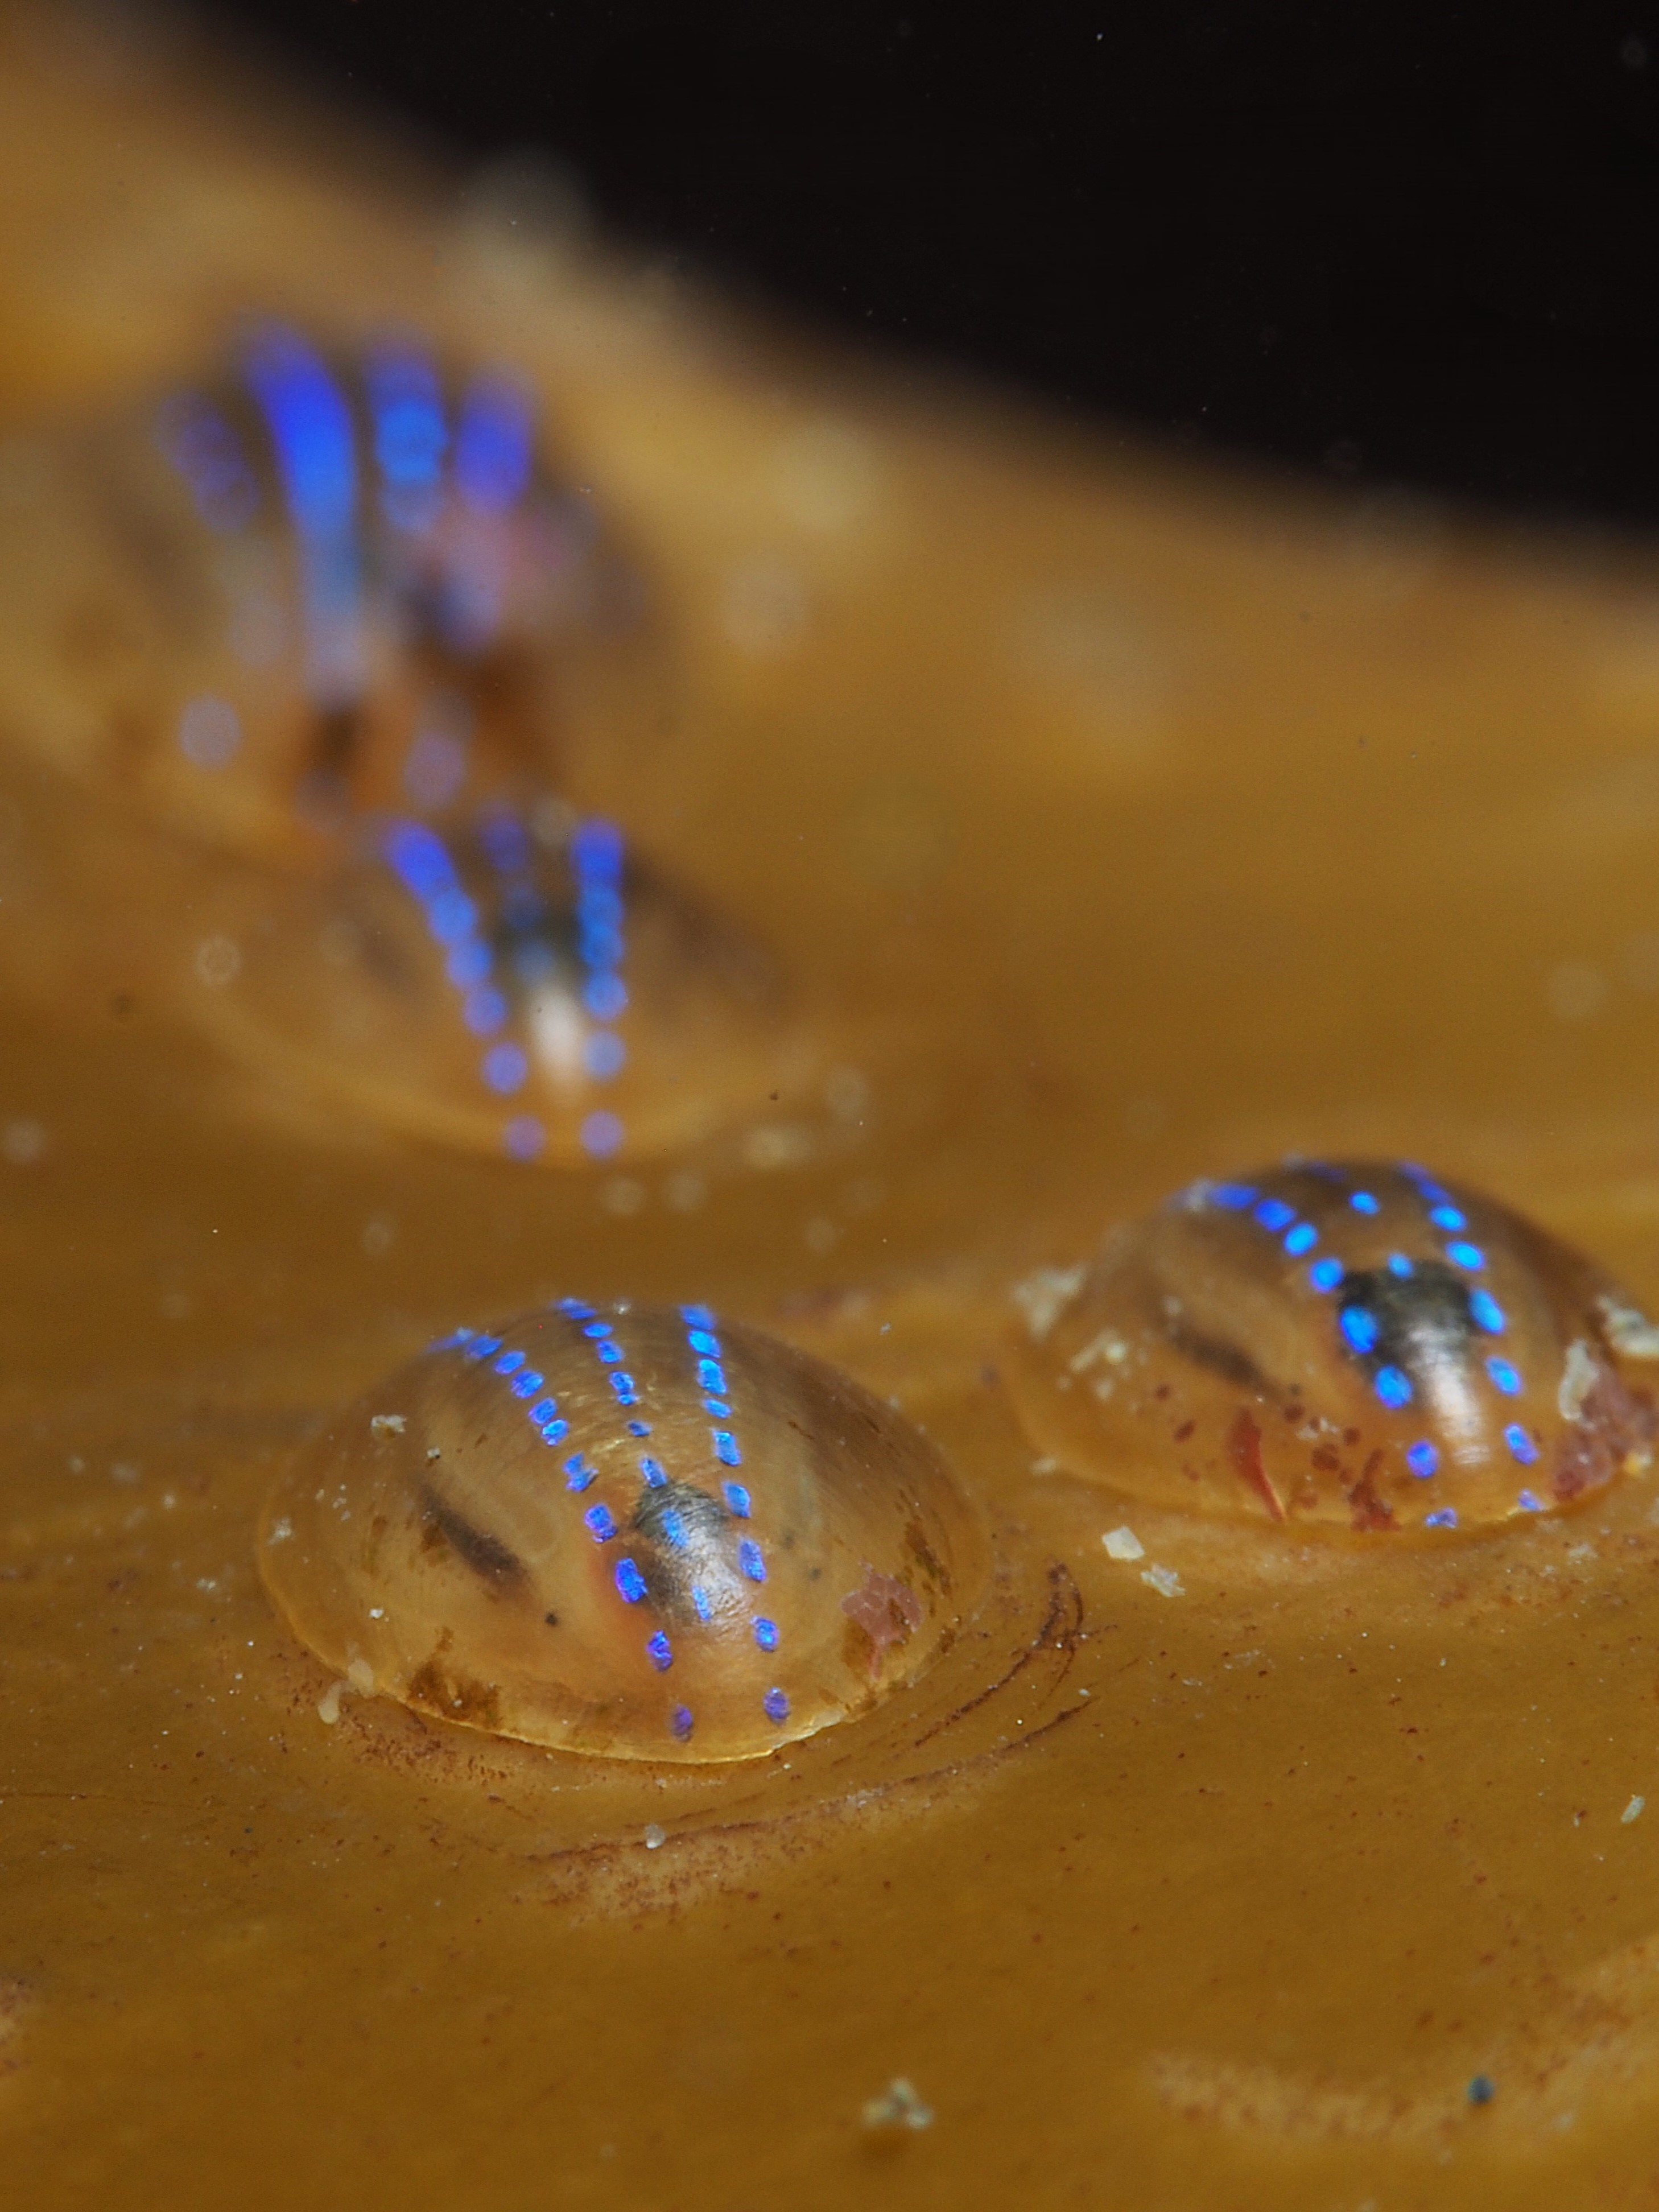
At the top and below a Flat Periwinkle (Littorina obtusata or maybe L. fabialis – distinguishing is very hard as it requires investigating differences in penis shape!). As you can see the locations are not always glamorous, but if you zoom in you can still find beauty!

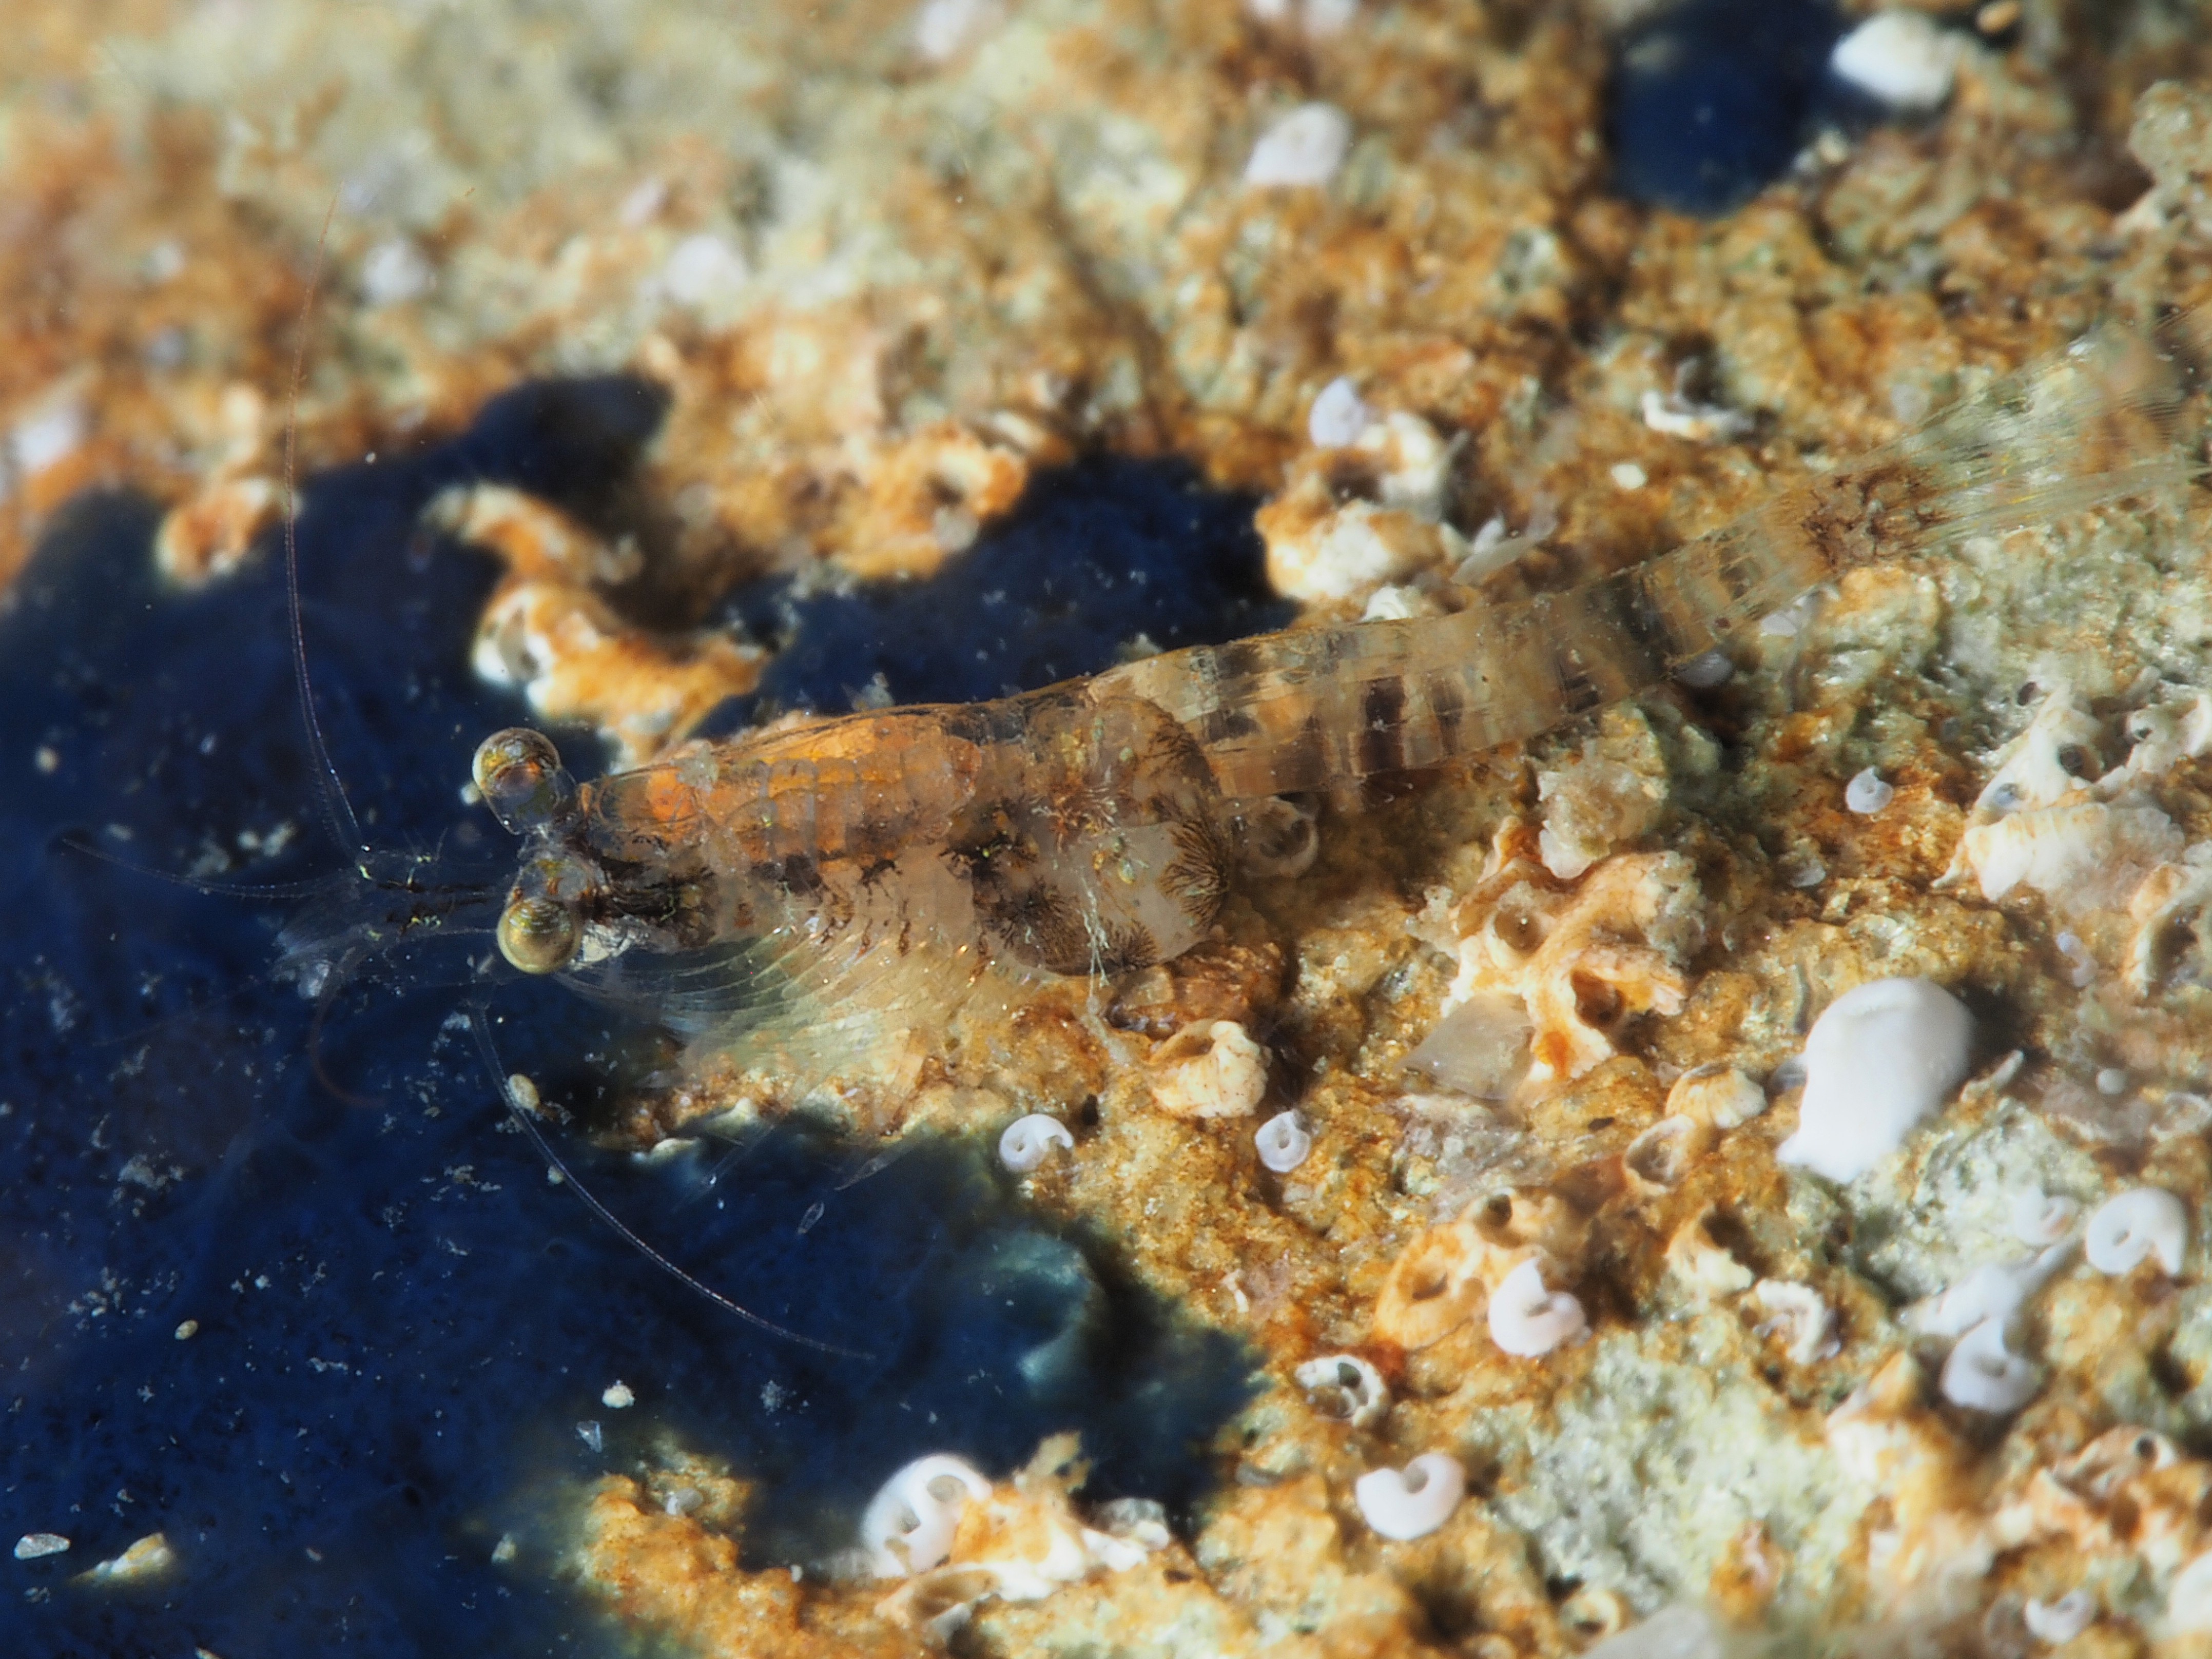
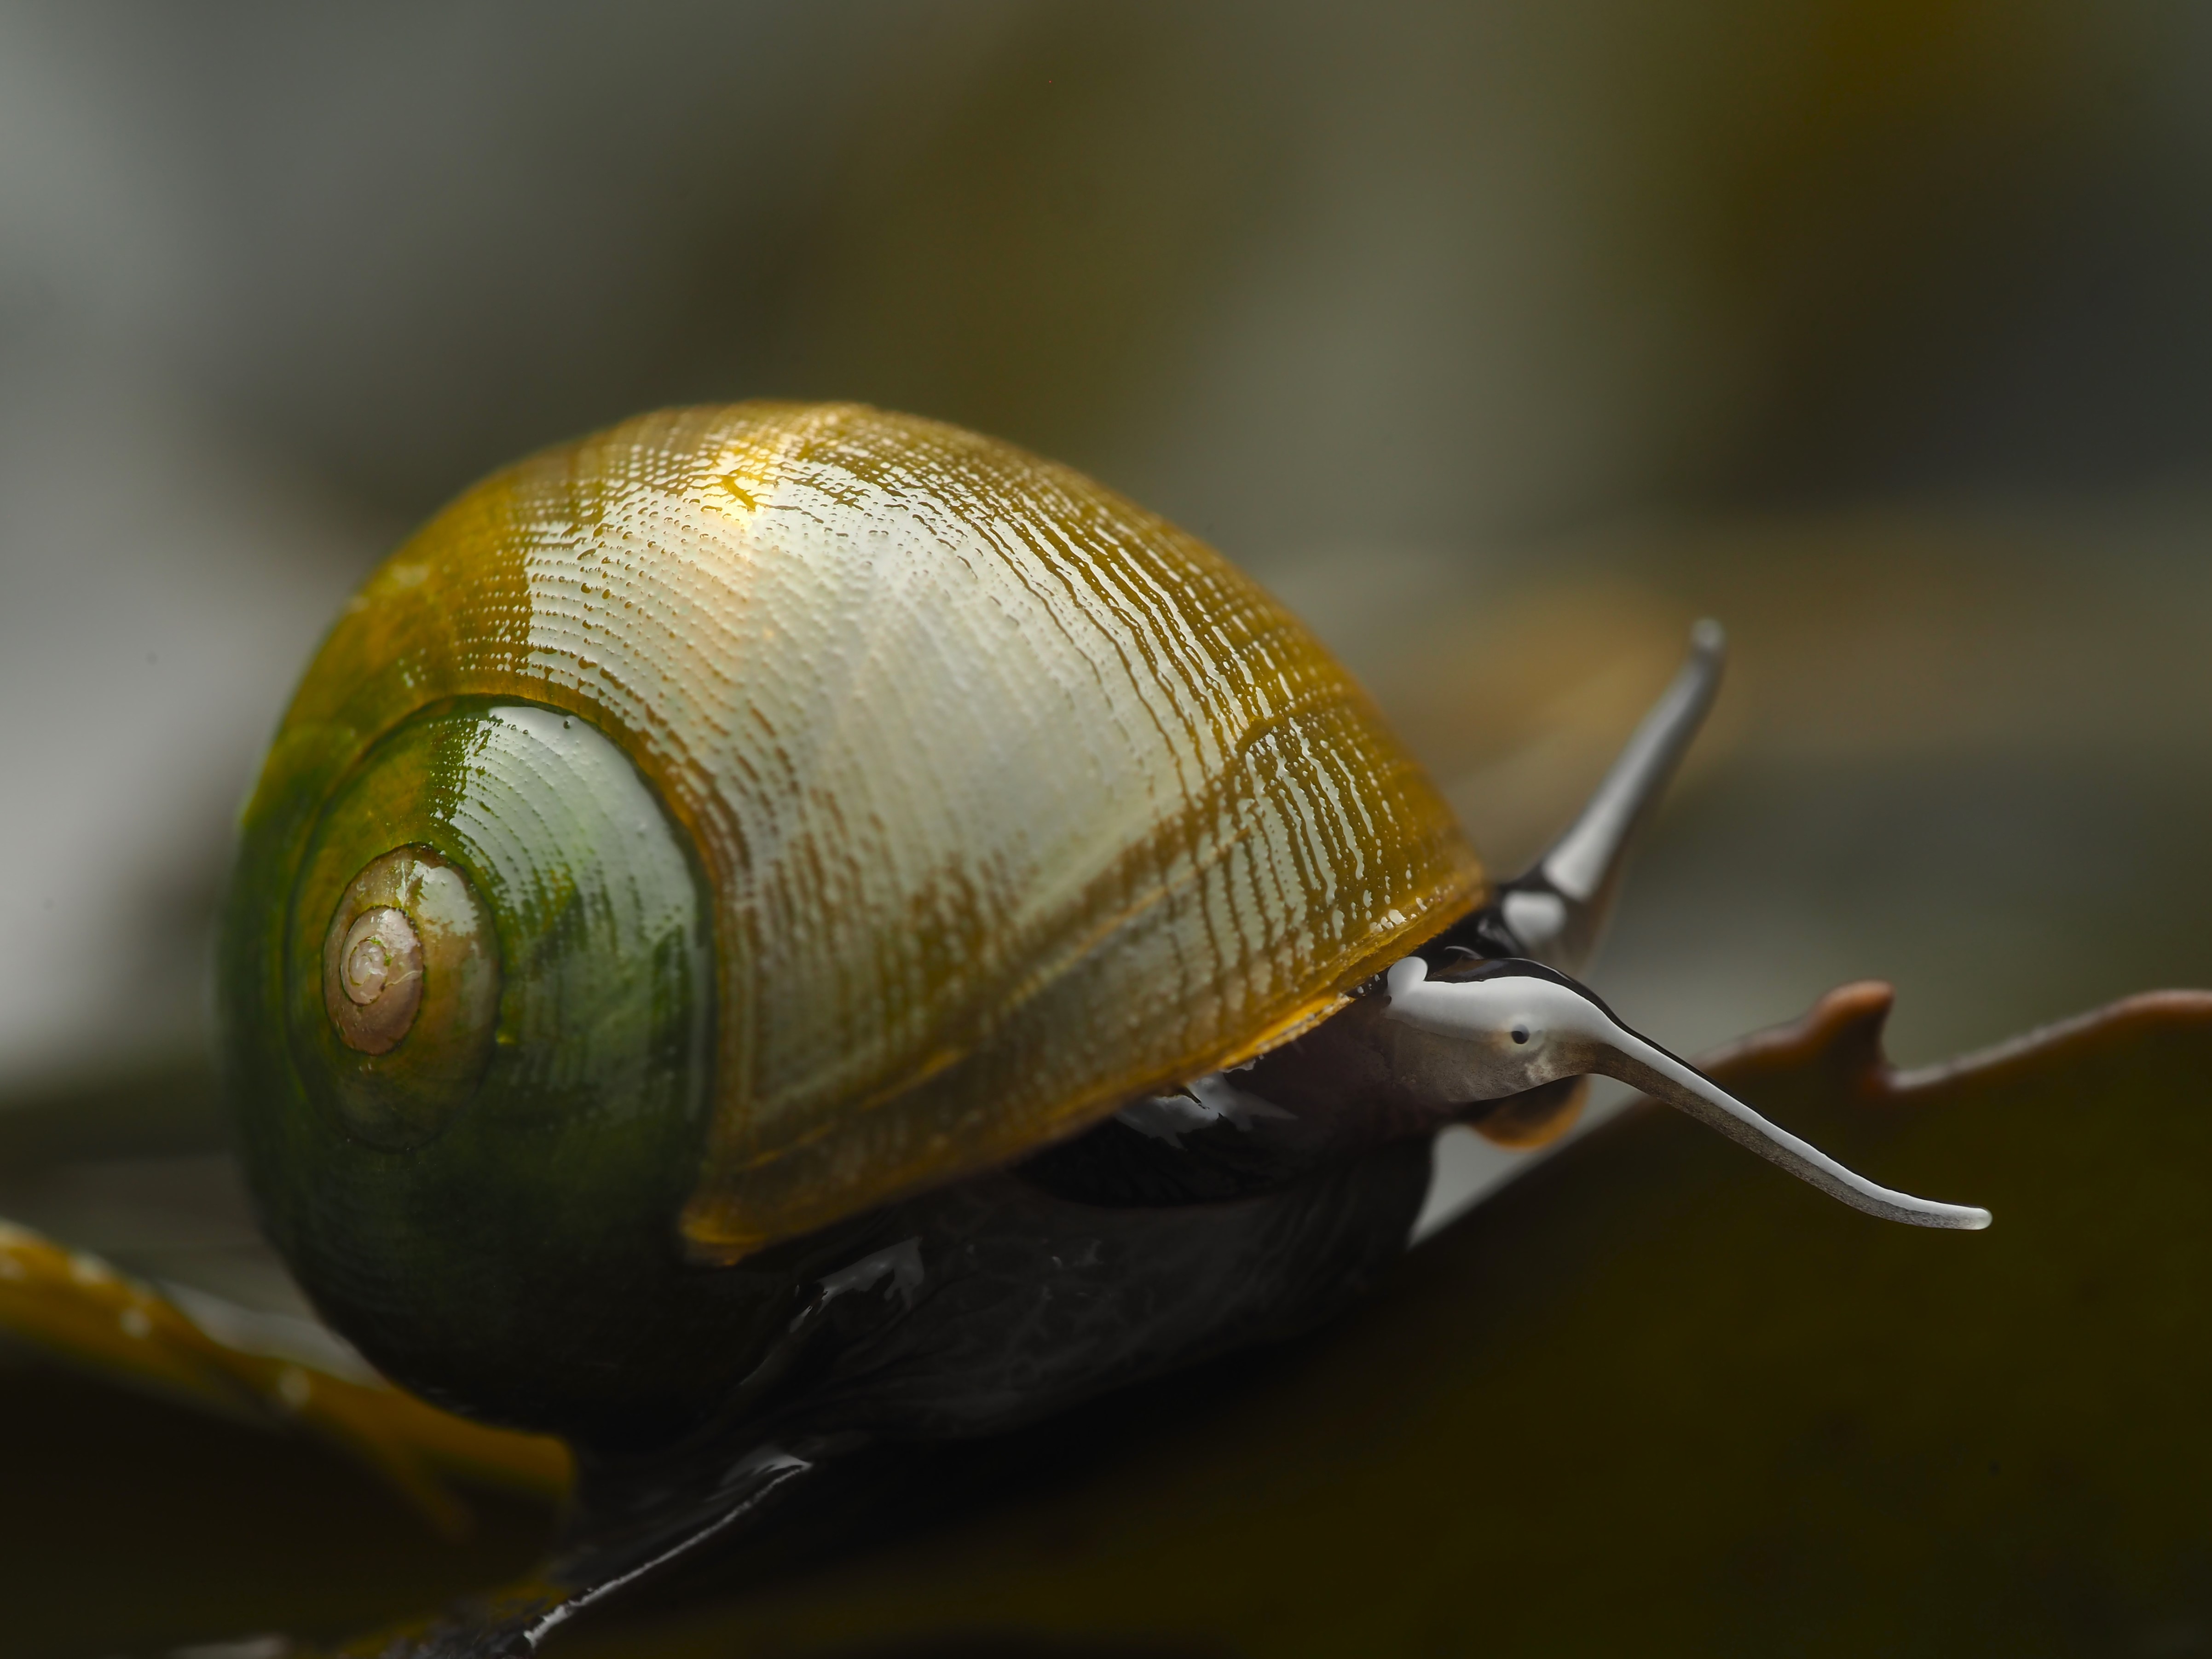
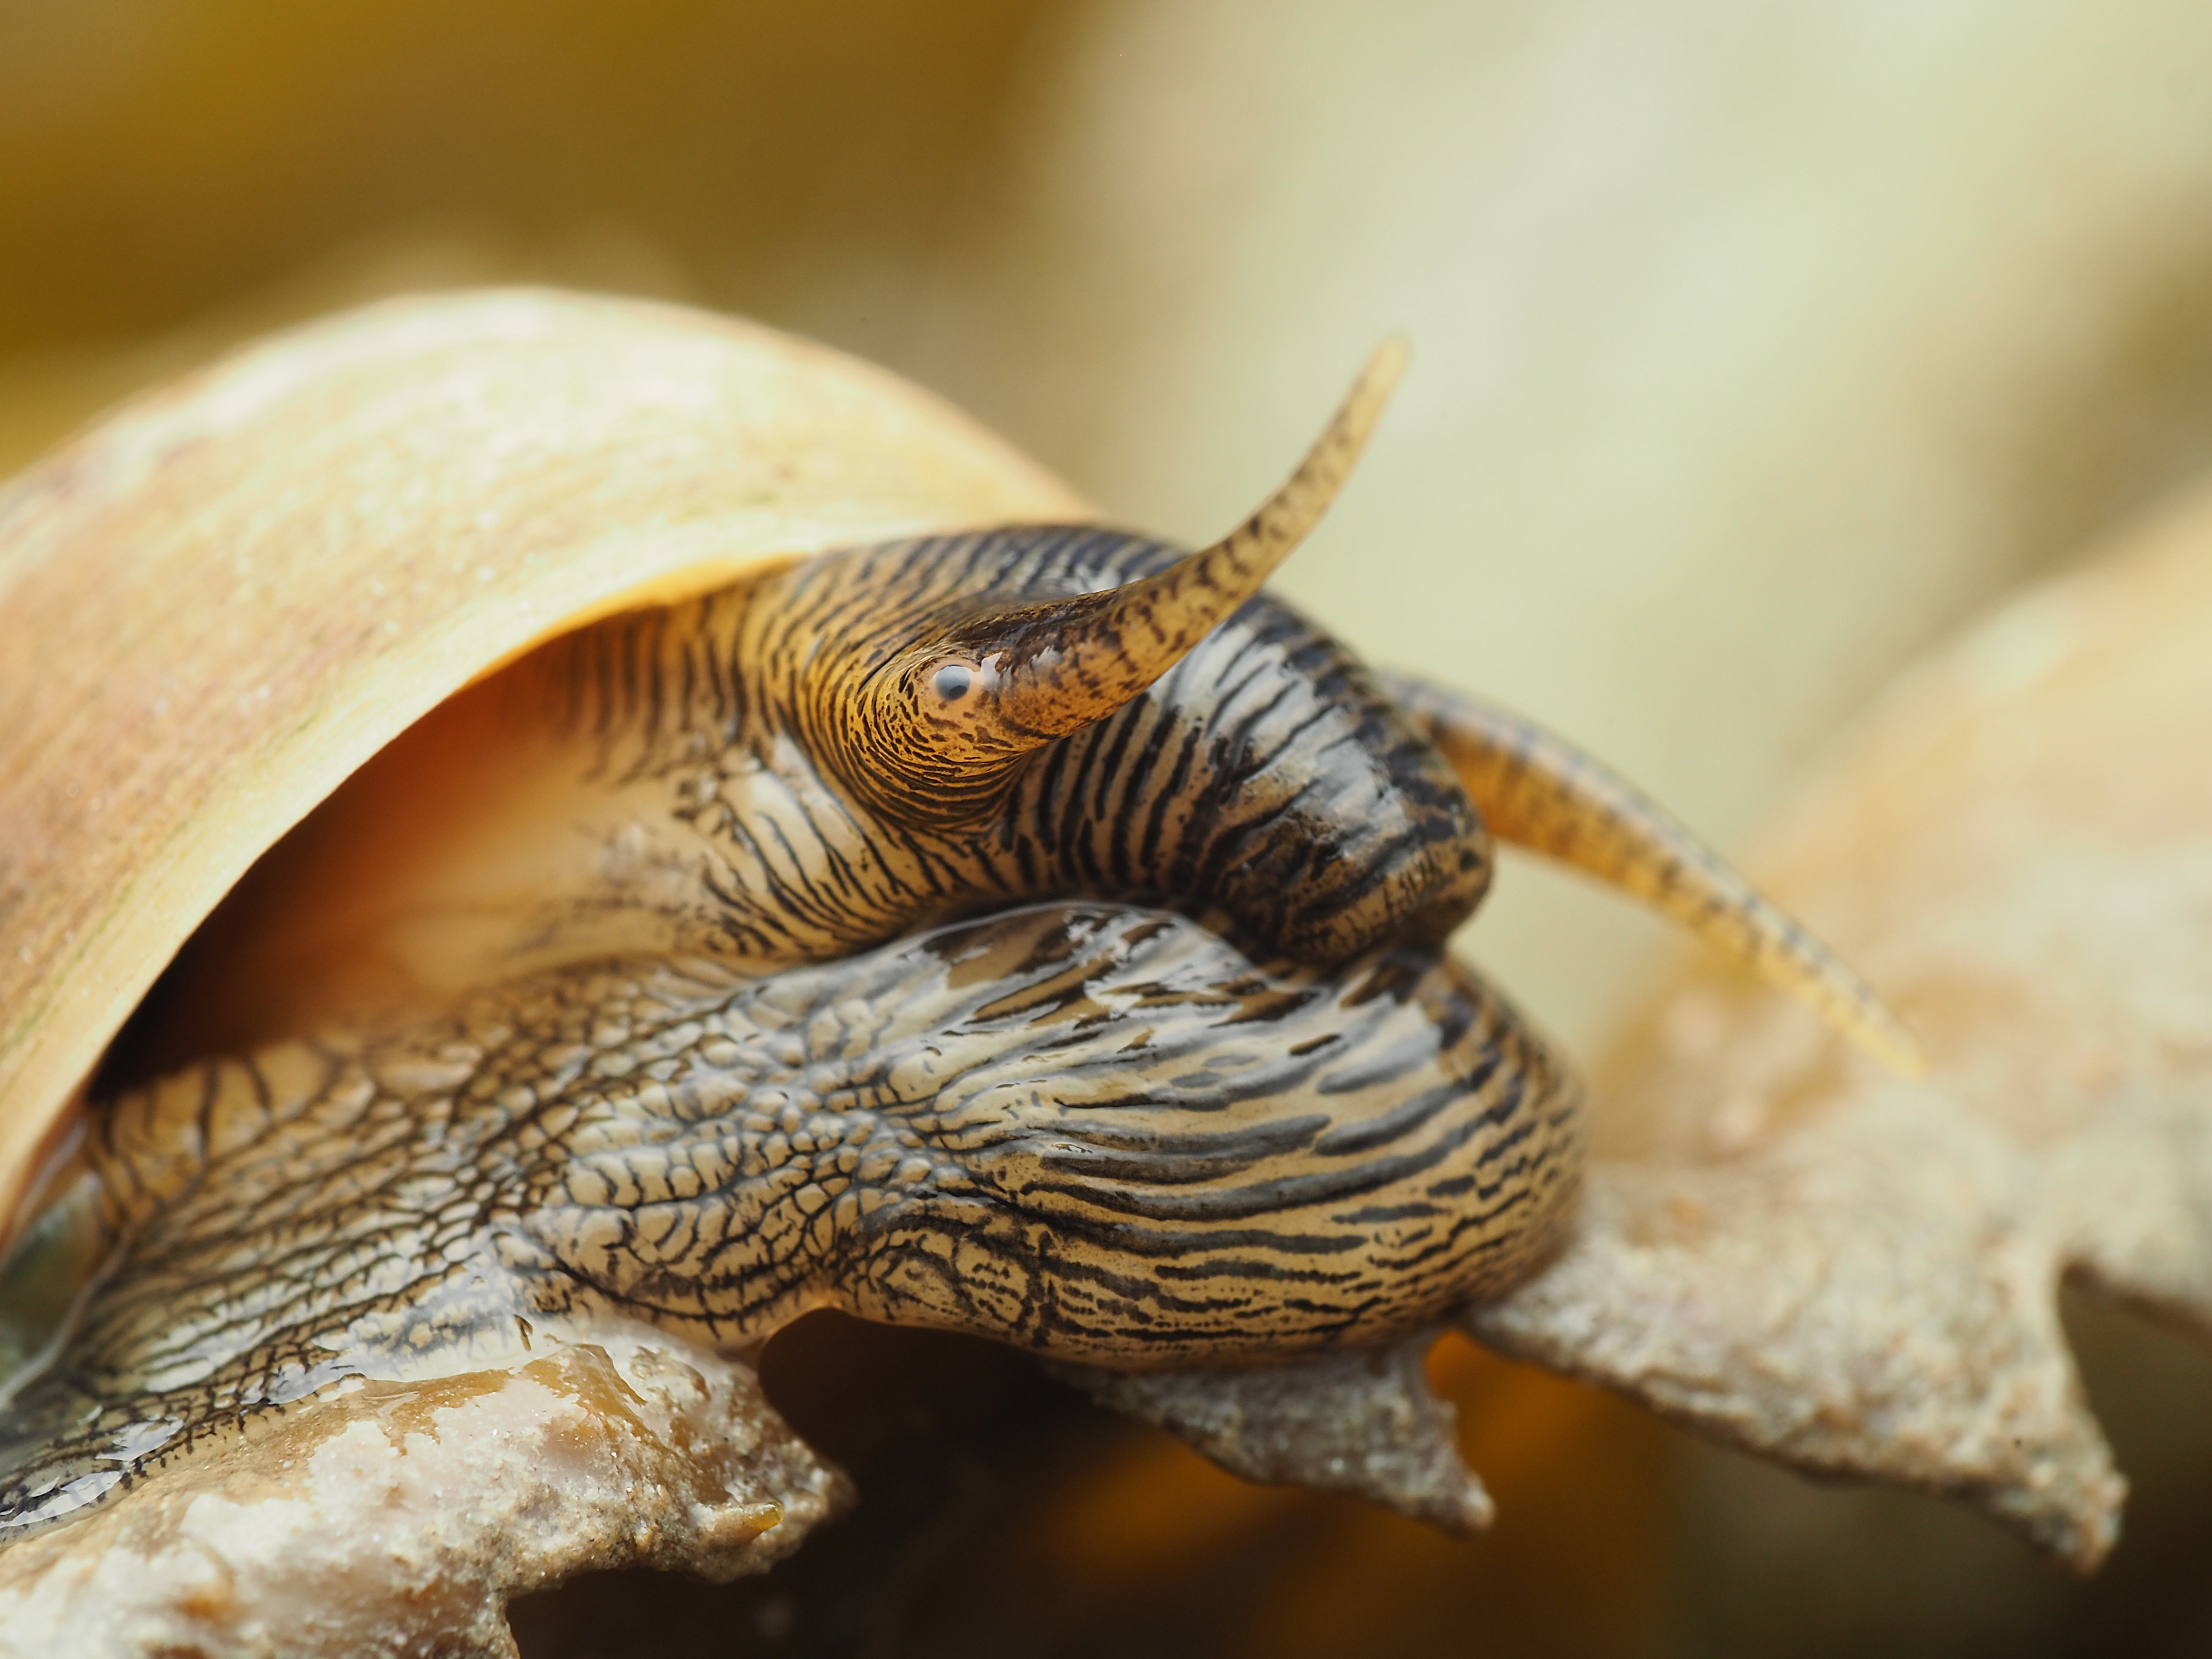
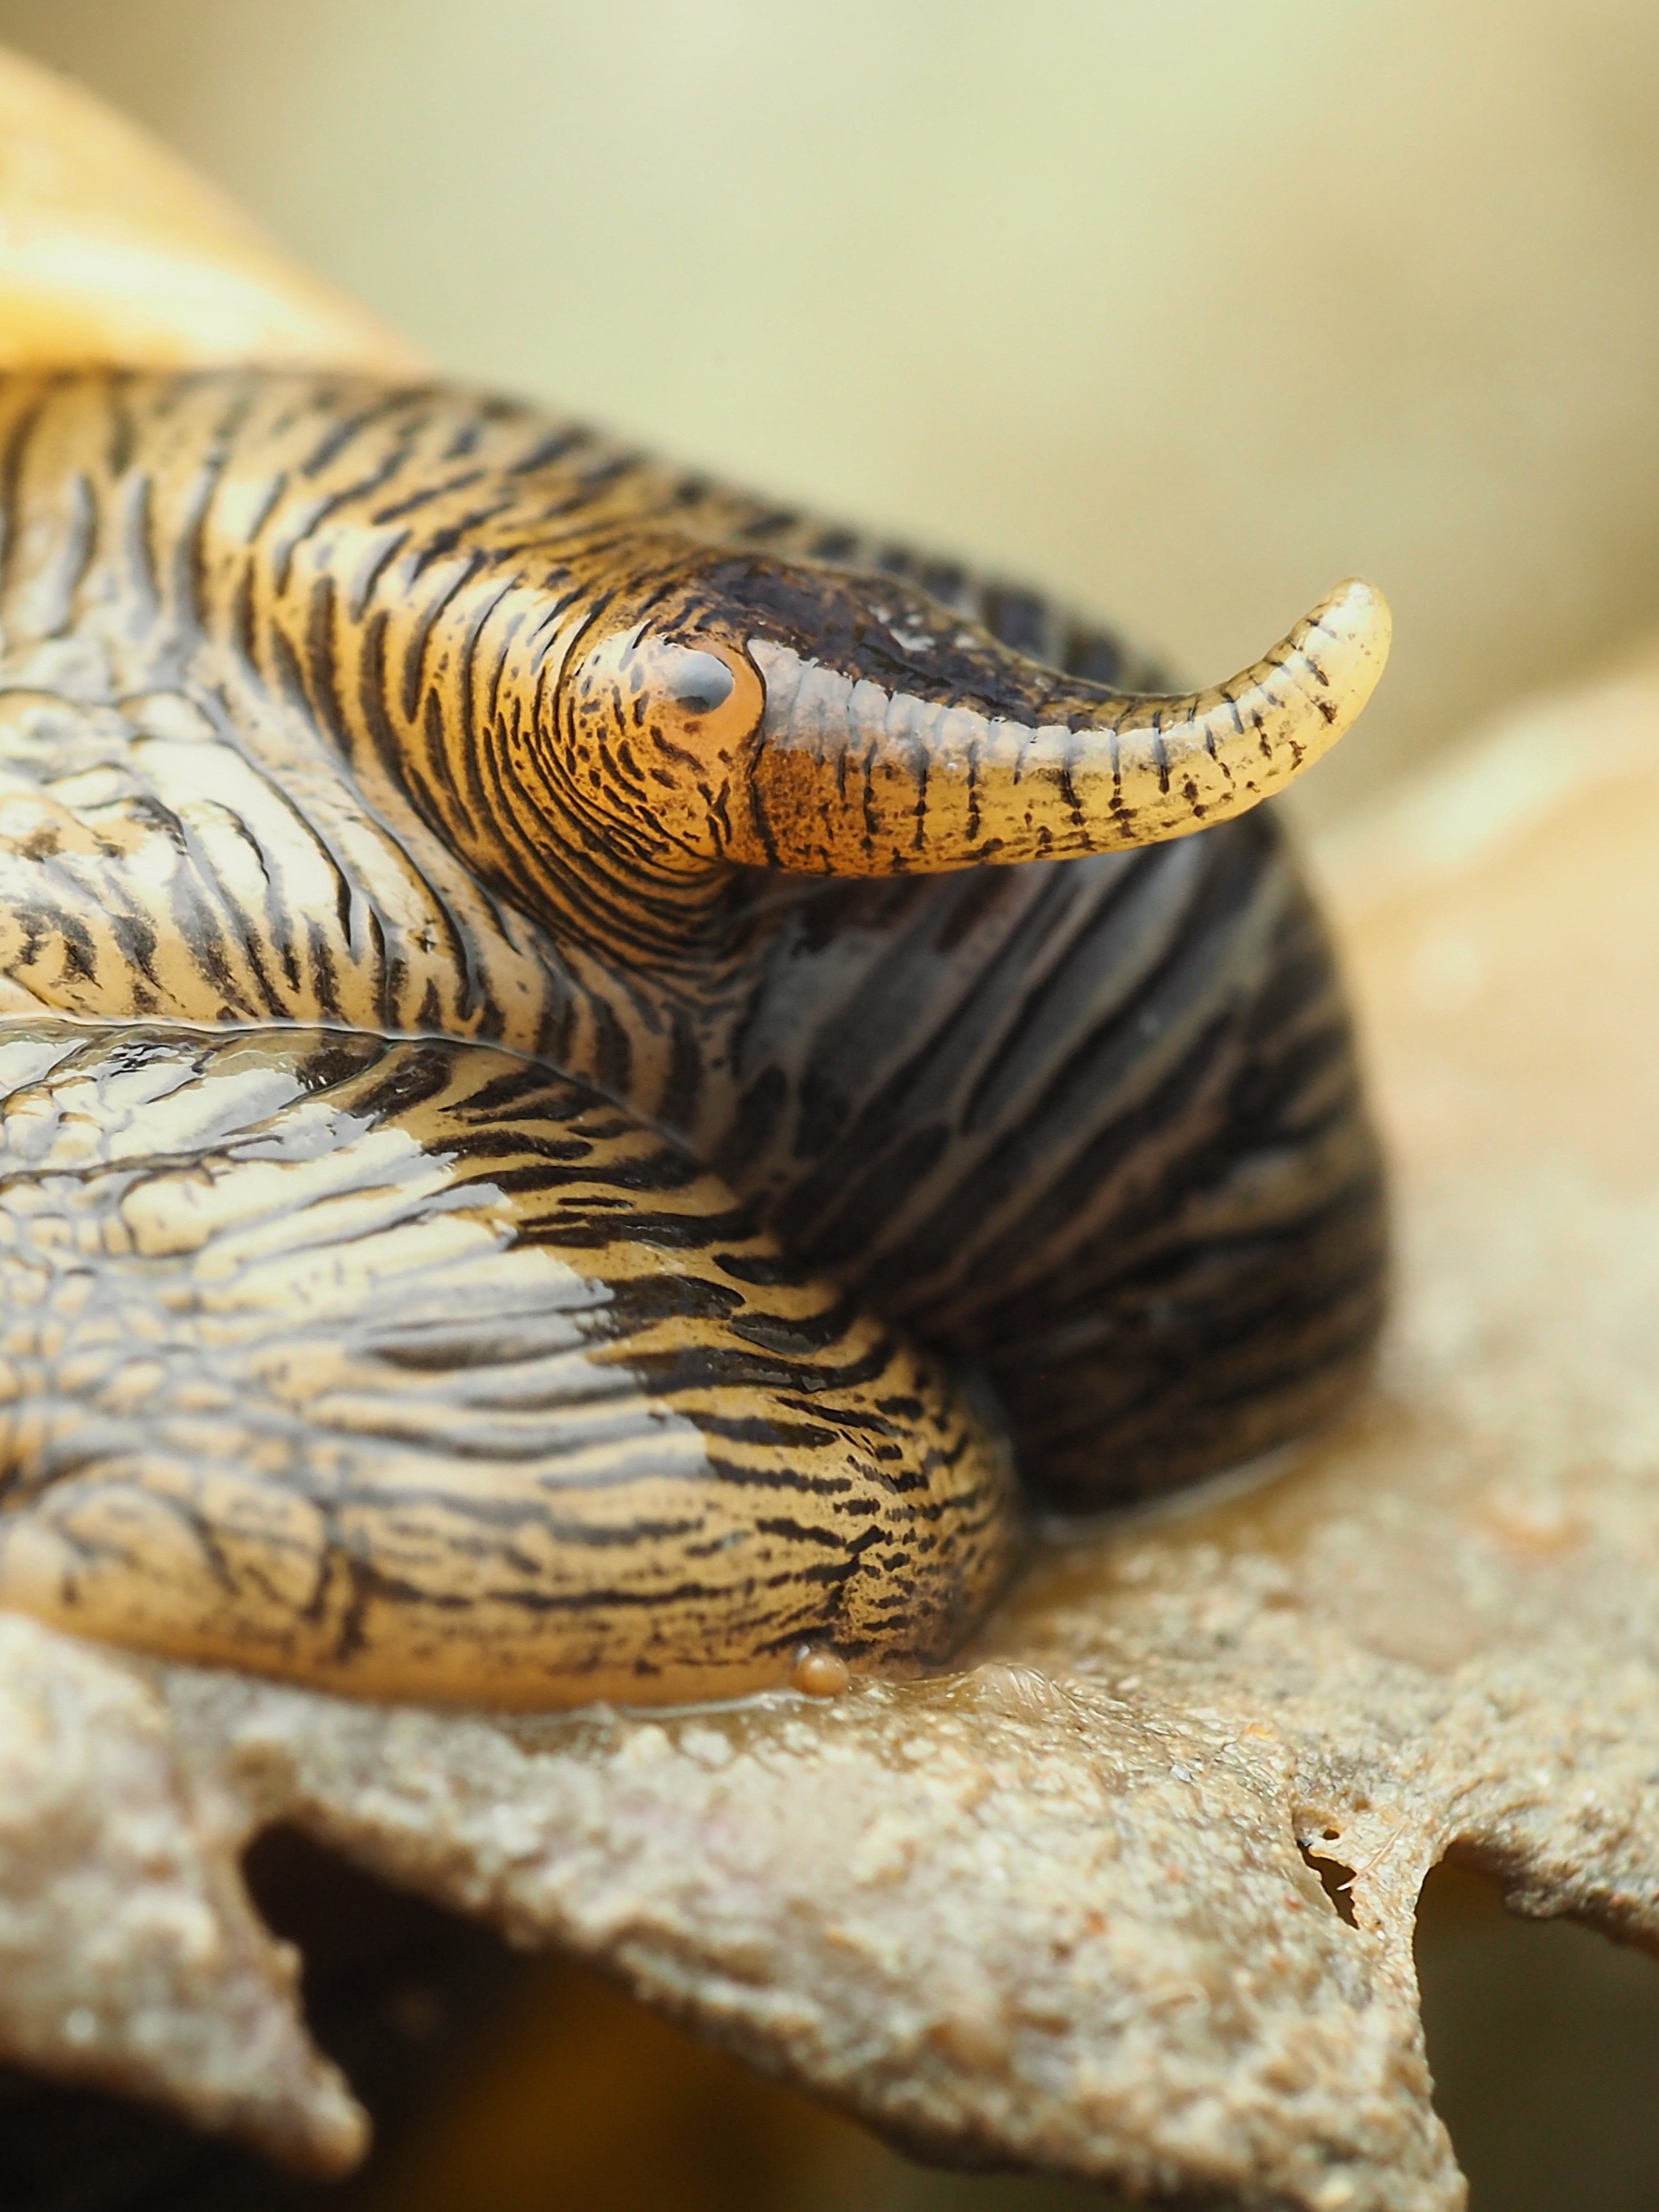
Flat periwinkles tend to be most active above-water, followed by the smaller Rough Periwinkle (Littorina saxatilis – below) with the Common Periwinkle (Littorina littorea – below that) only occasionally moving about.
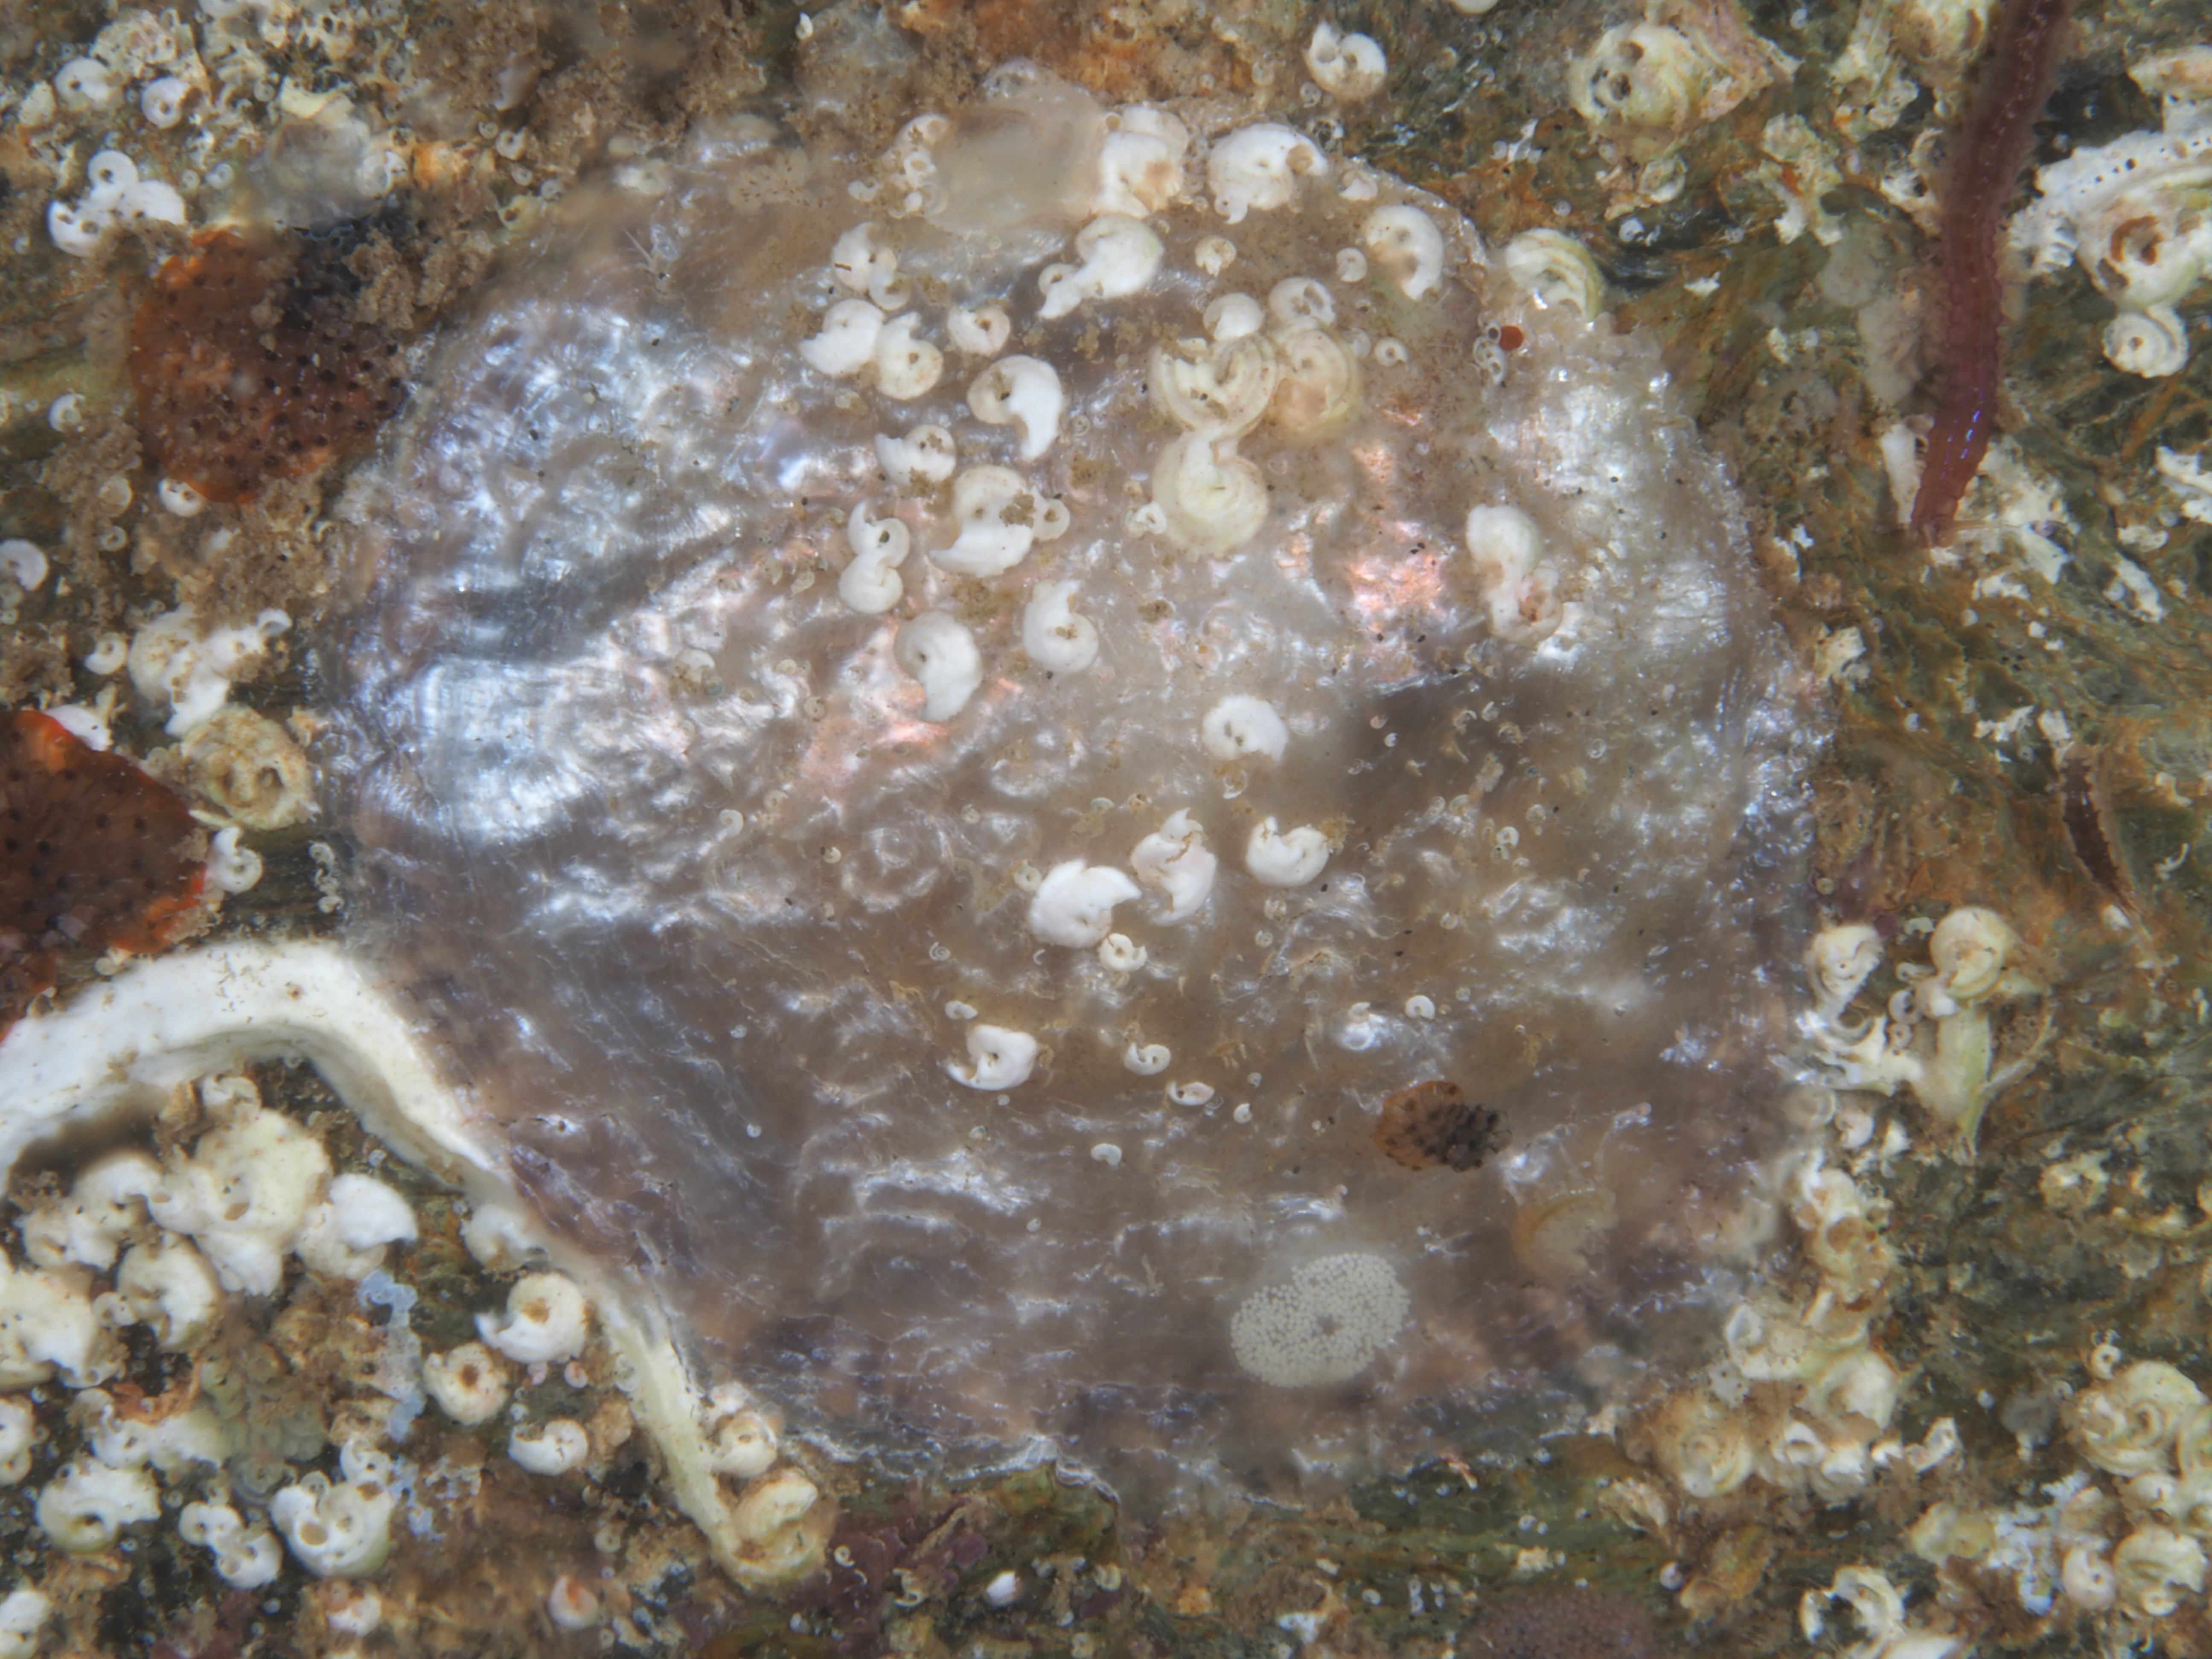
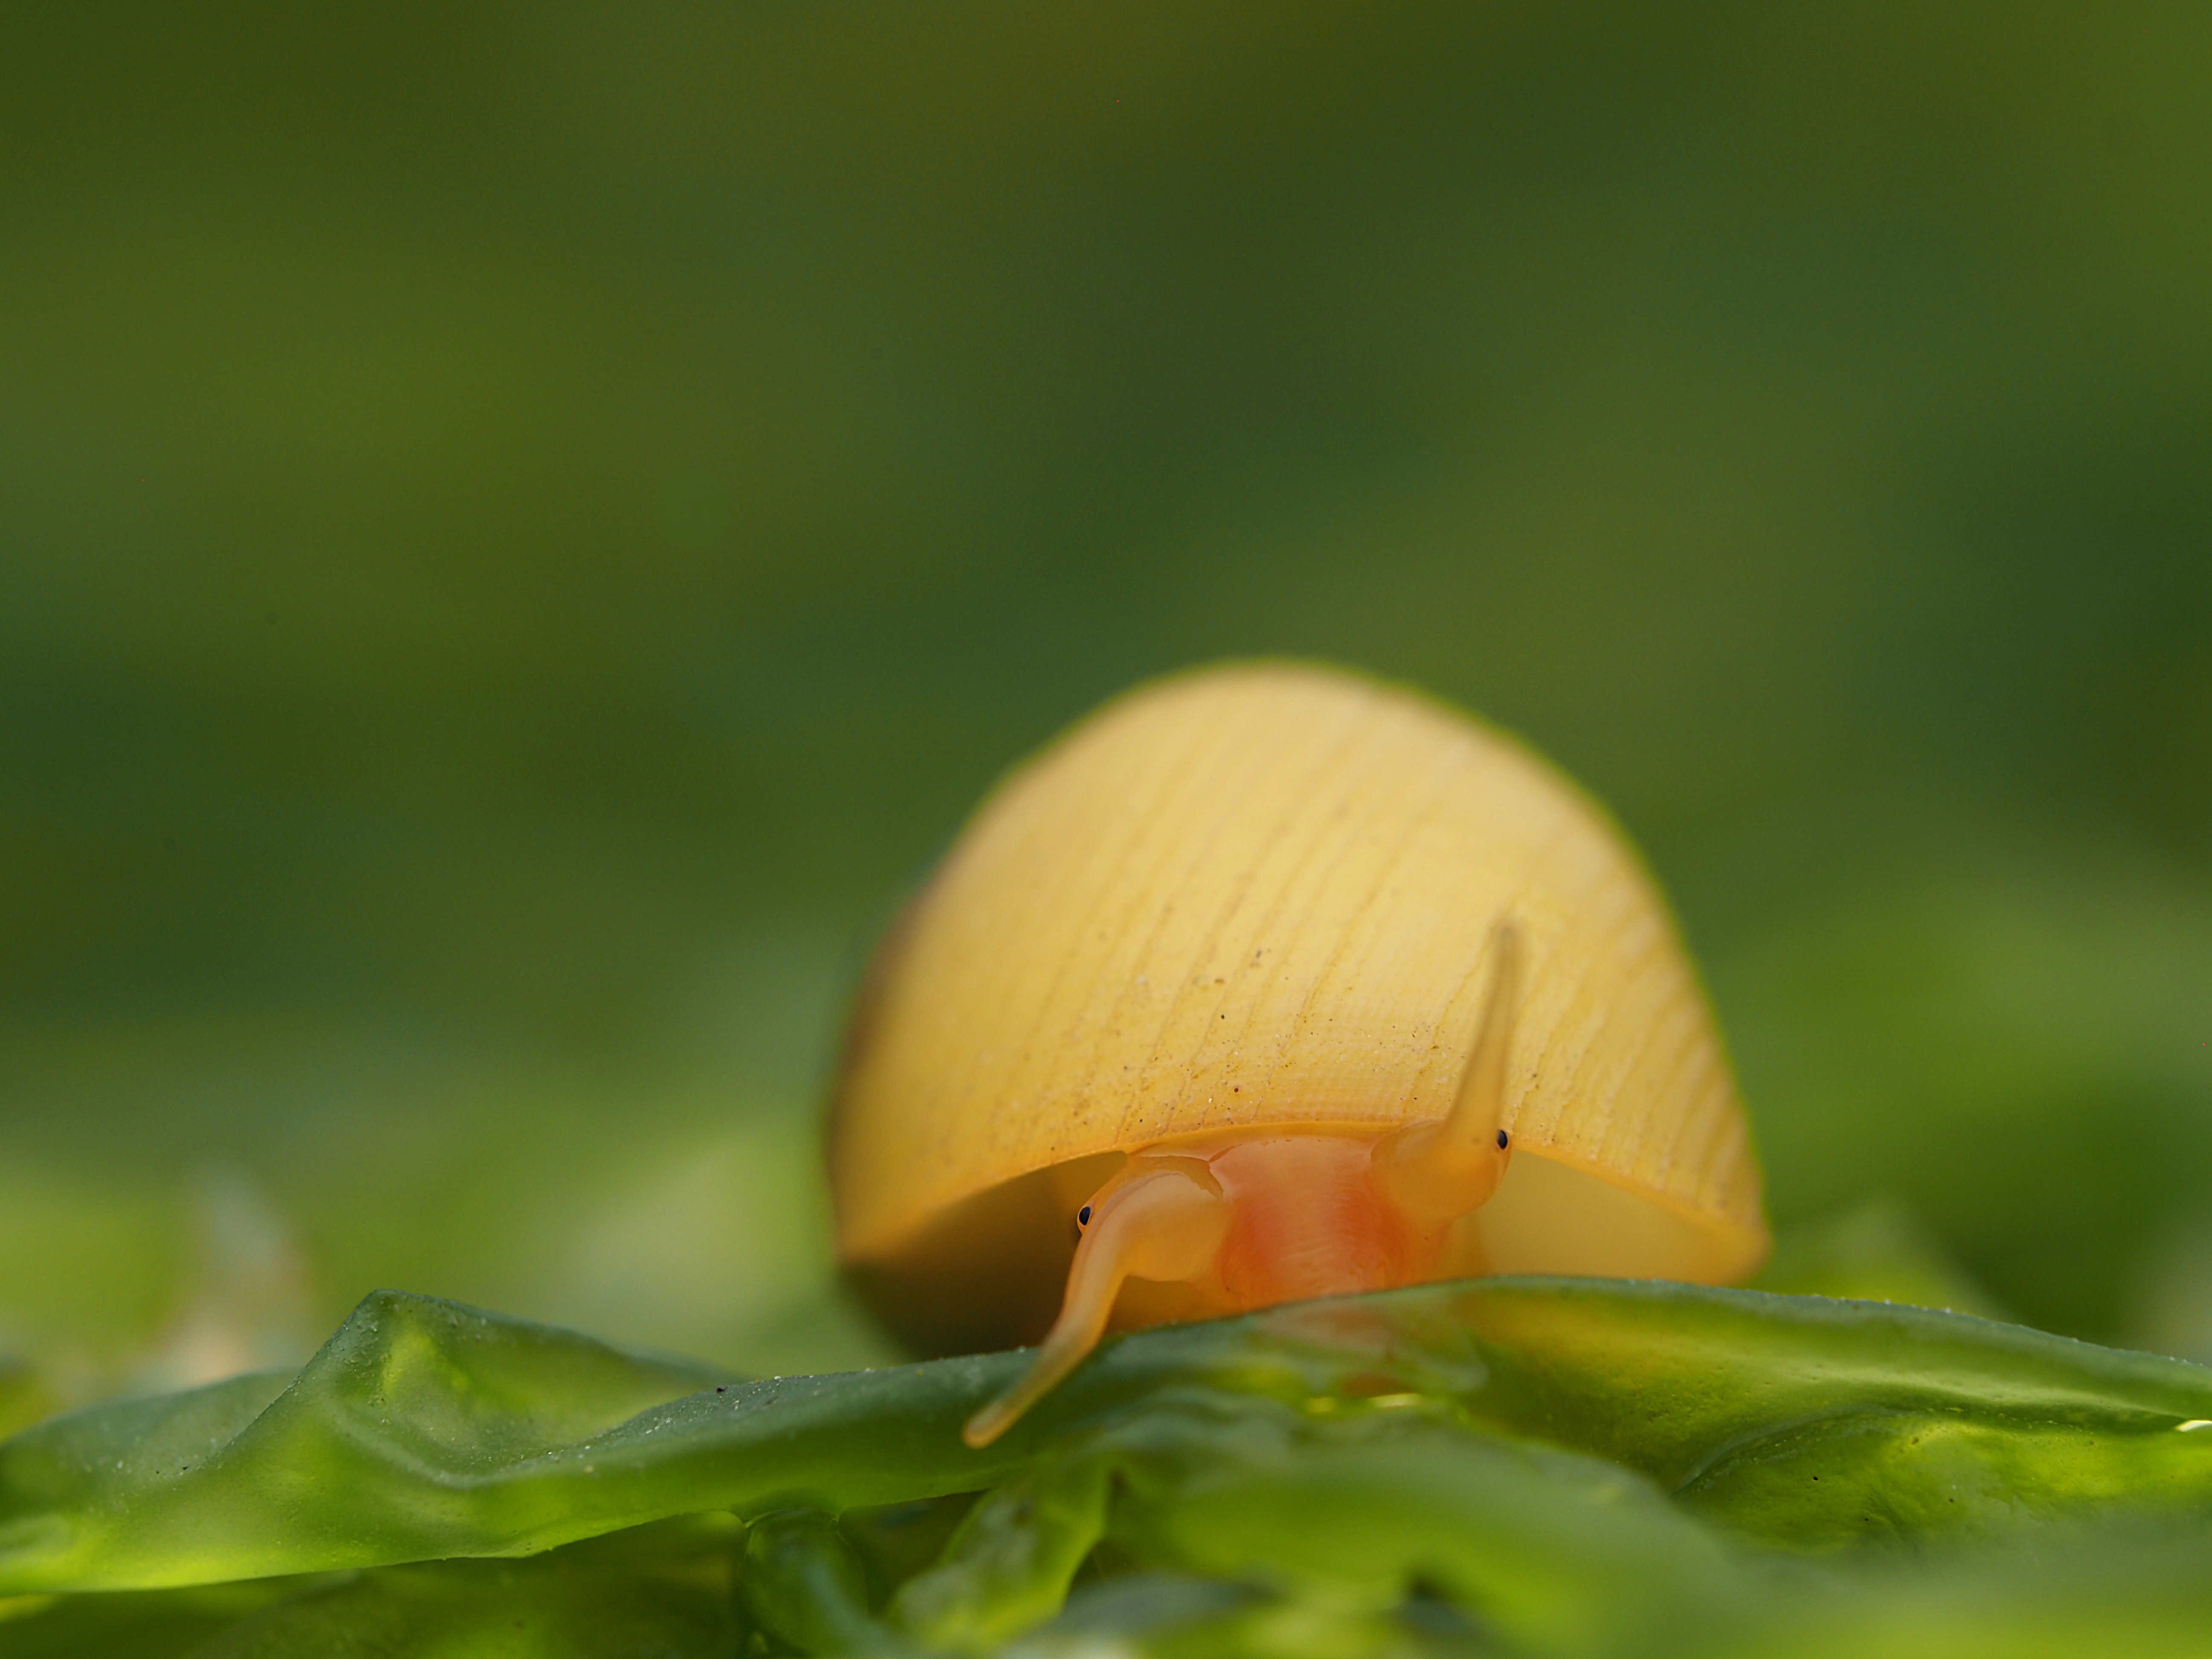
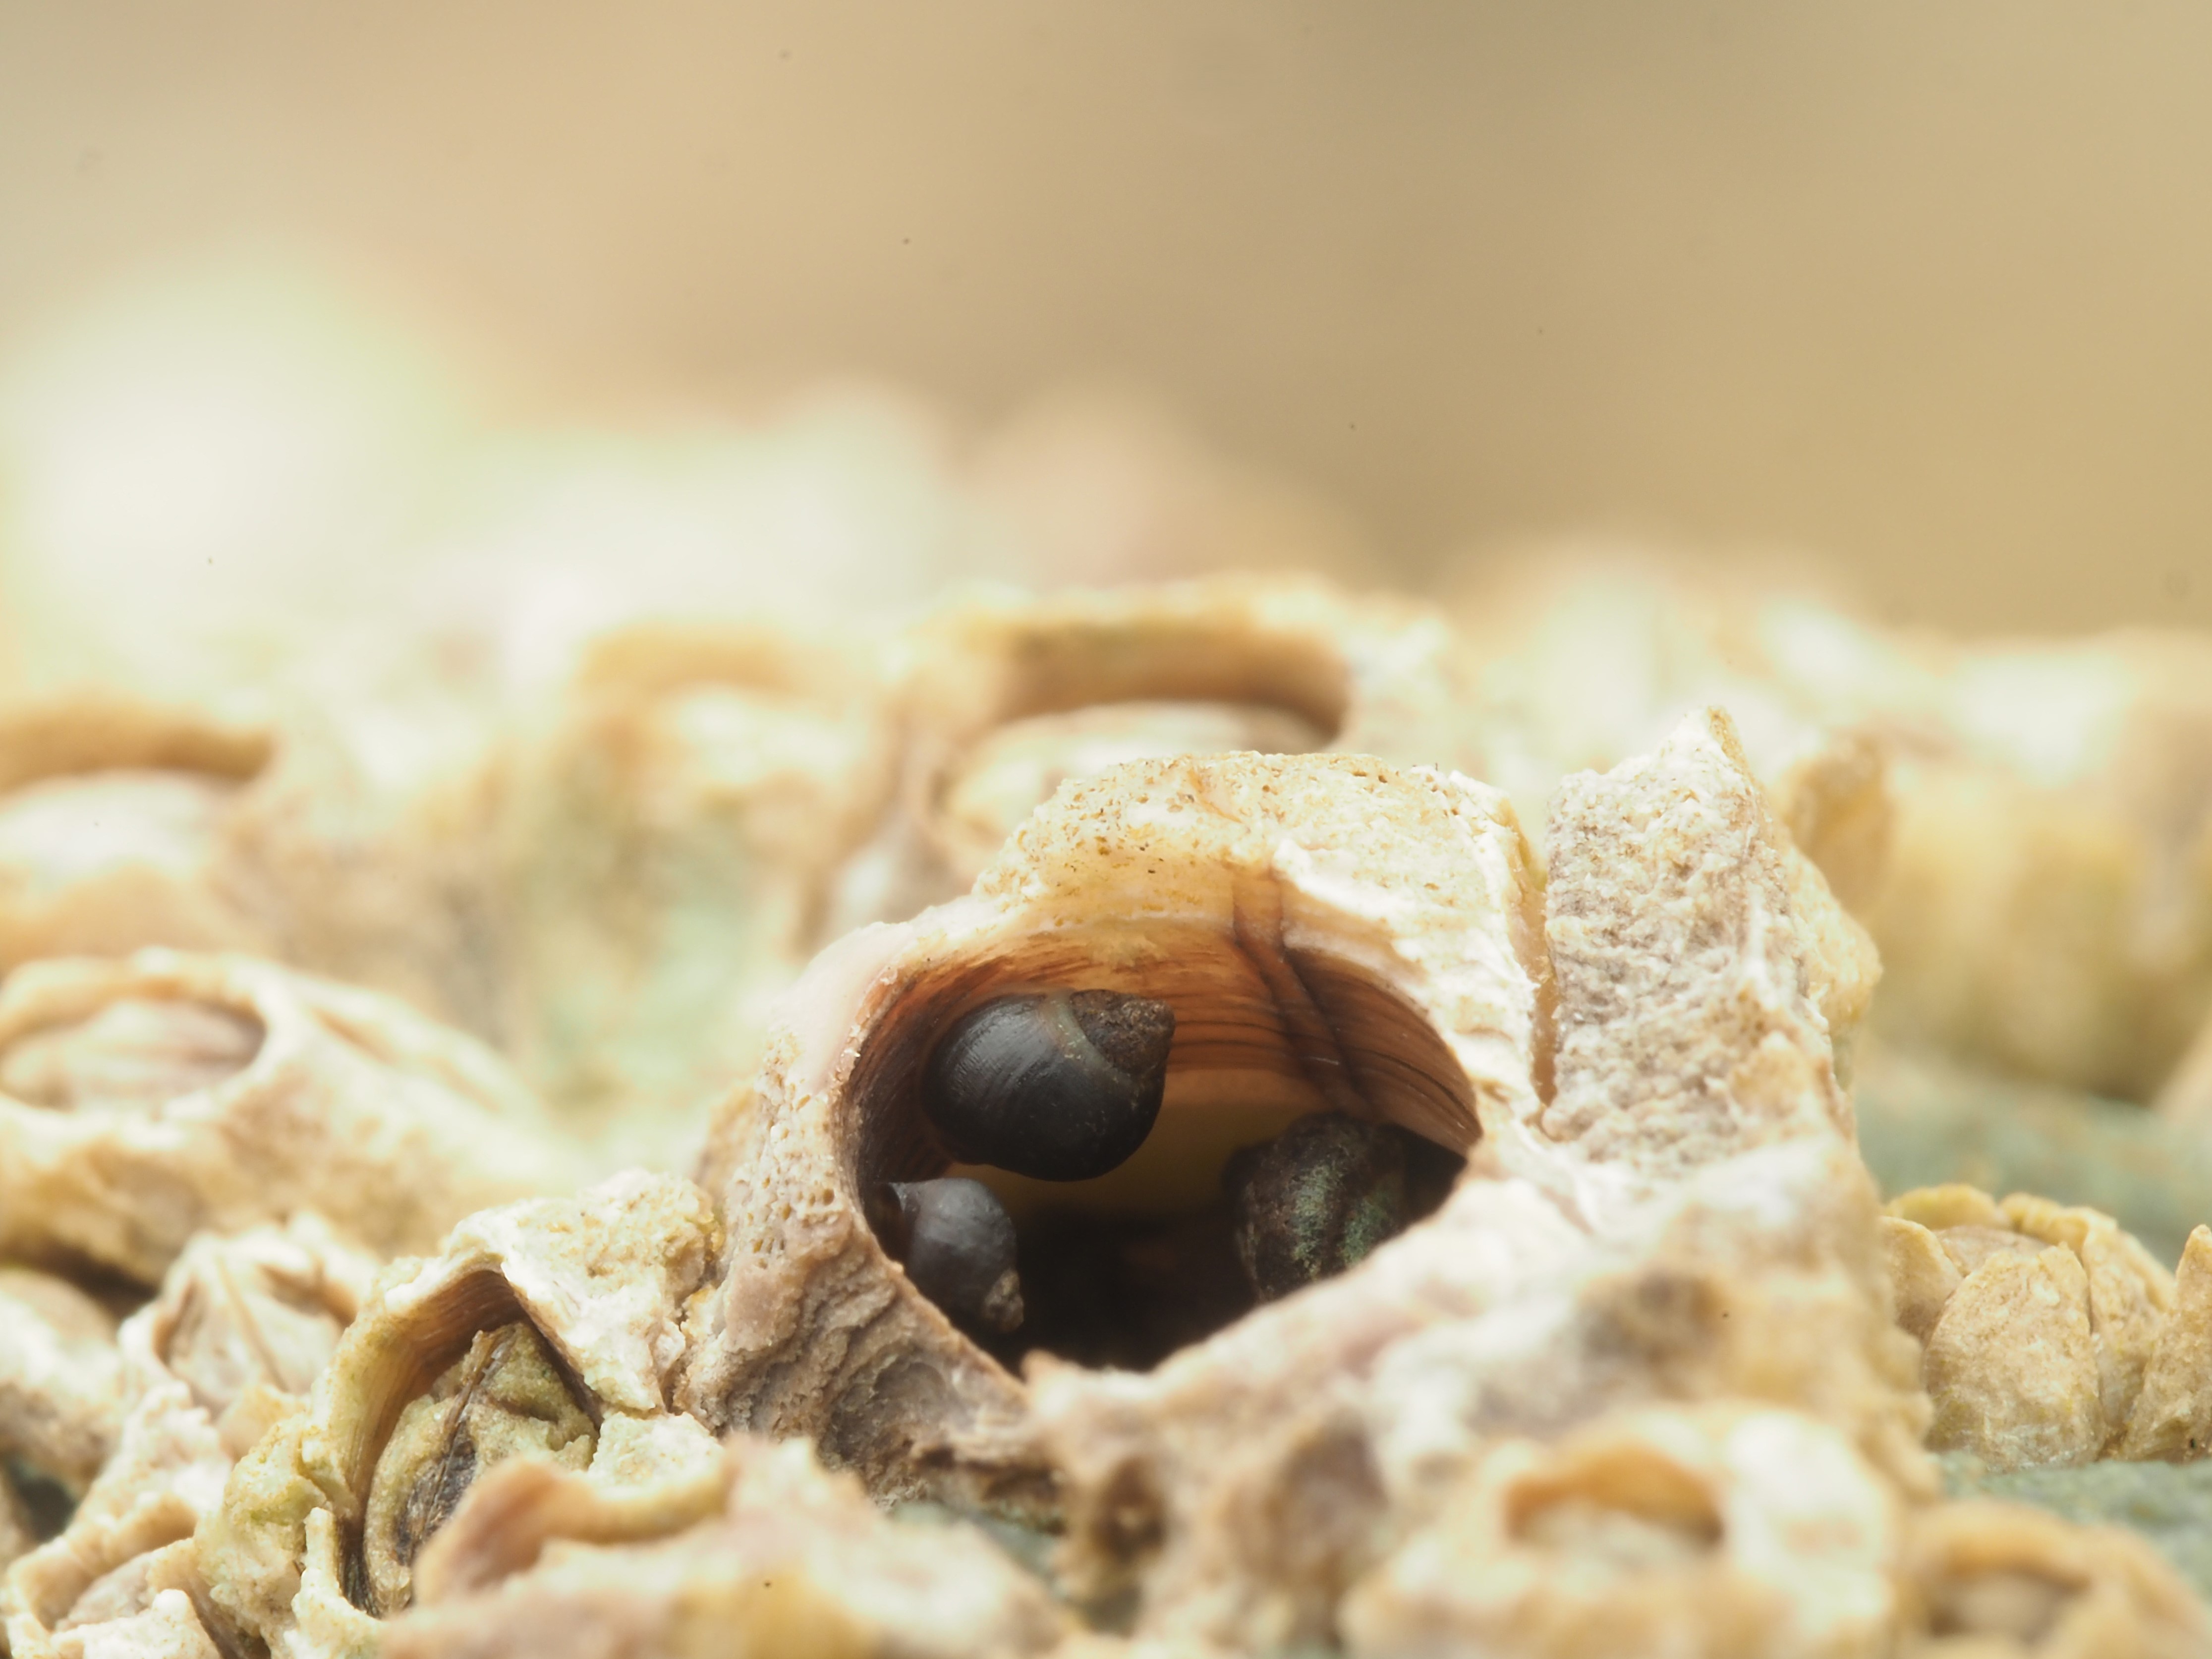
Finally, a tiny species the Small Periwinkle (Littorina Melharaphe neritoides). Probably overlooked by most, as it is tiny (up to 8mm, usually smaller) and hidden between barnacles (or even nestled in empty barnacle cases) high on the shore.
* and no, I could not bring myself to go diving without a camera…
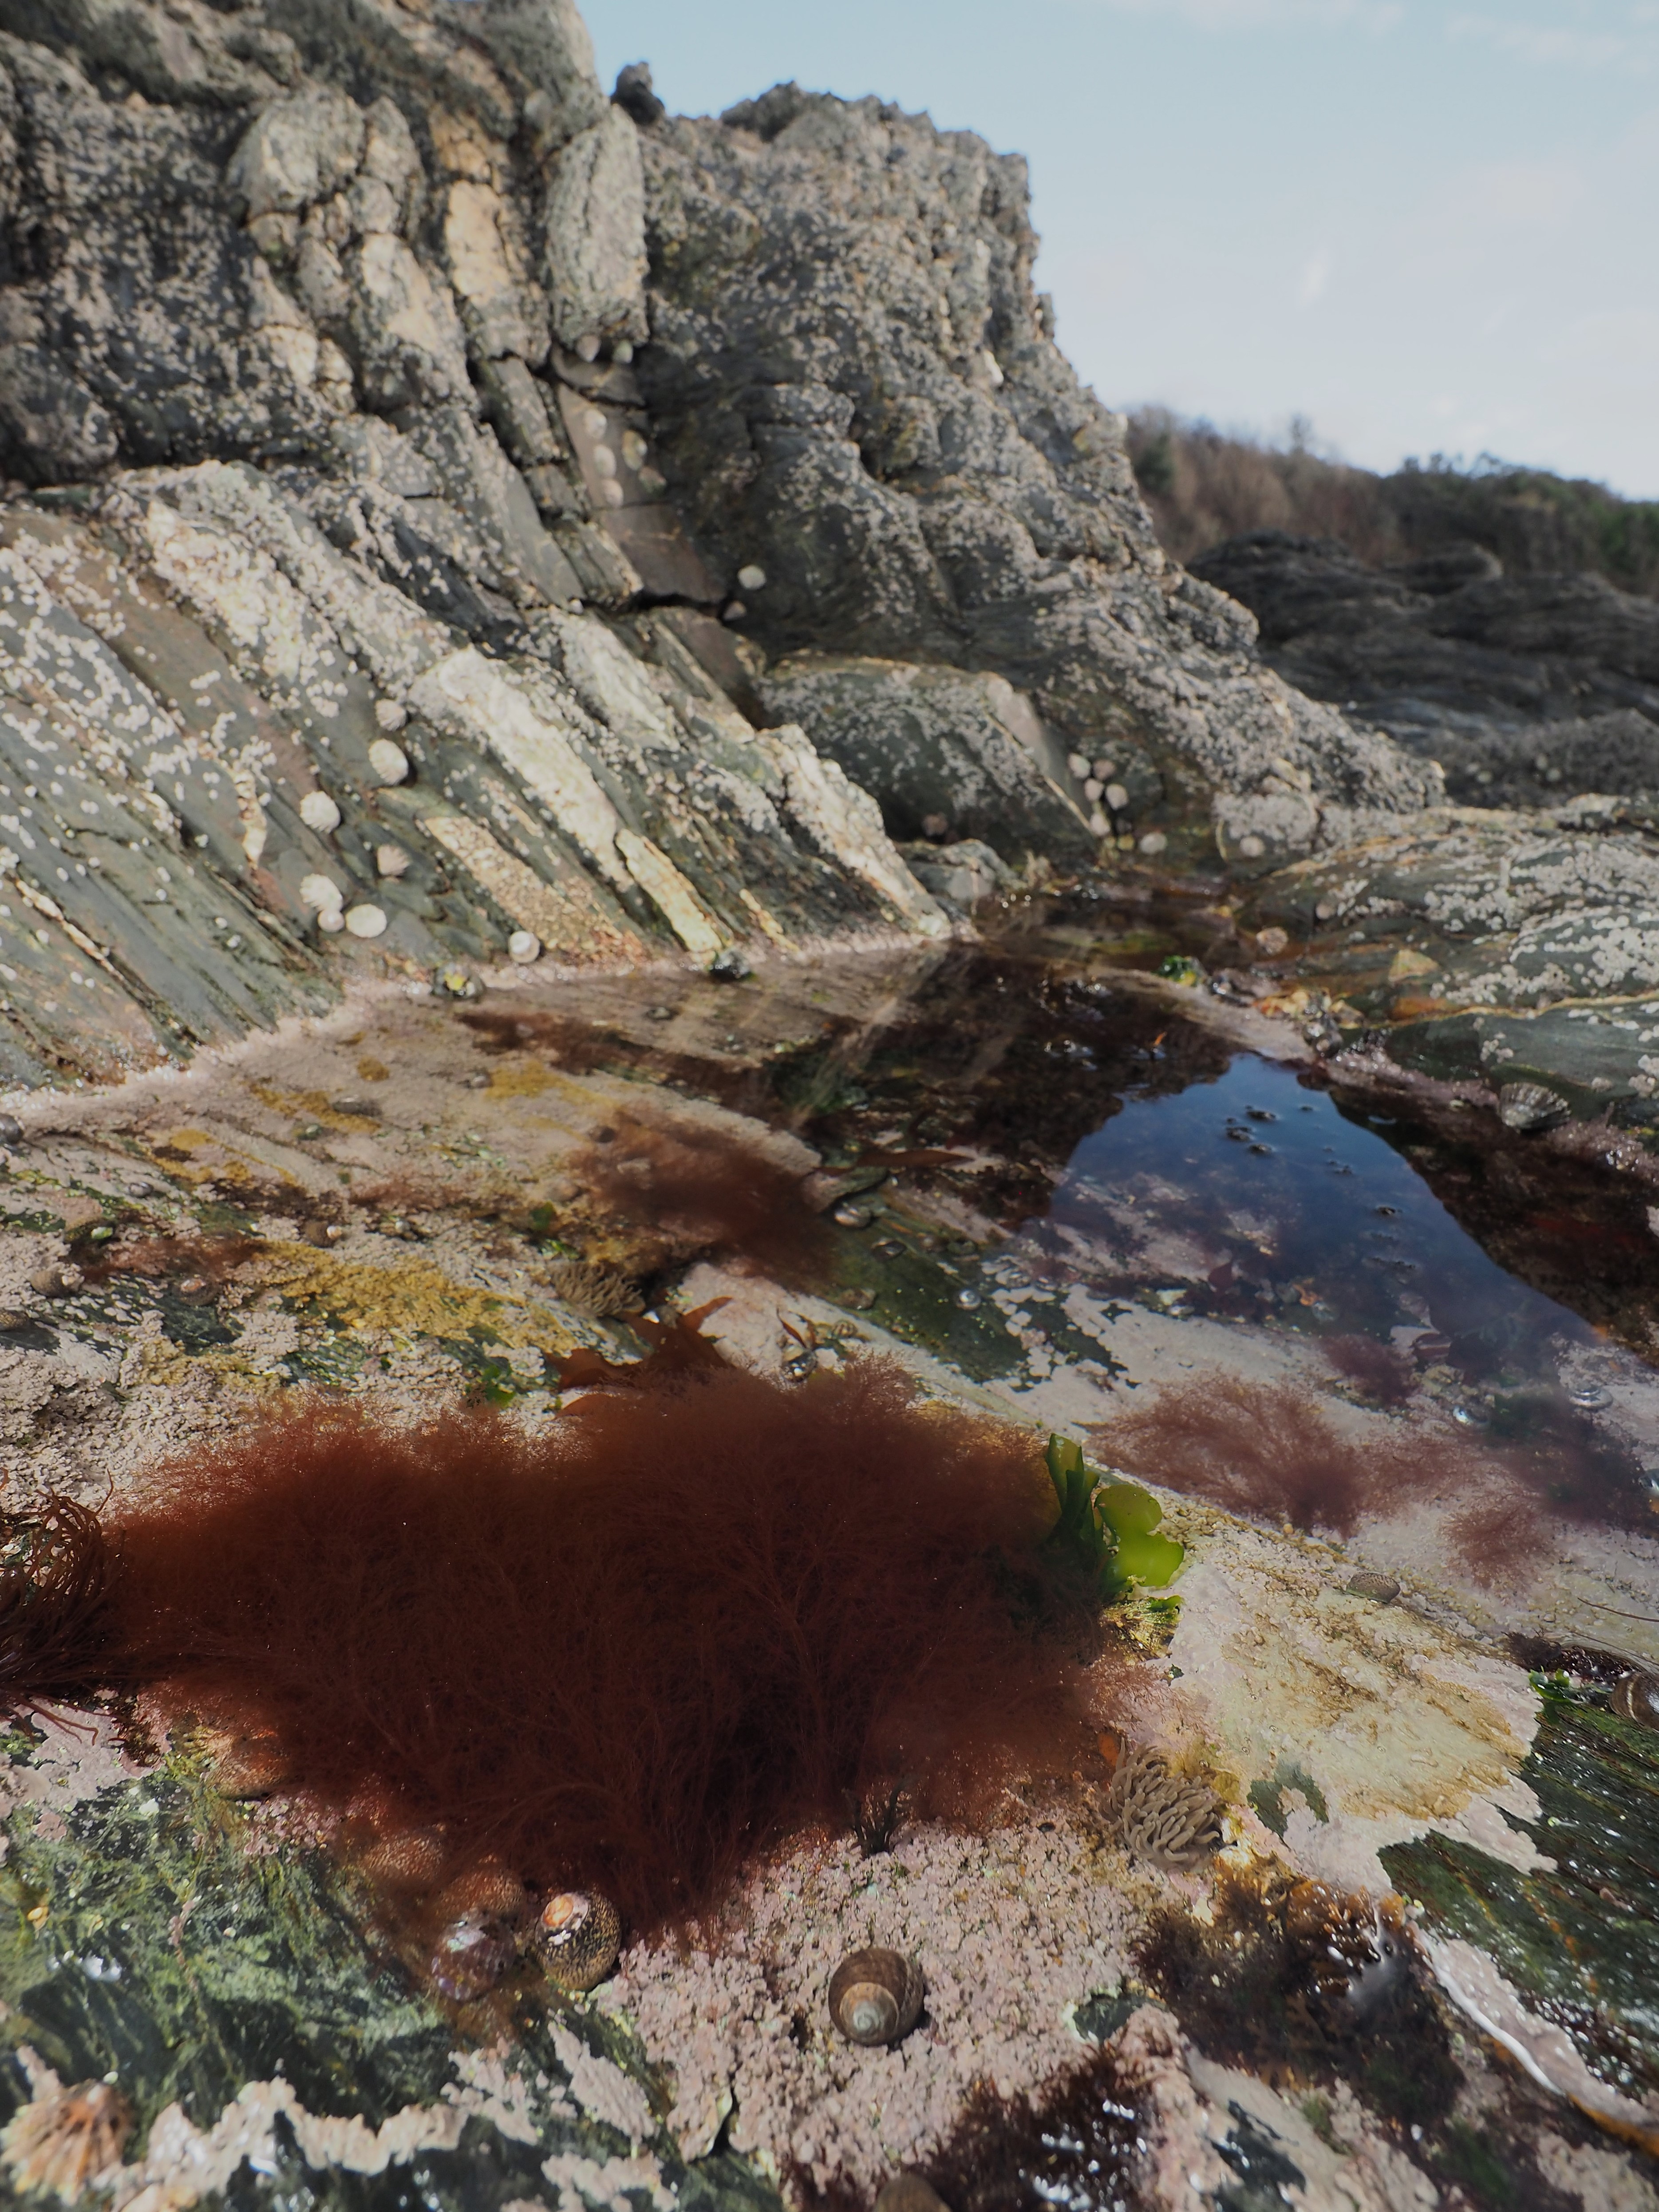
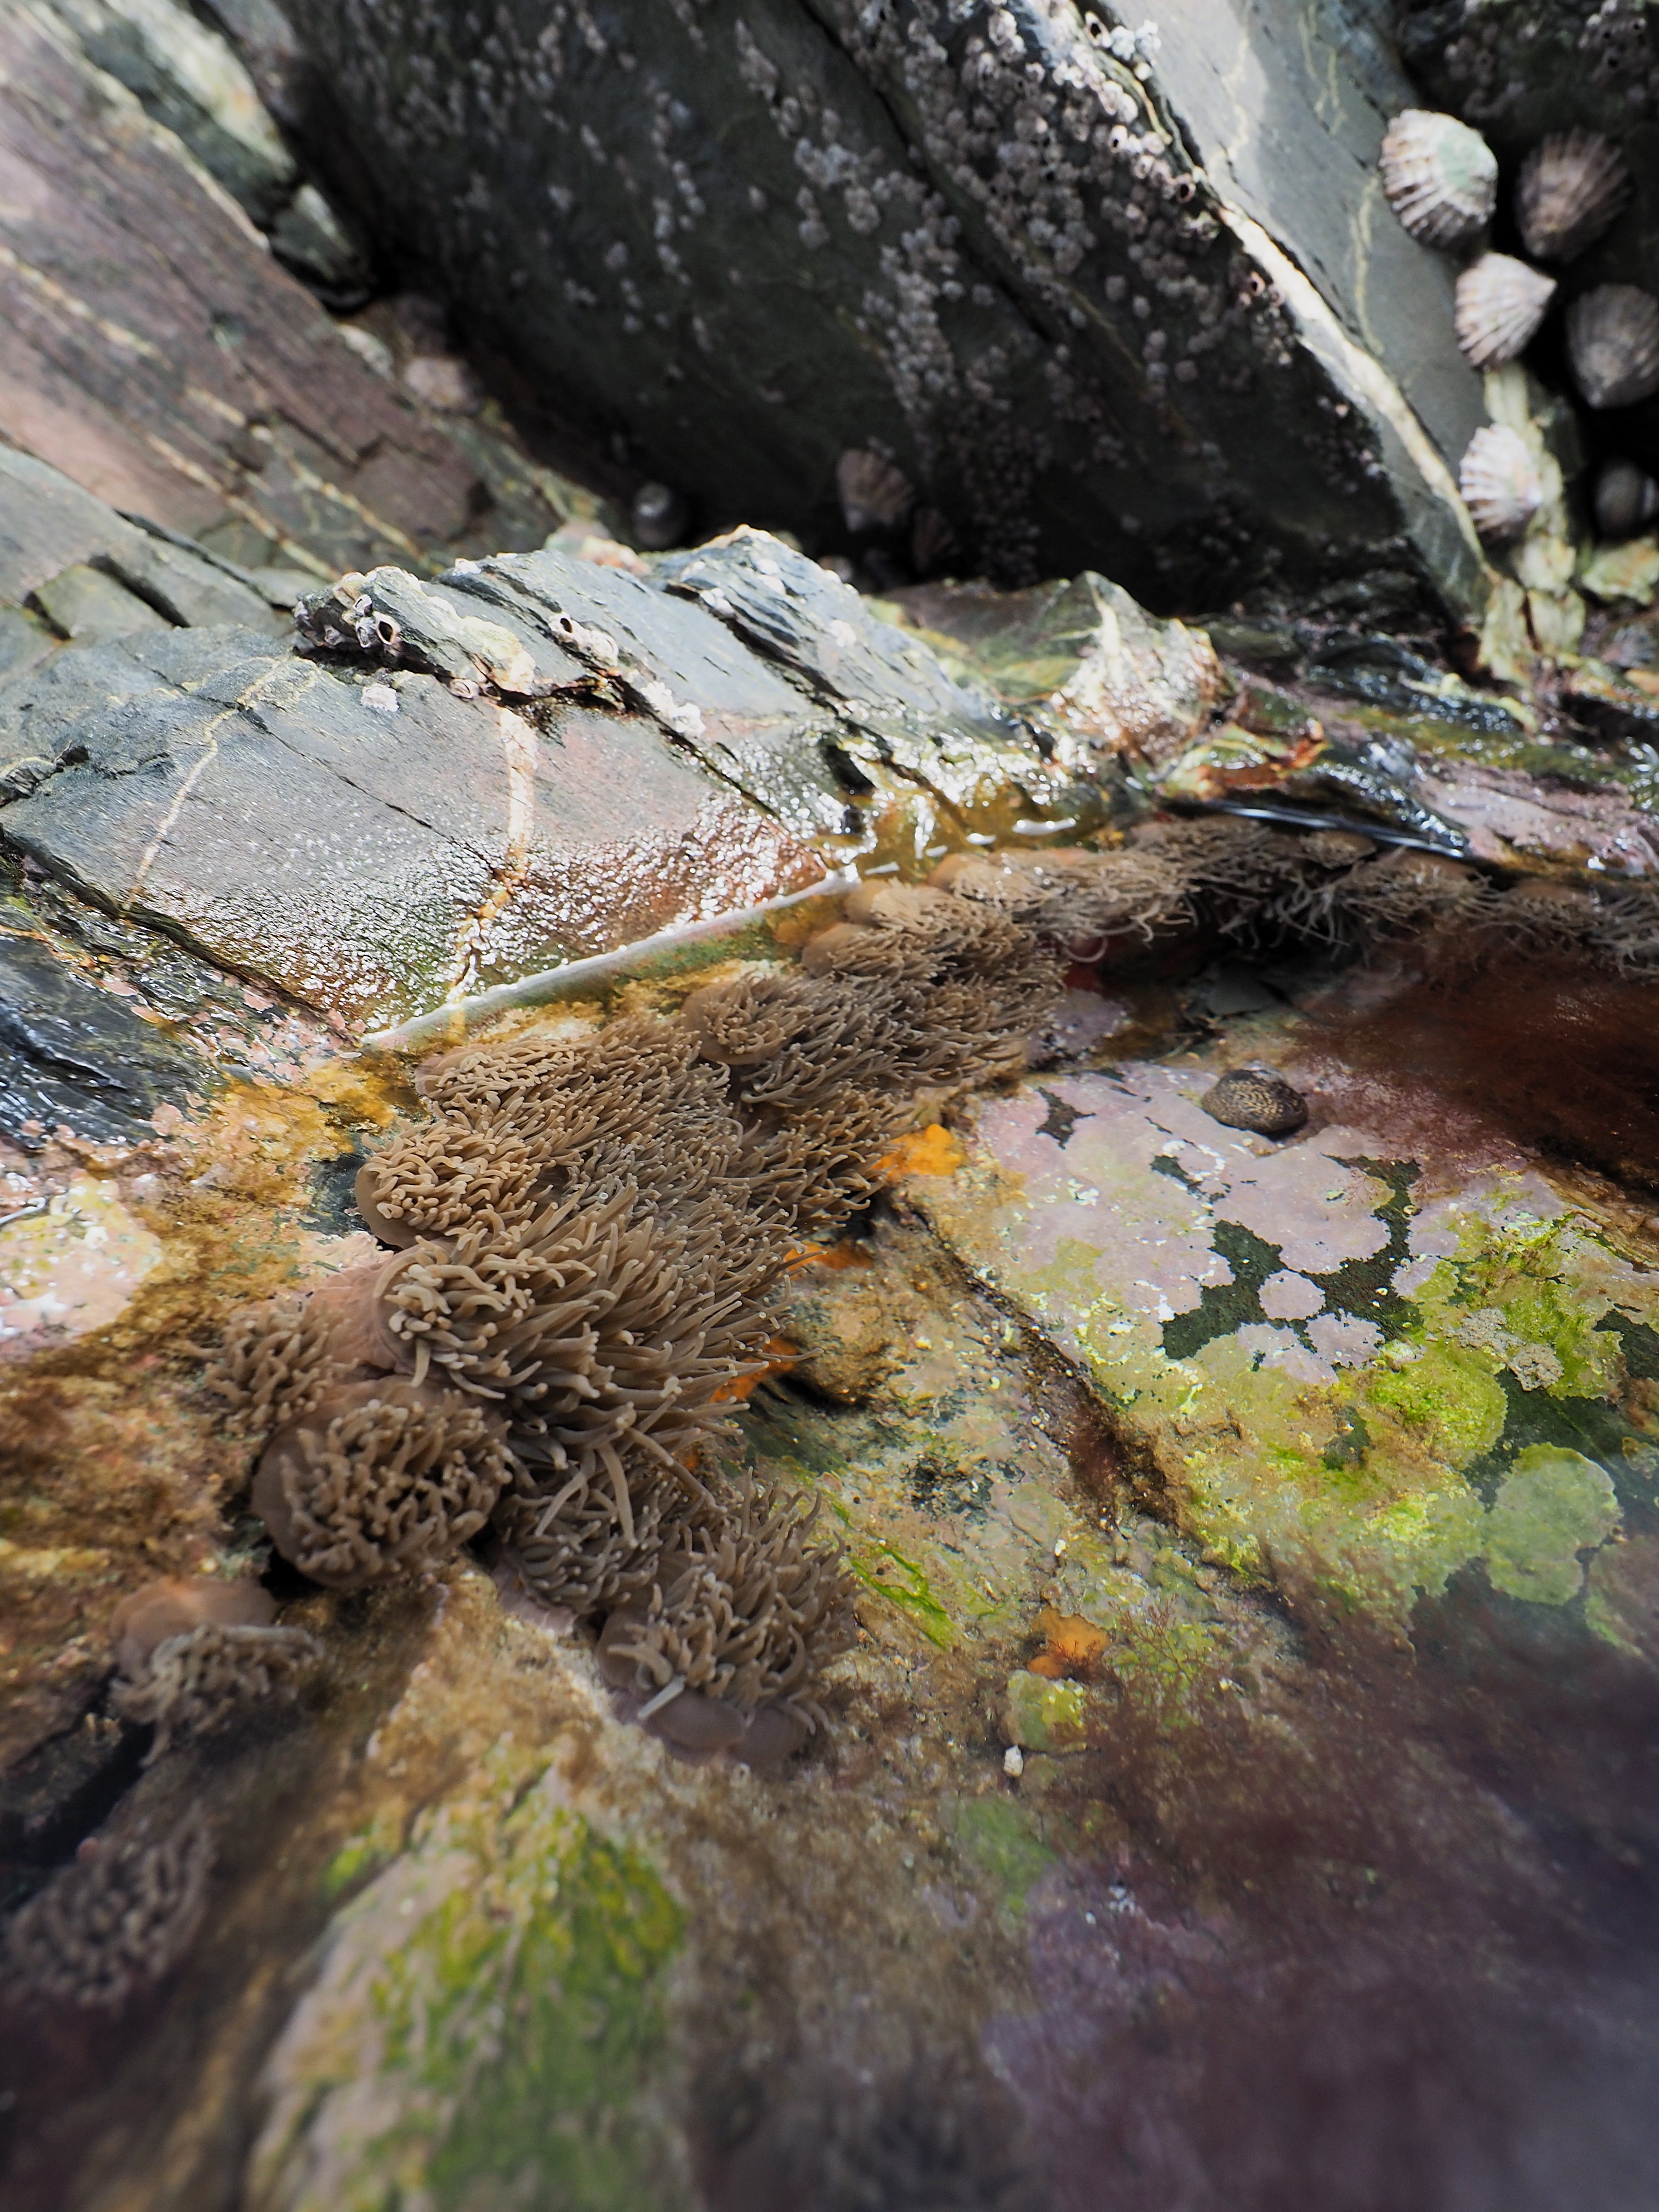
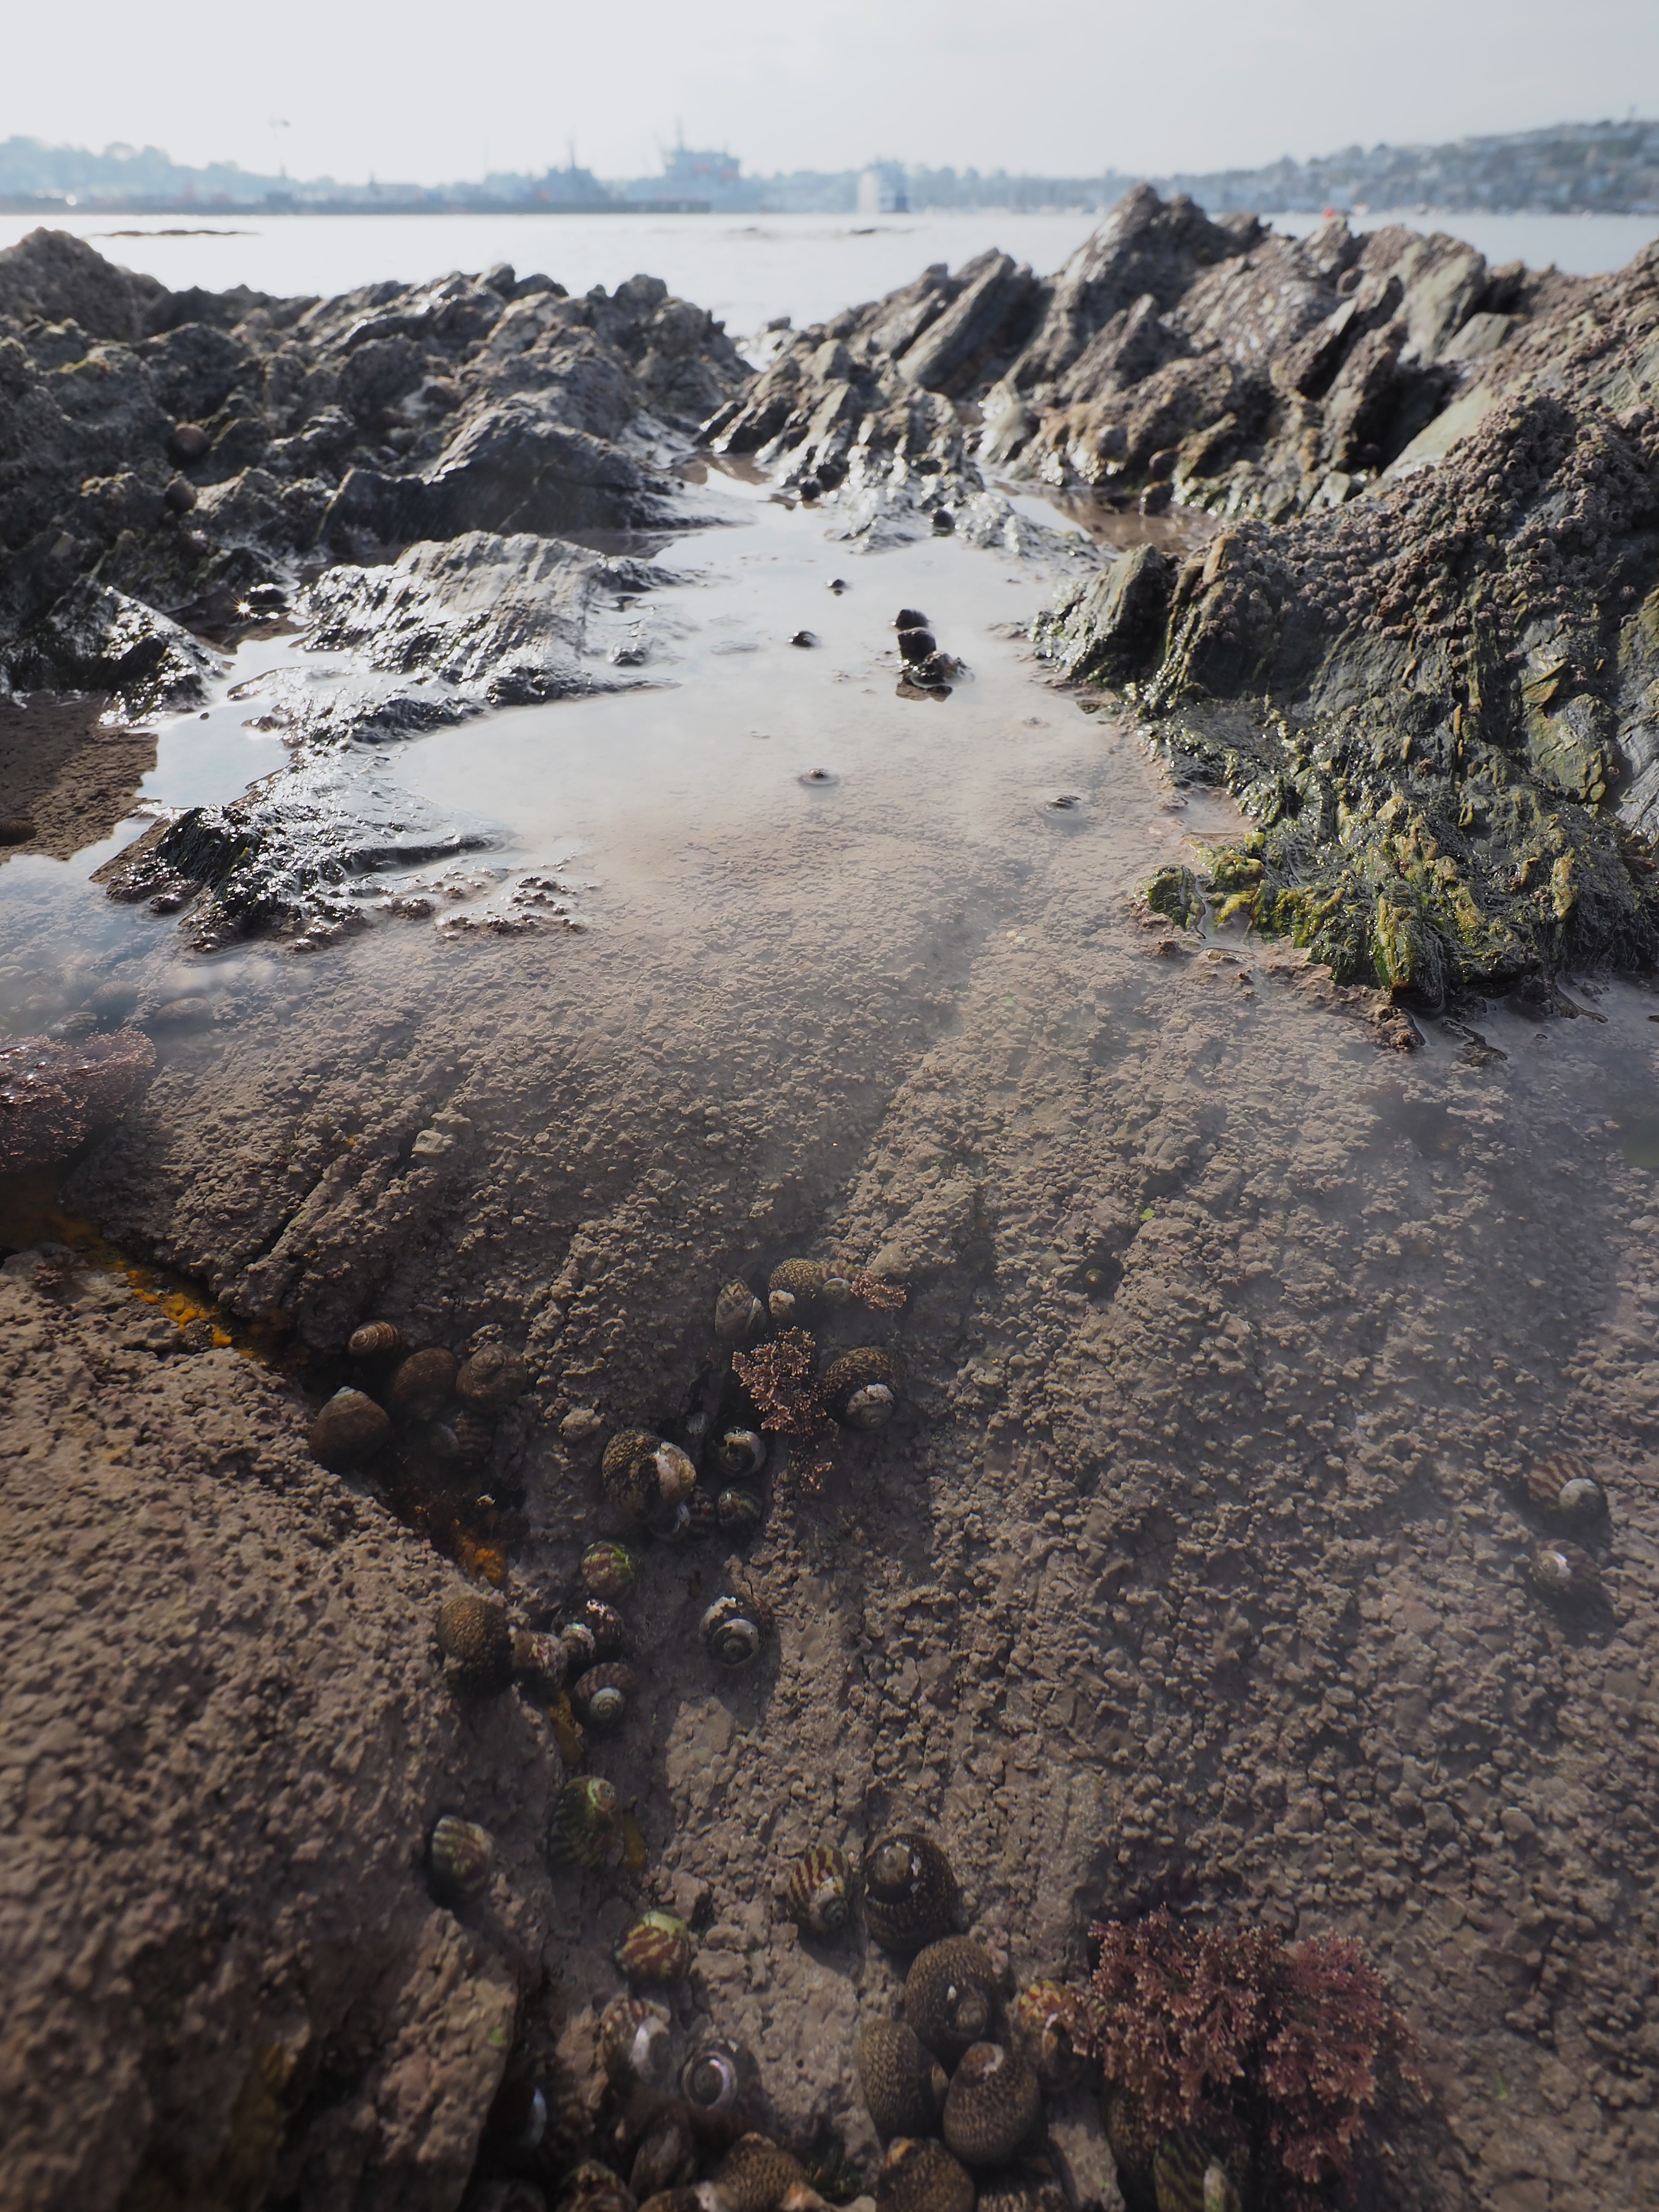
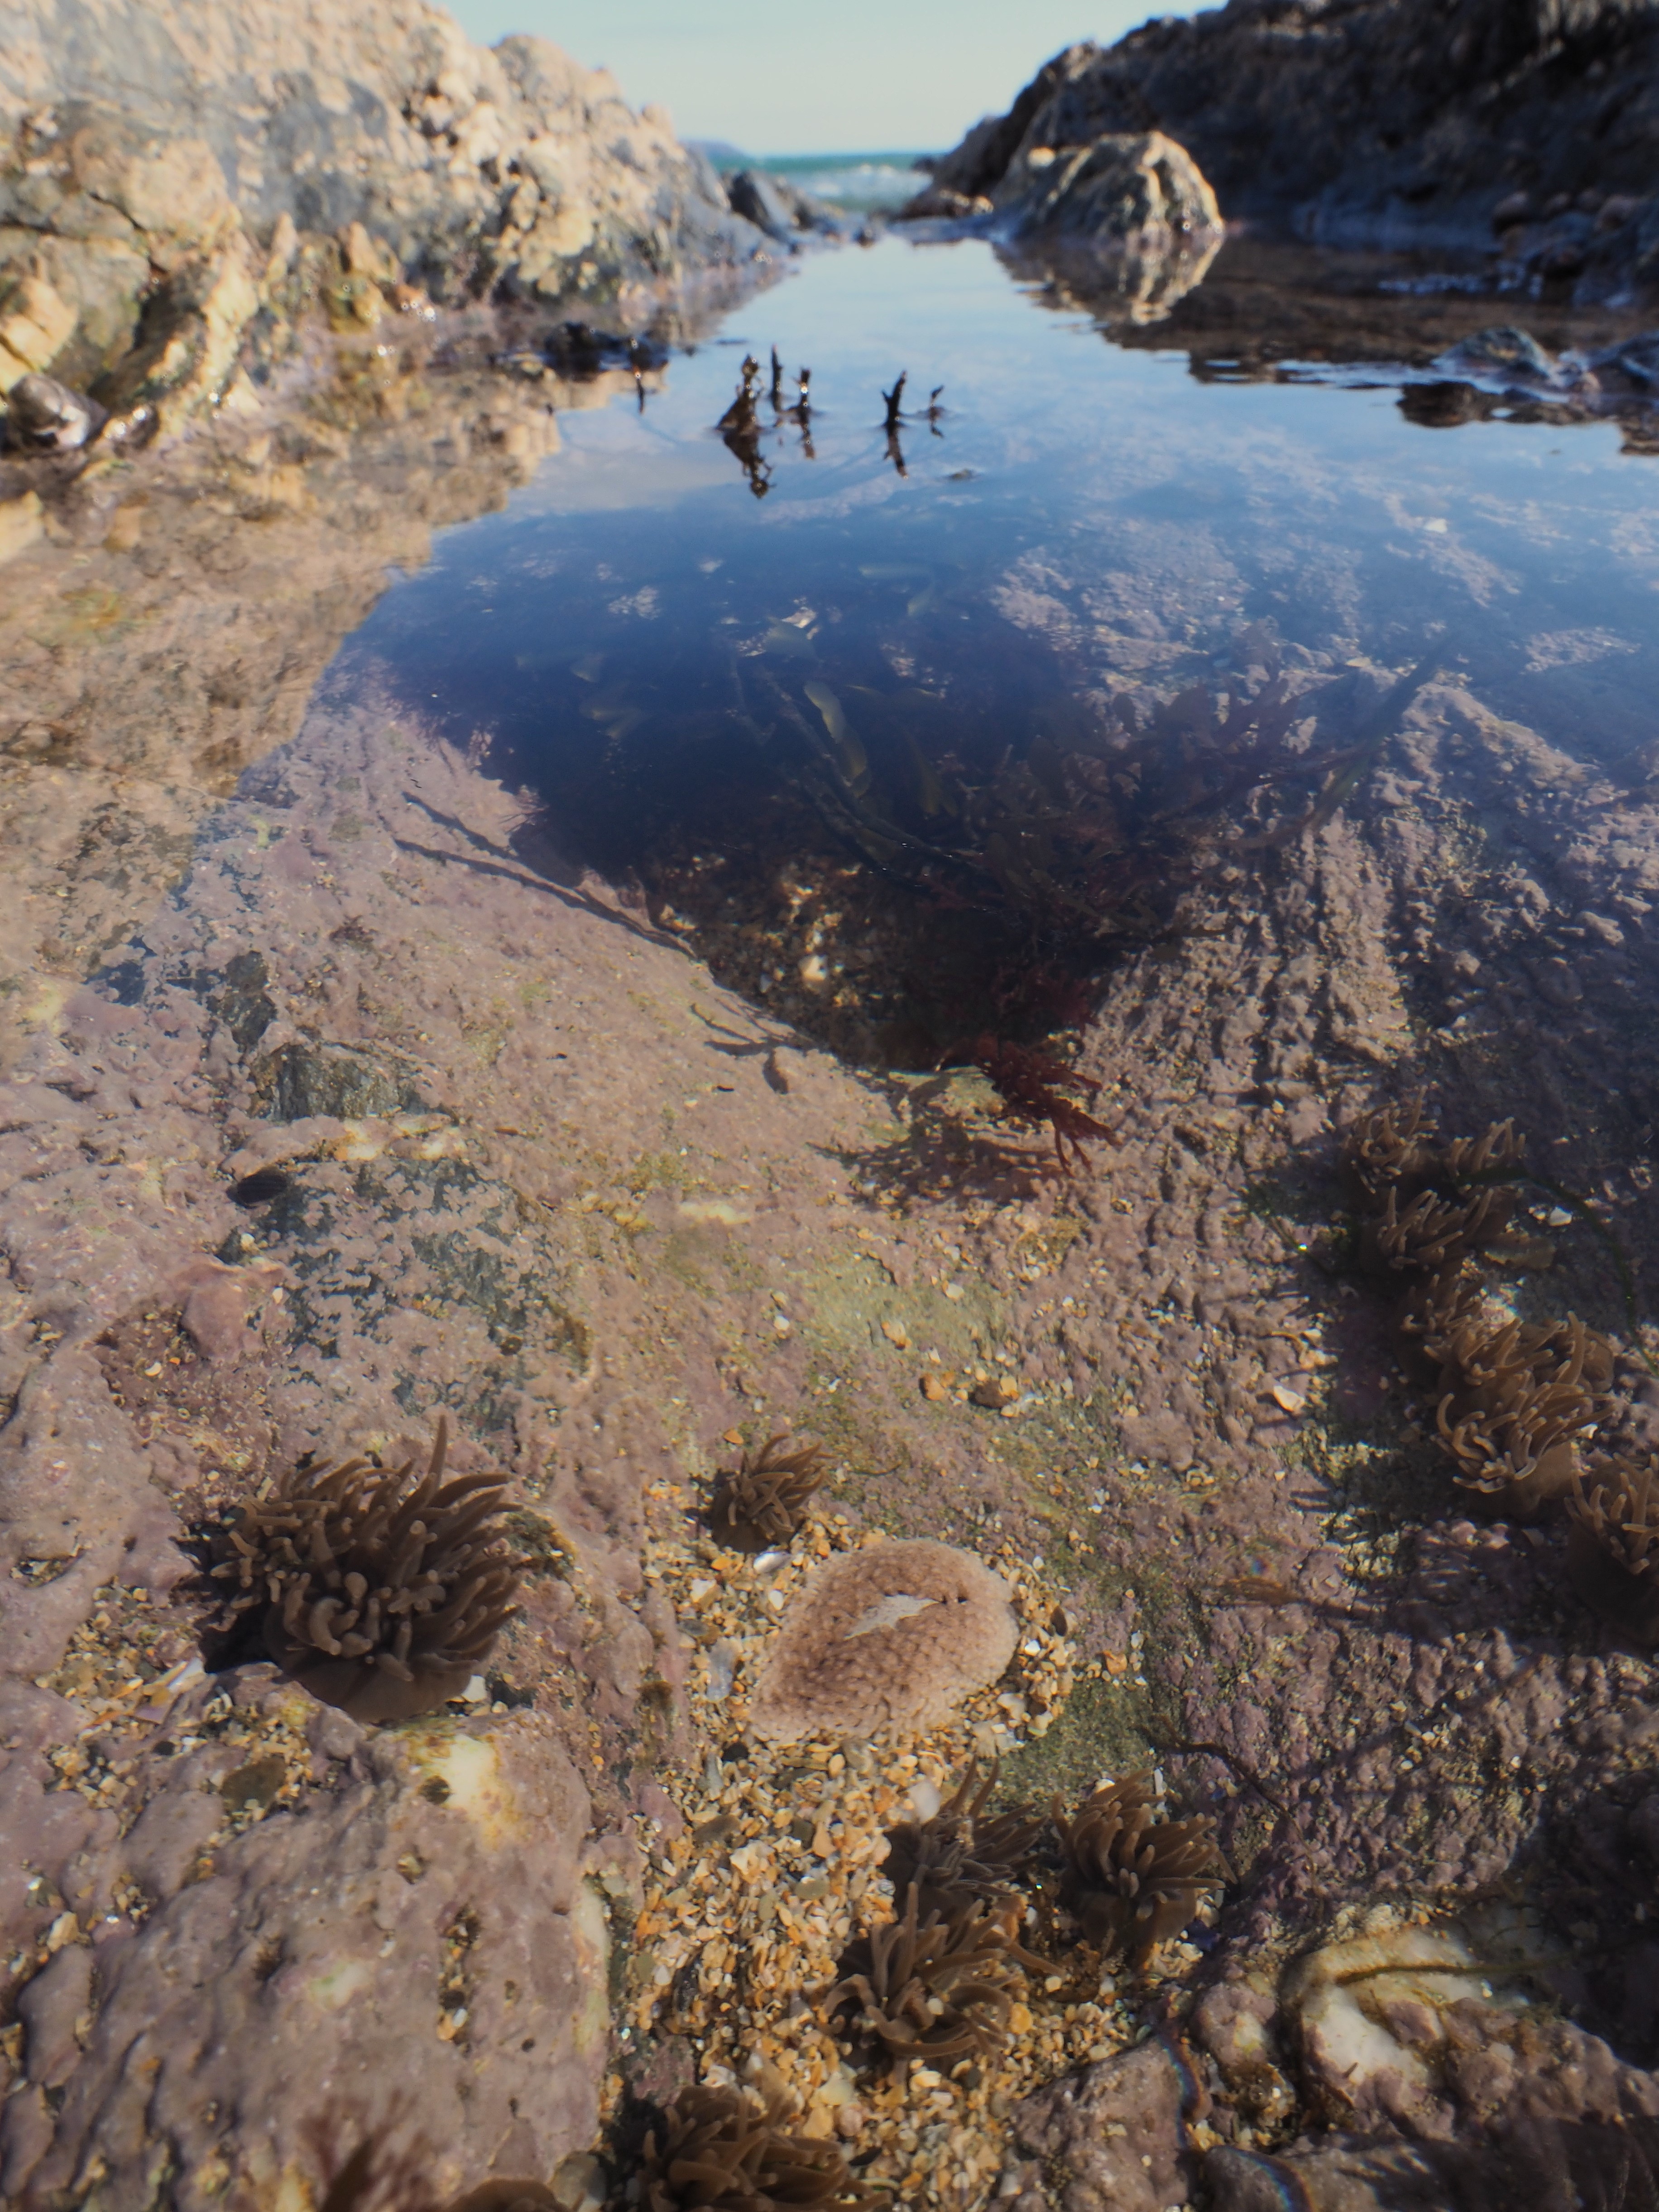
I tried my hand today at taking photos of rock pools above water – tricky! I used my Leica wide angle lens with a polarizing filter and a handheld strobe in a diffuser. It was fun playing around, although felt my back after an hour or so trying! It is difficult to keep the reflection of the flash out of the shot. The tide was not low so these are small, mid-shore pools dominated by coralline algae and some (fine) red seaweeds. Beadlet and snakelocks anemones, limpets, periwinkles, thick- and purple topshells are the most common animals. Some sunshine and blue sky – let’s see when I can try my hand at underwater photos again!

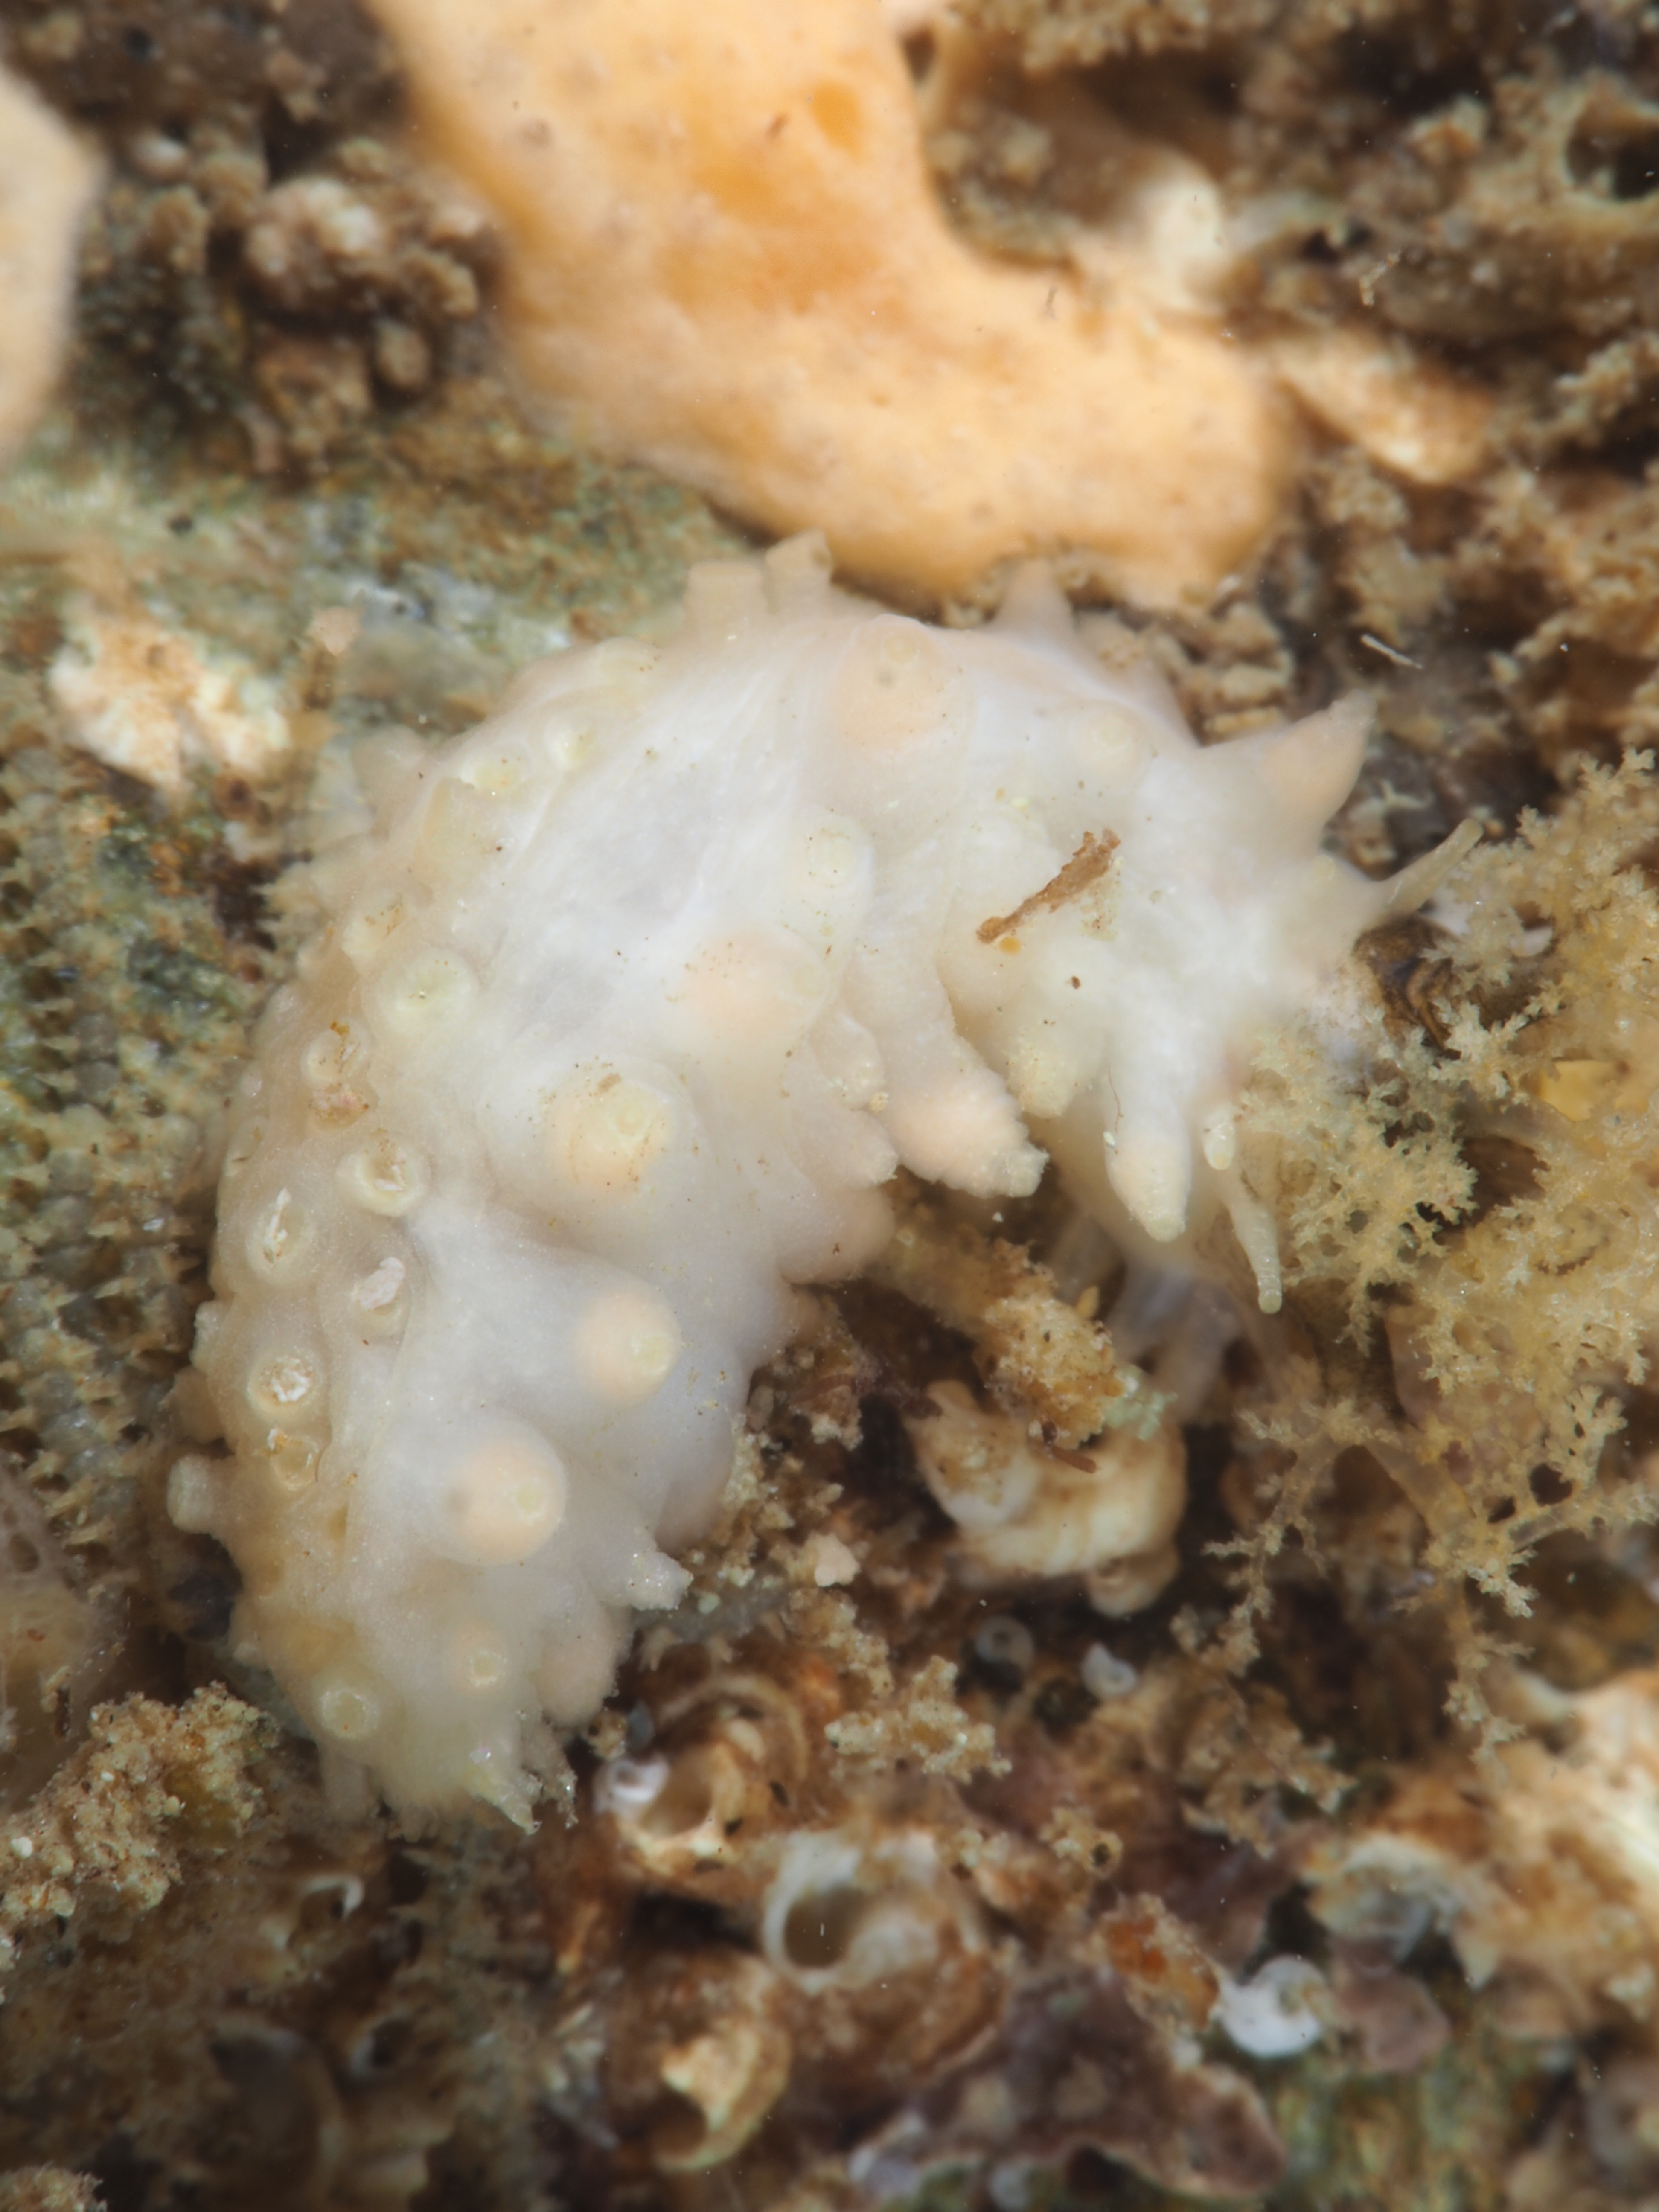
P.S. two extra pics taken a day later (without flash) near Bream Cove featuring an anemone-eating Aeolidia nudibranch.


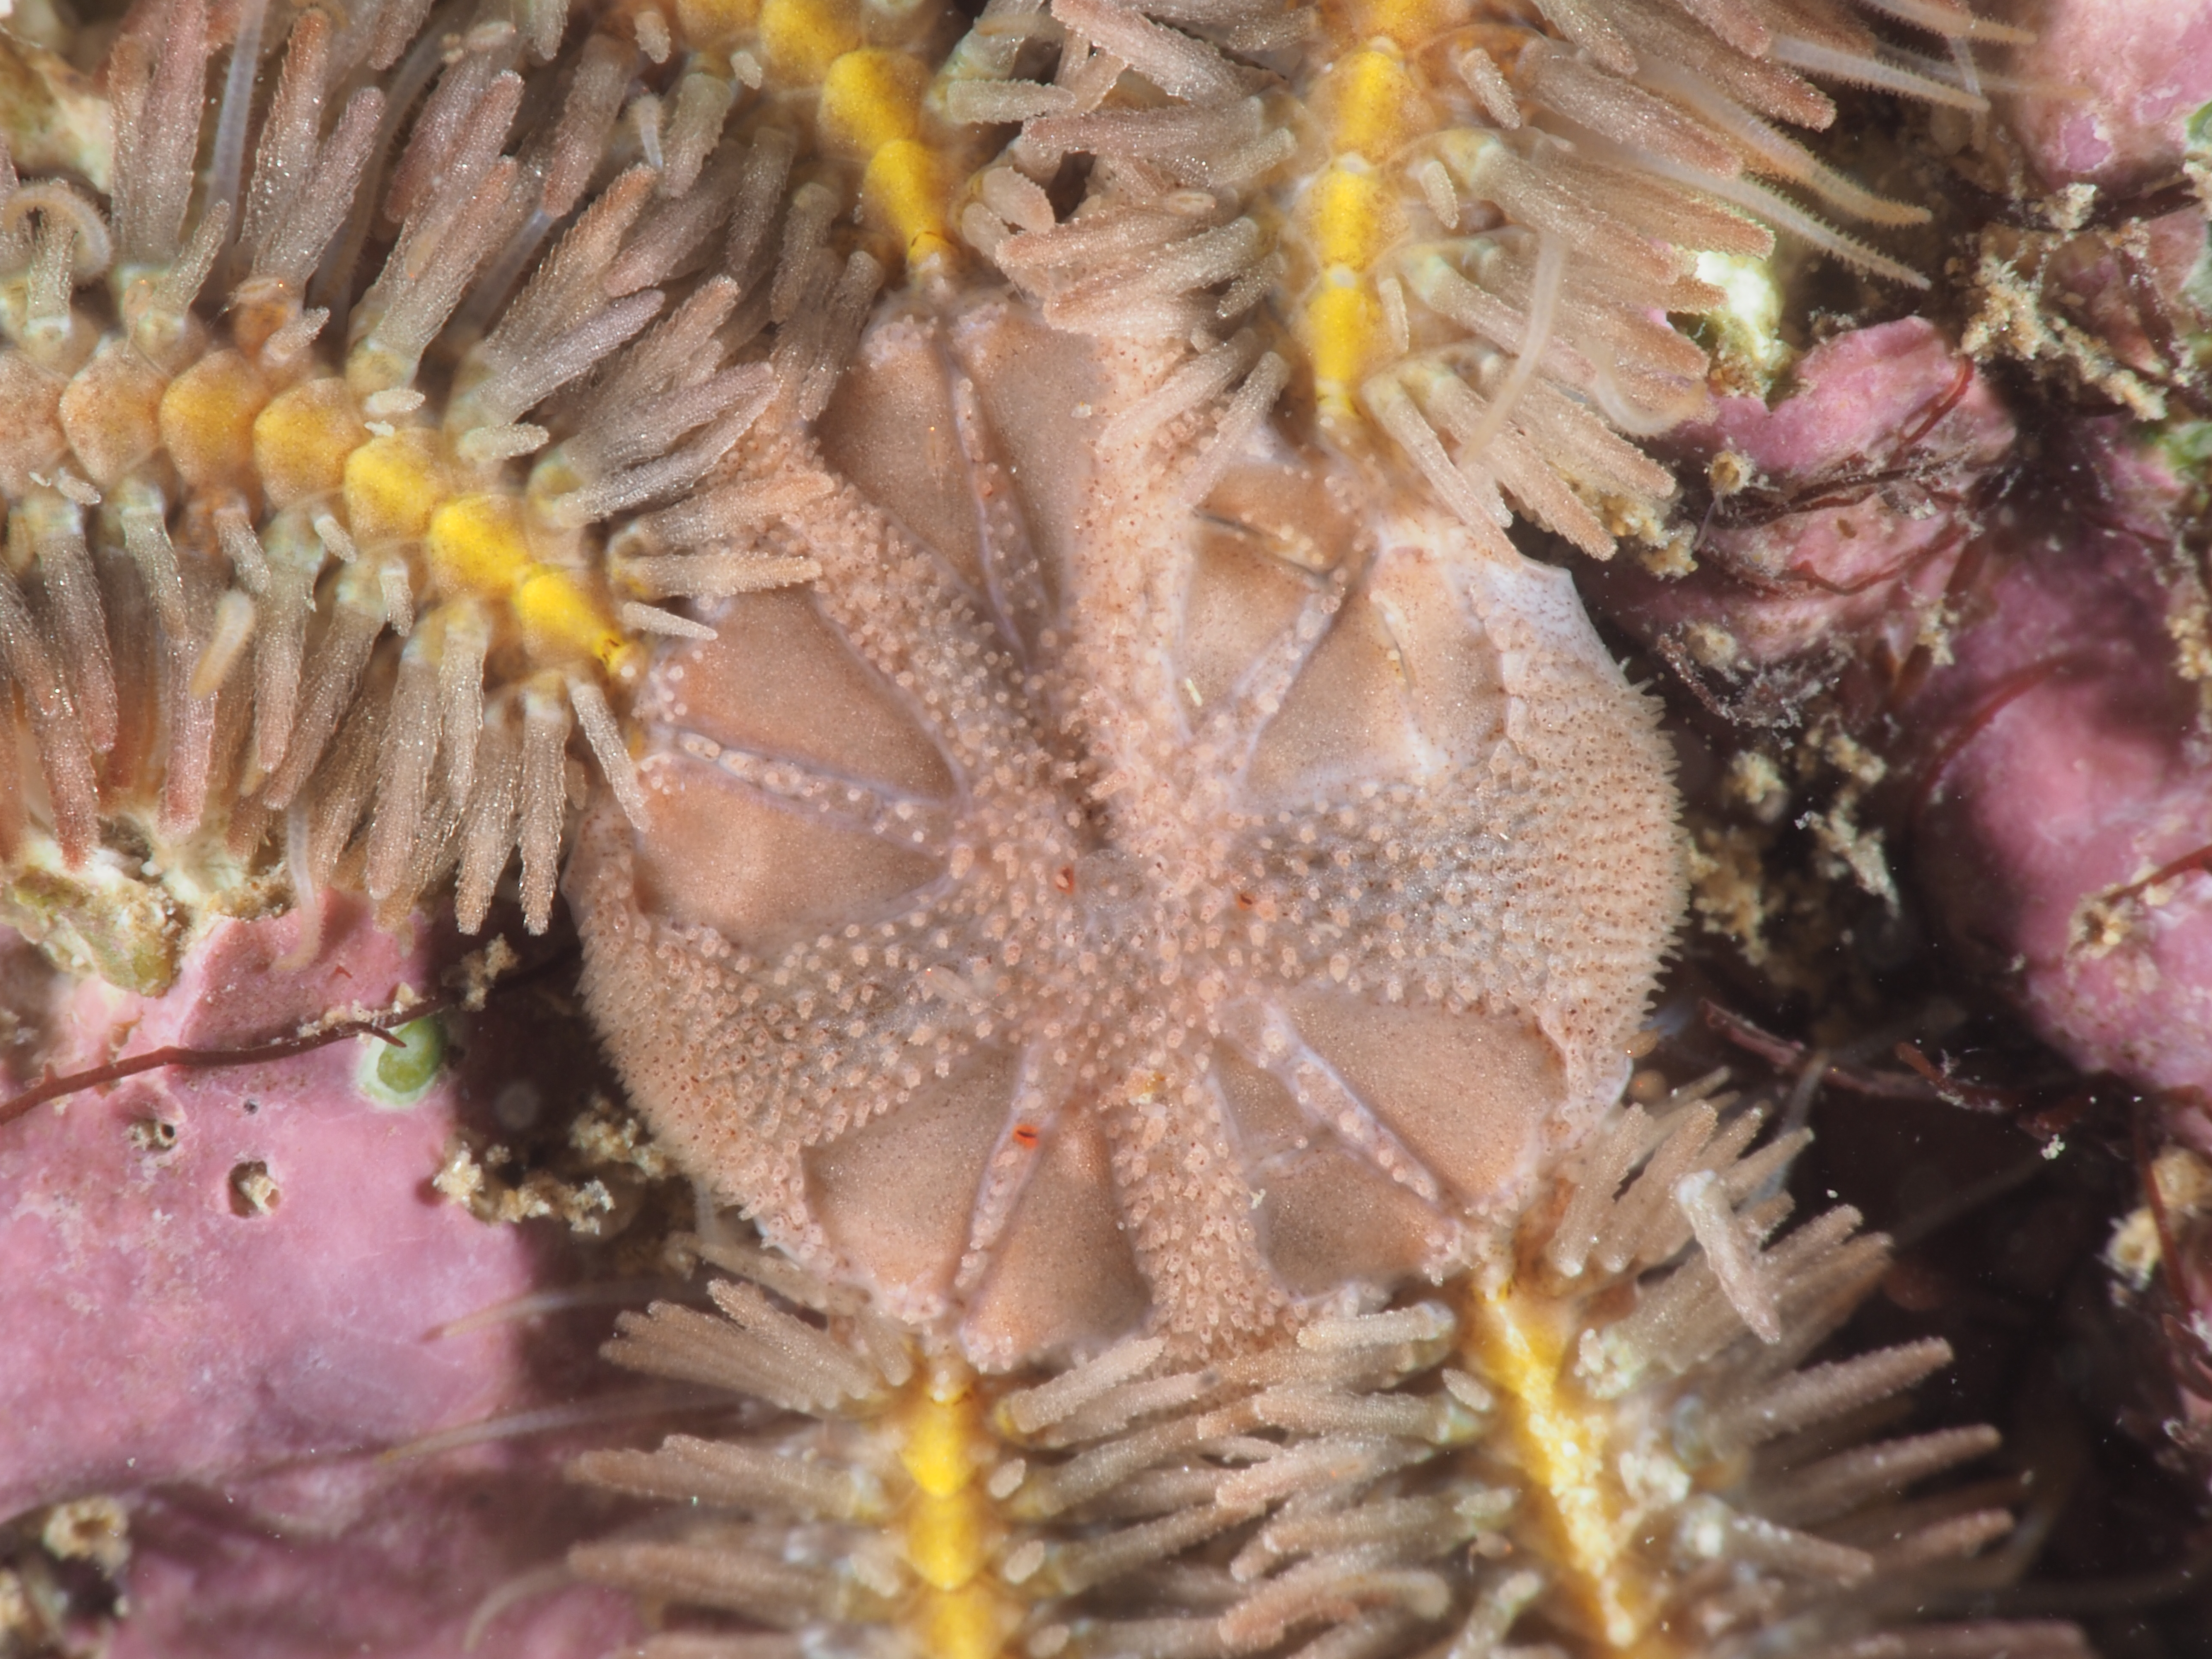
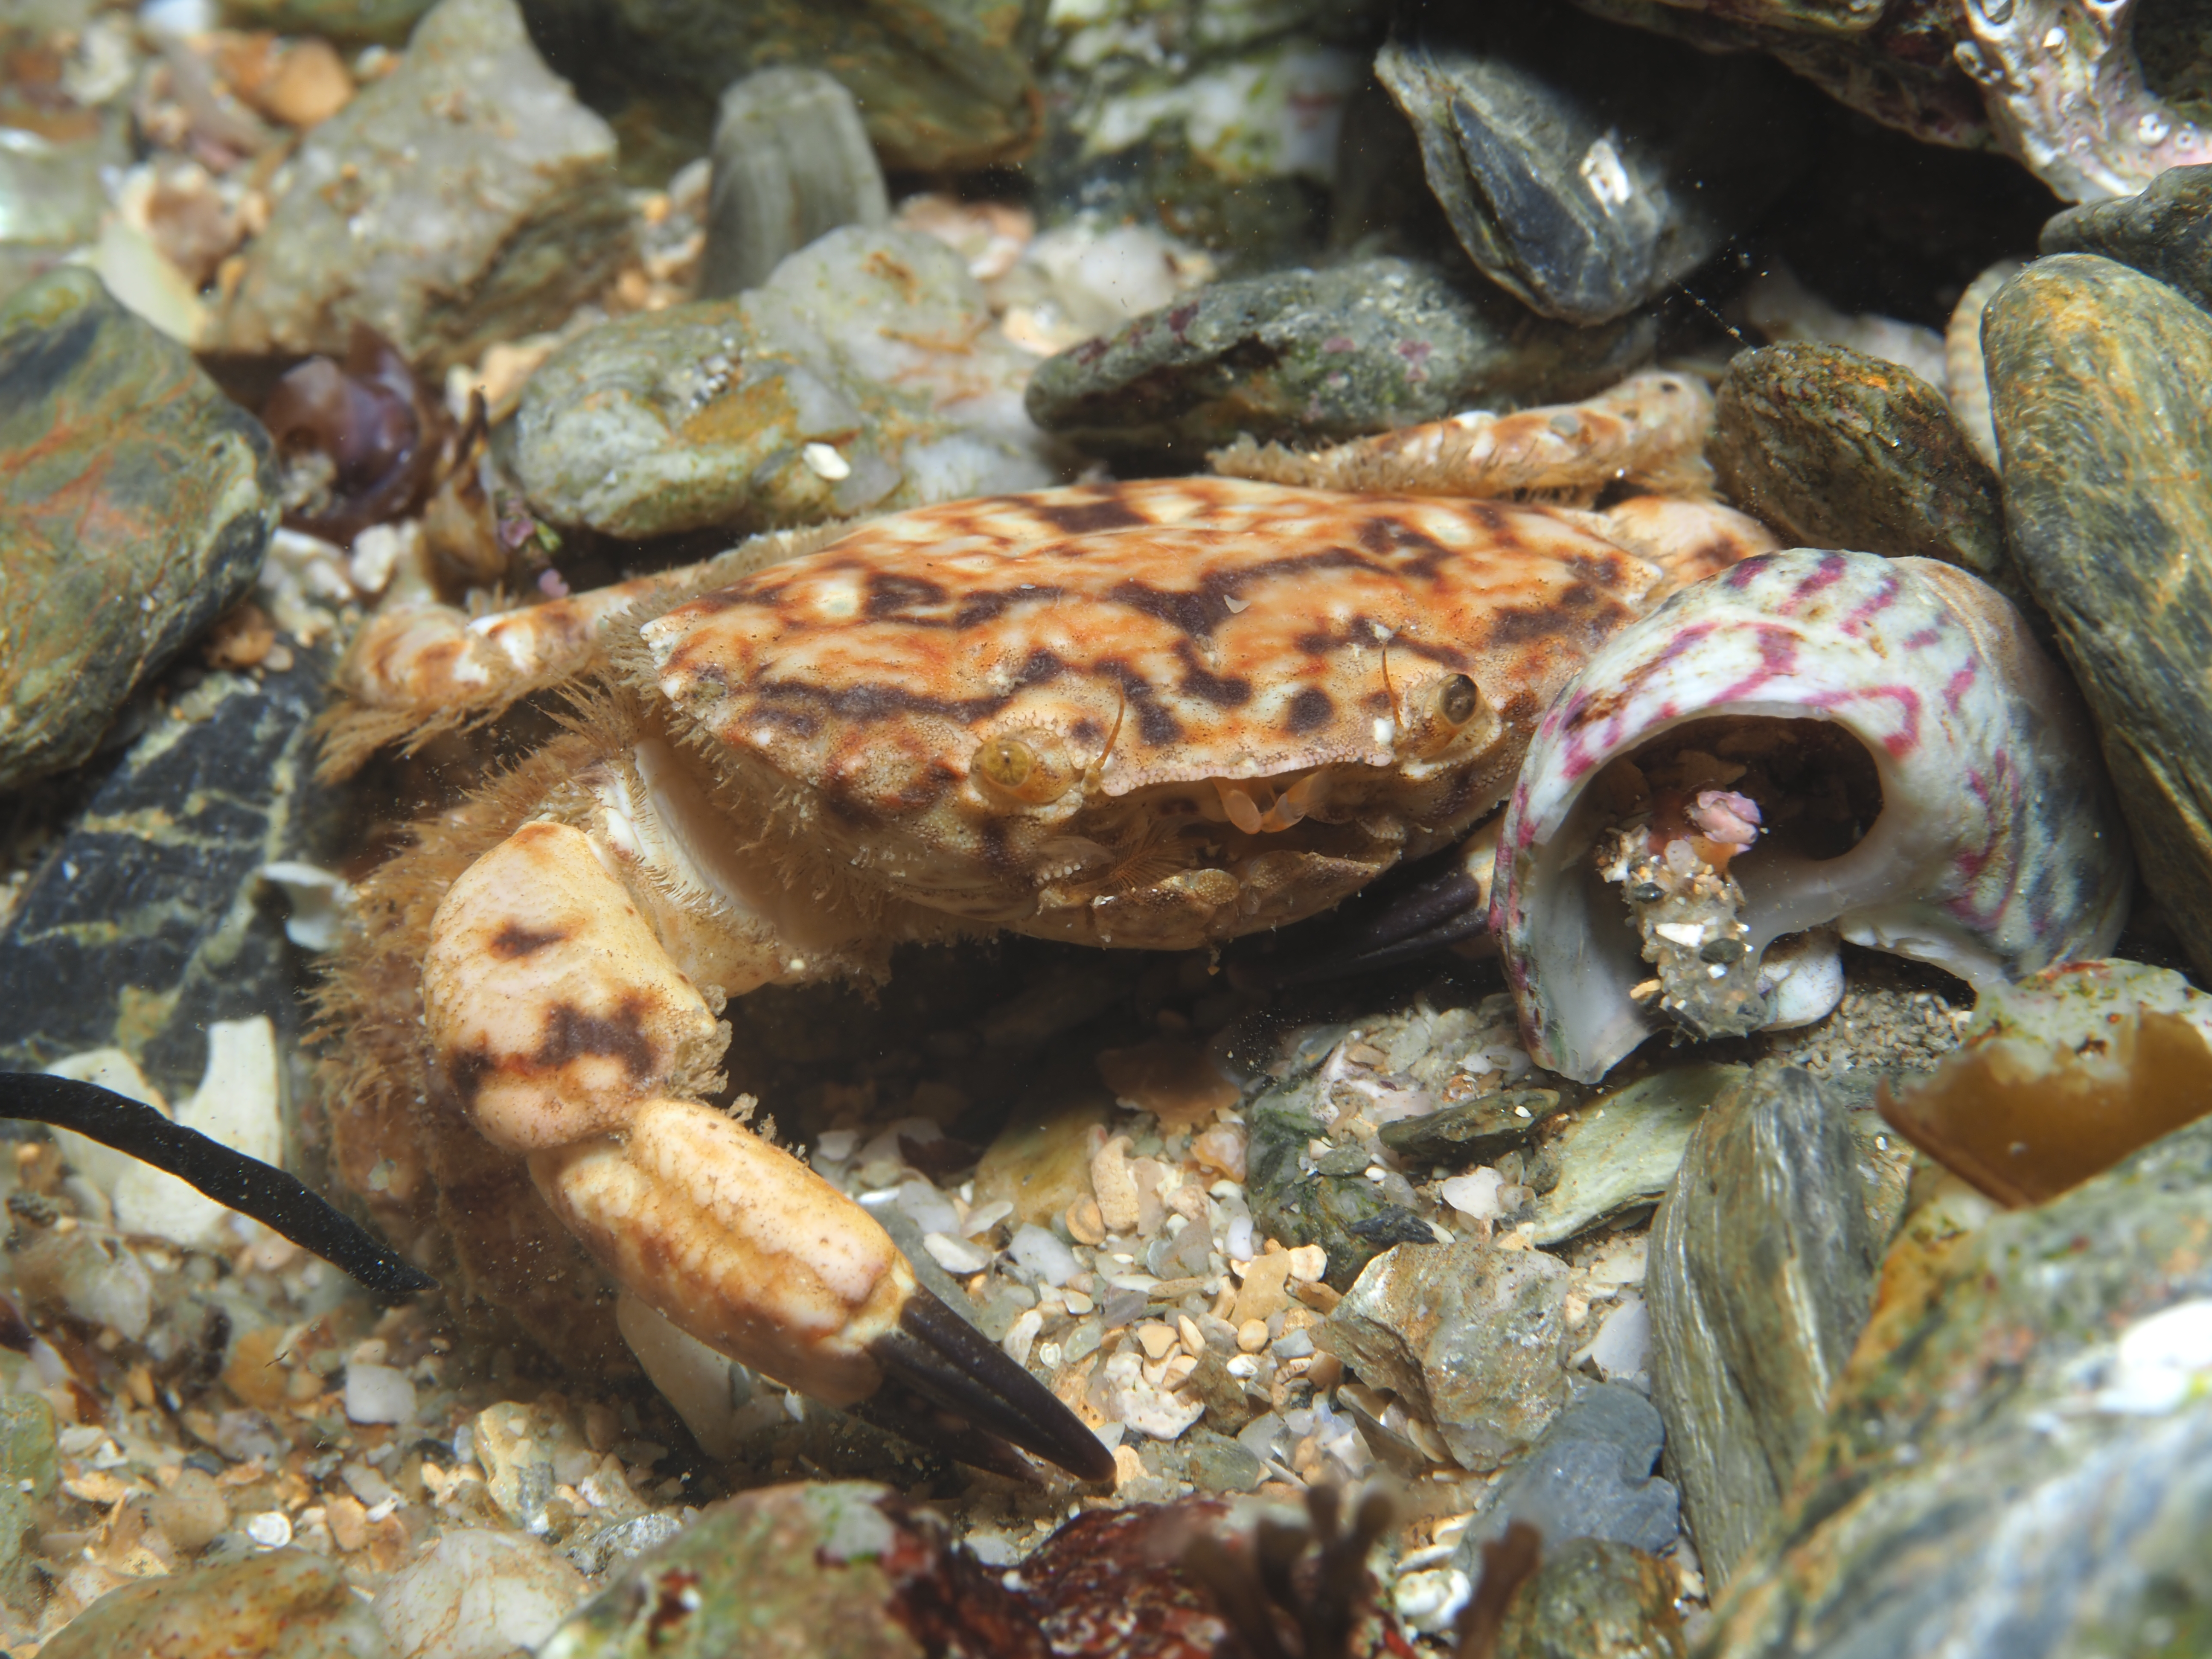
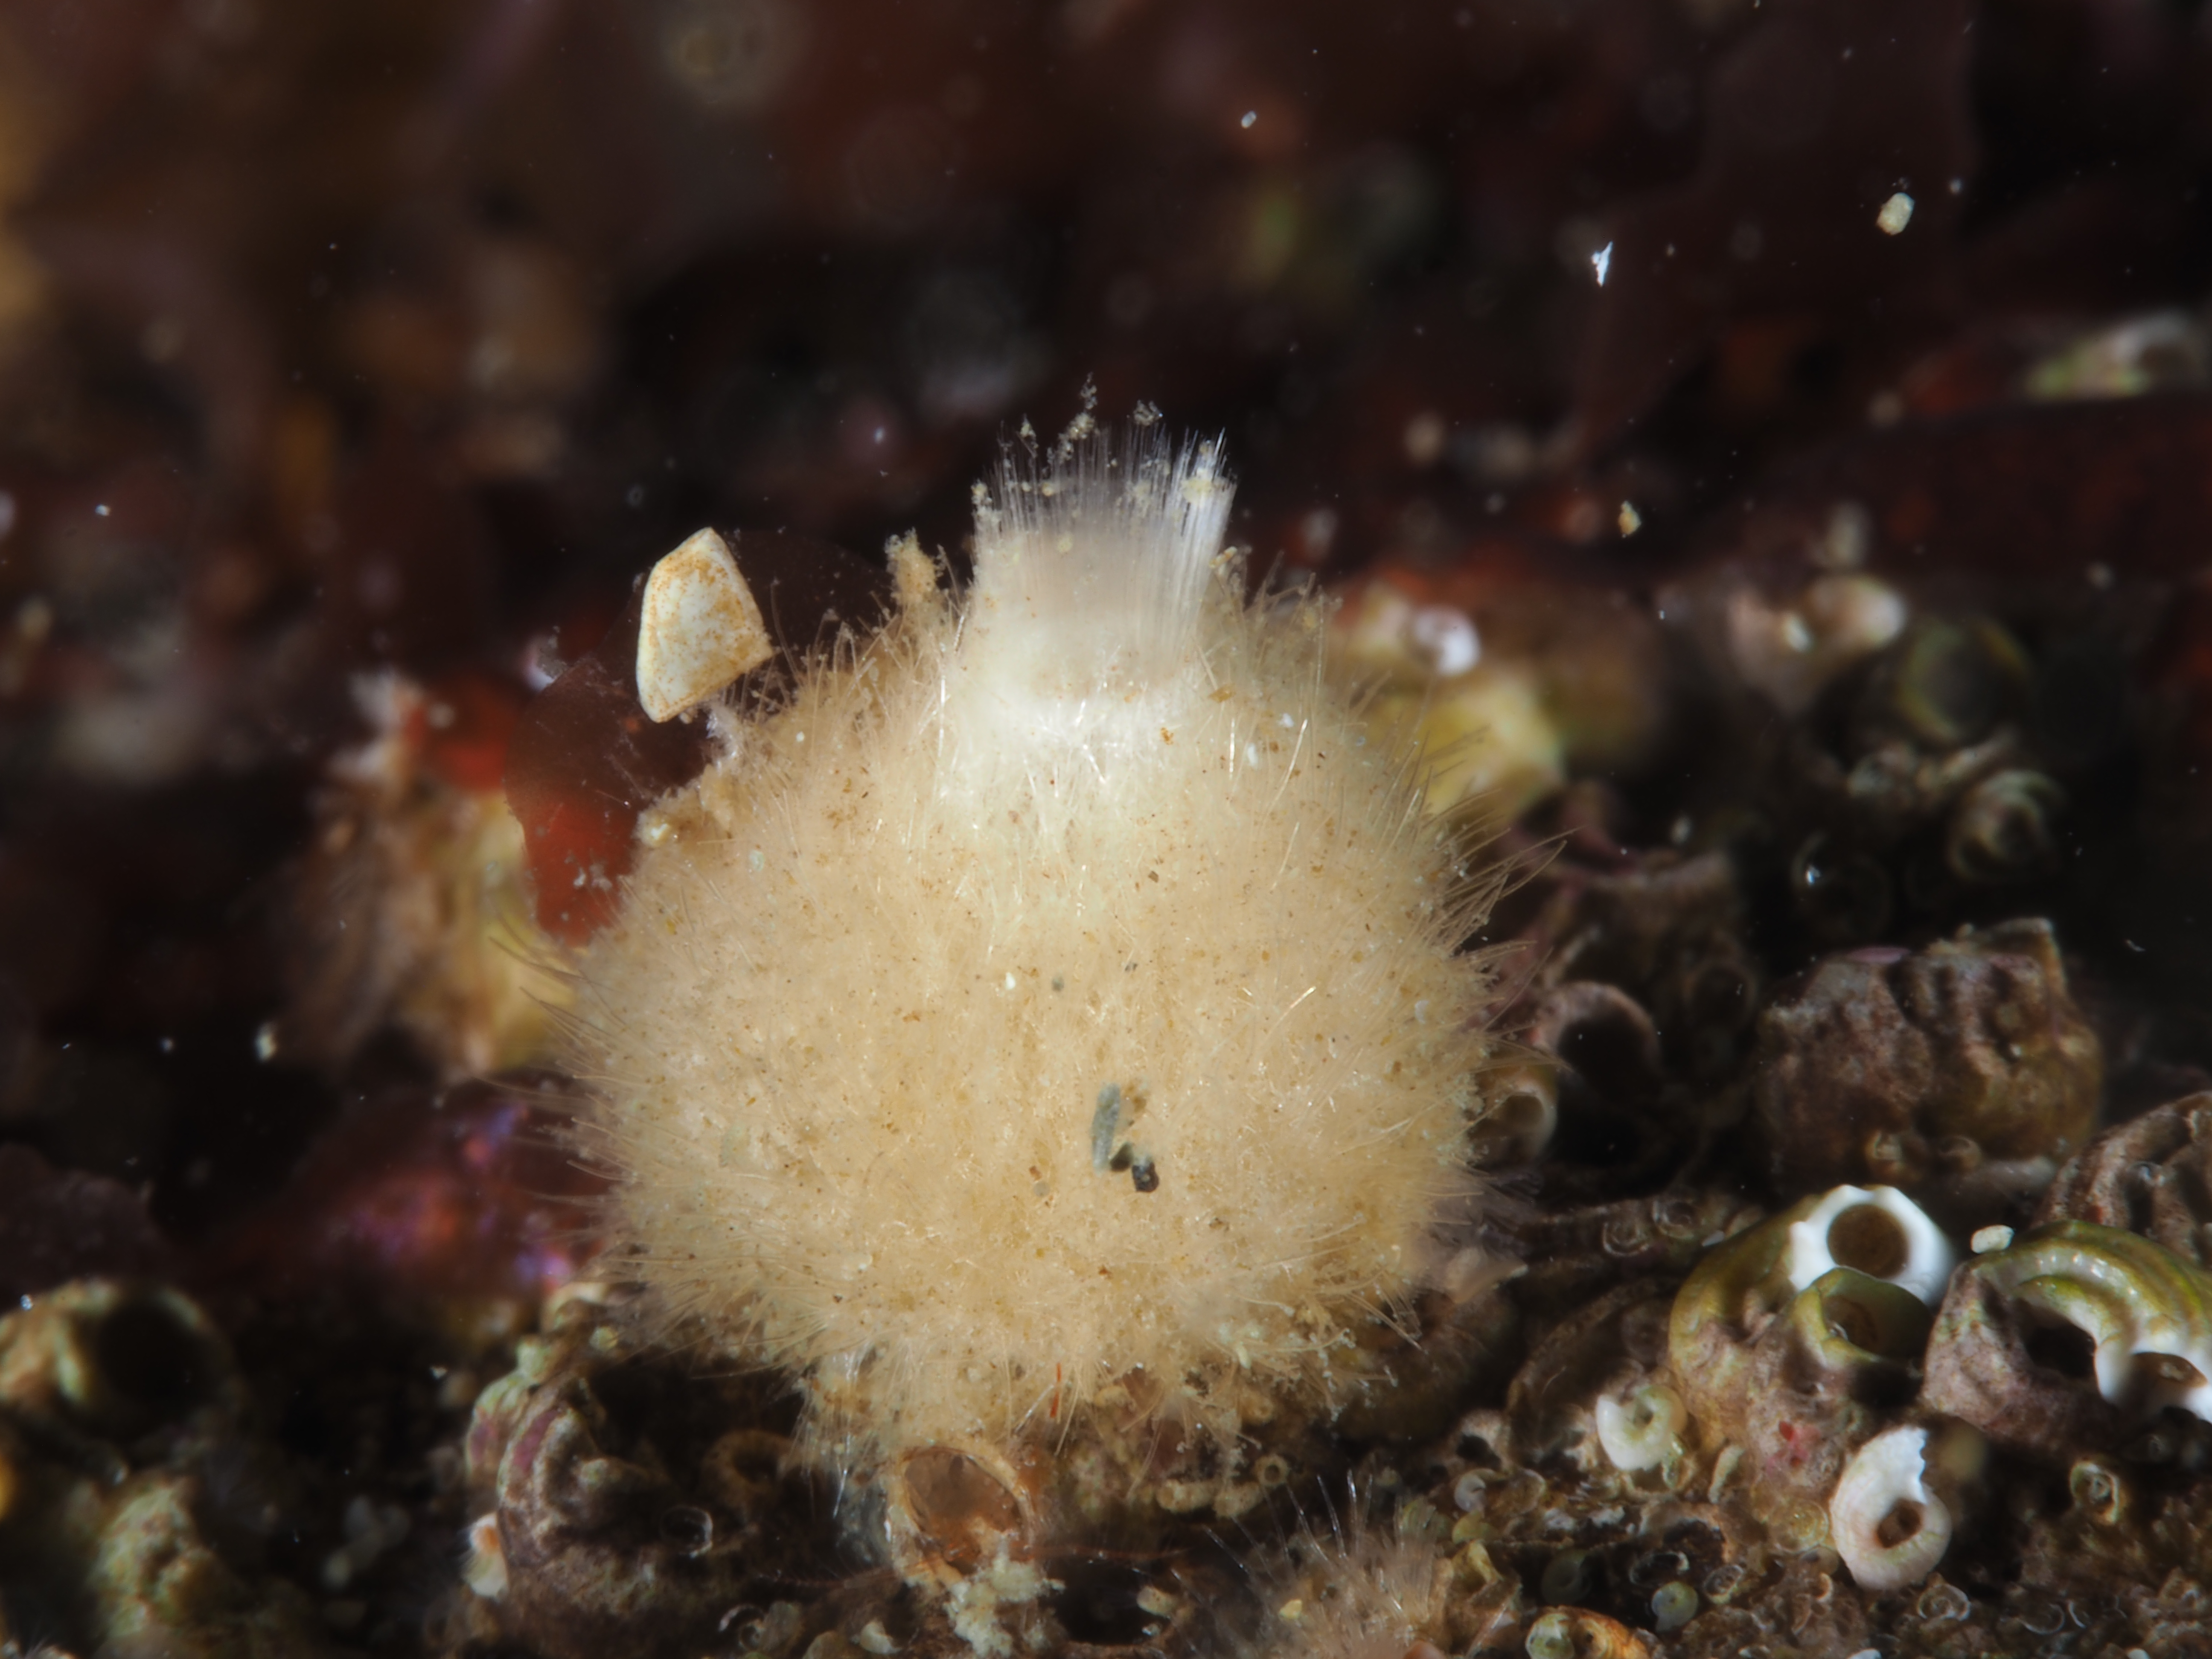
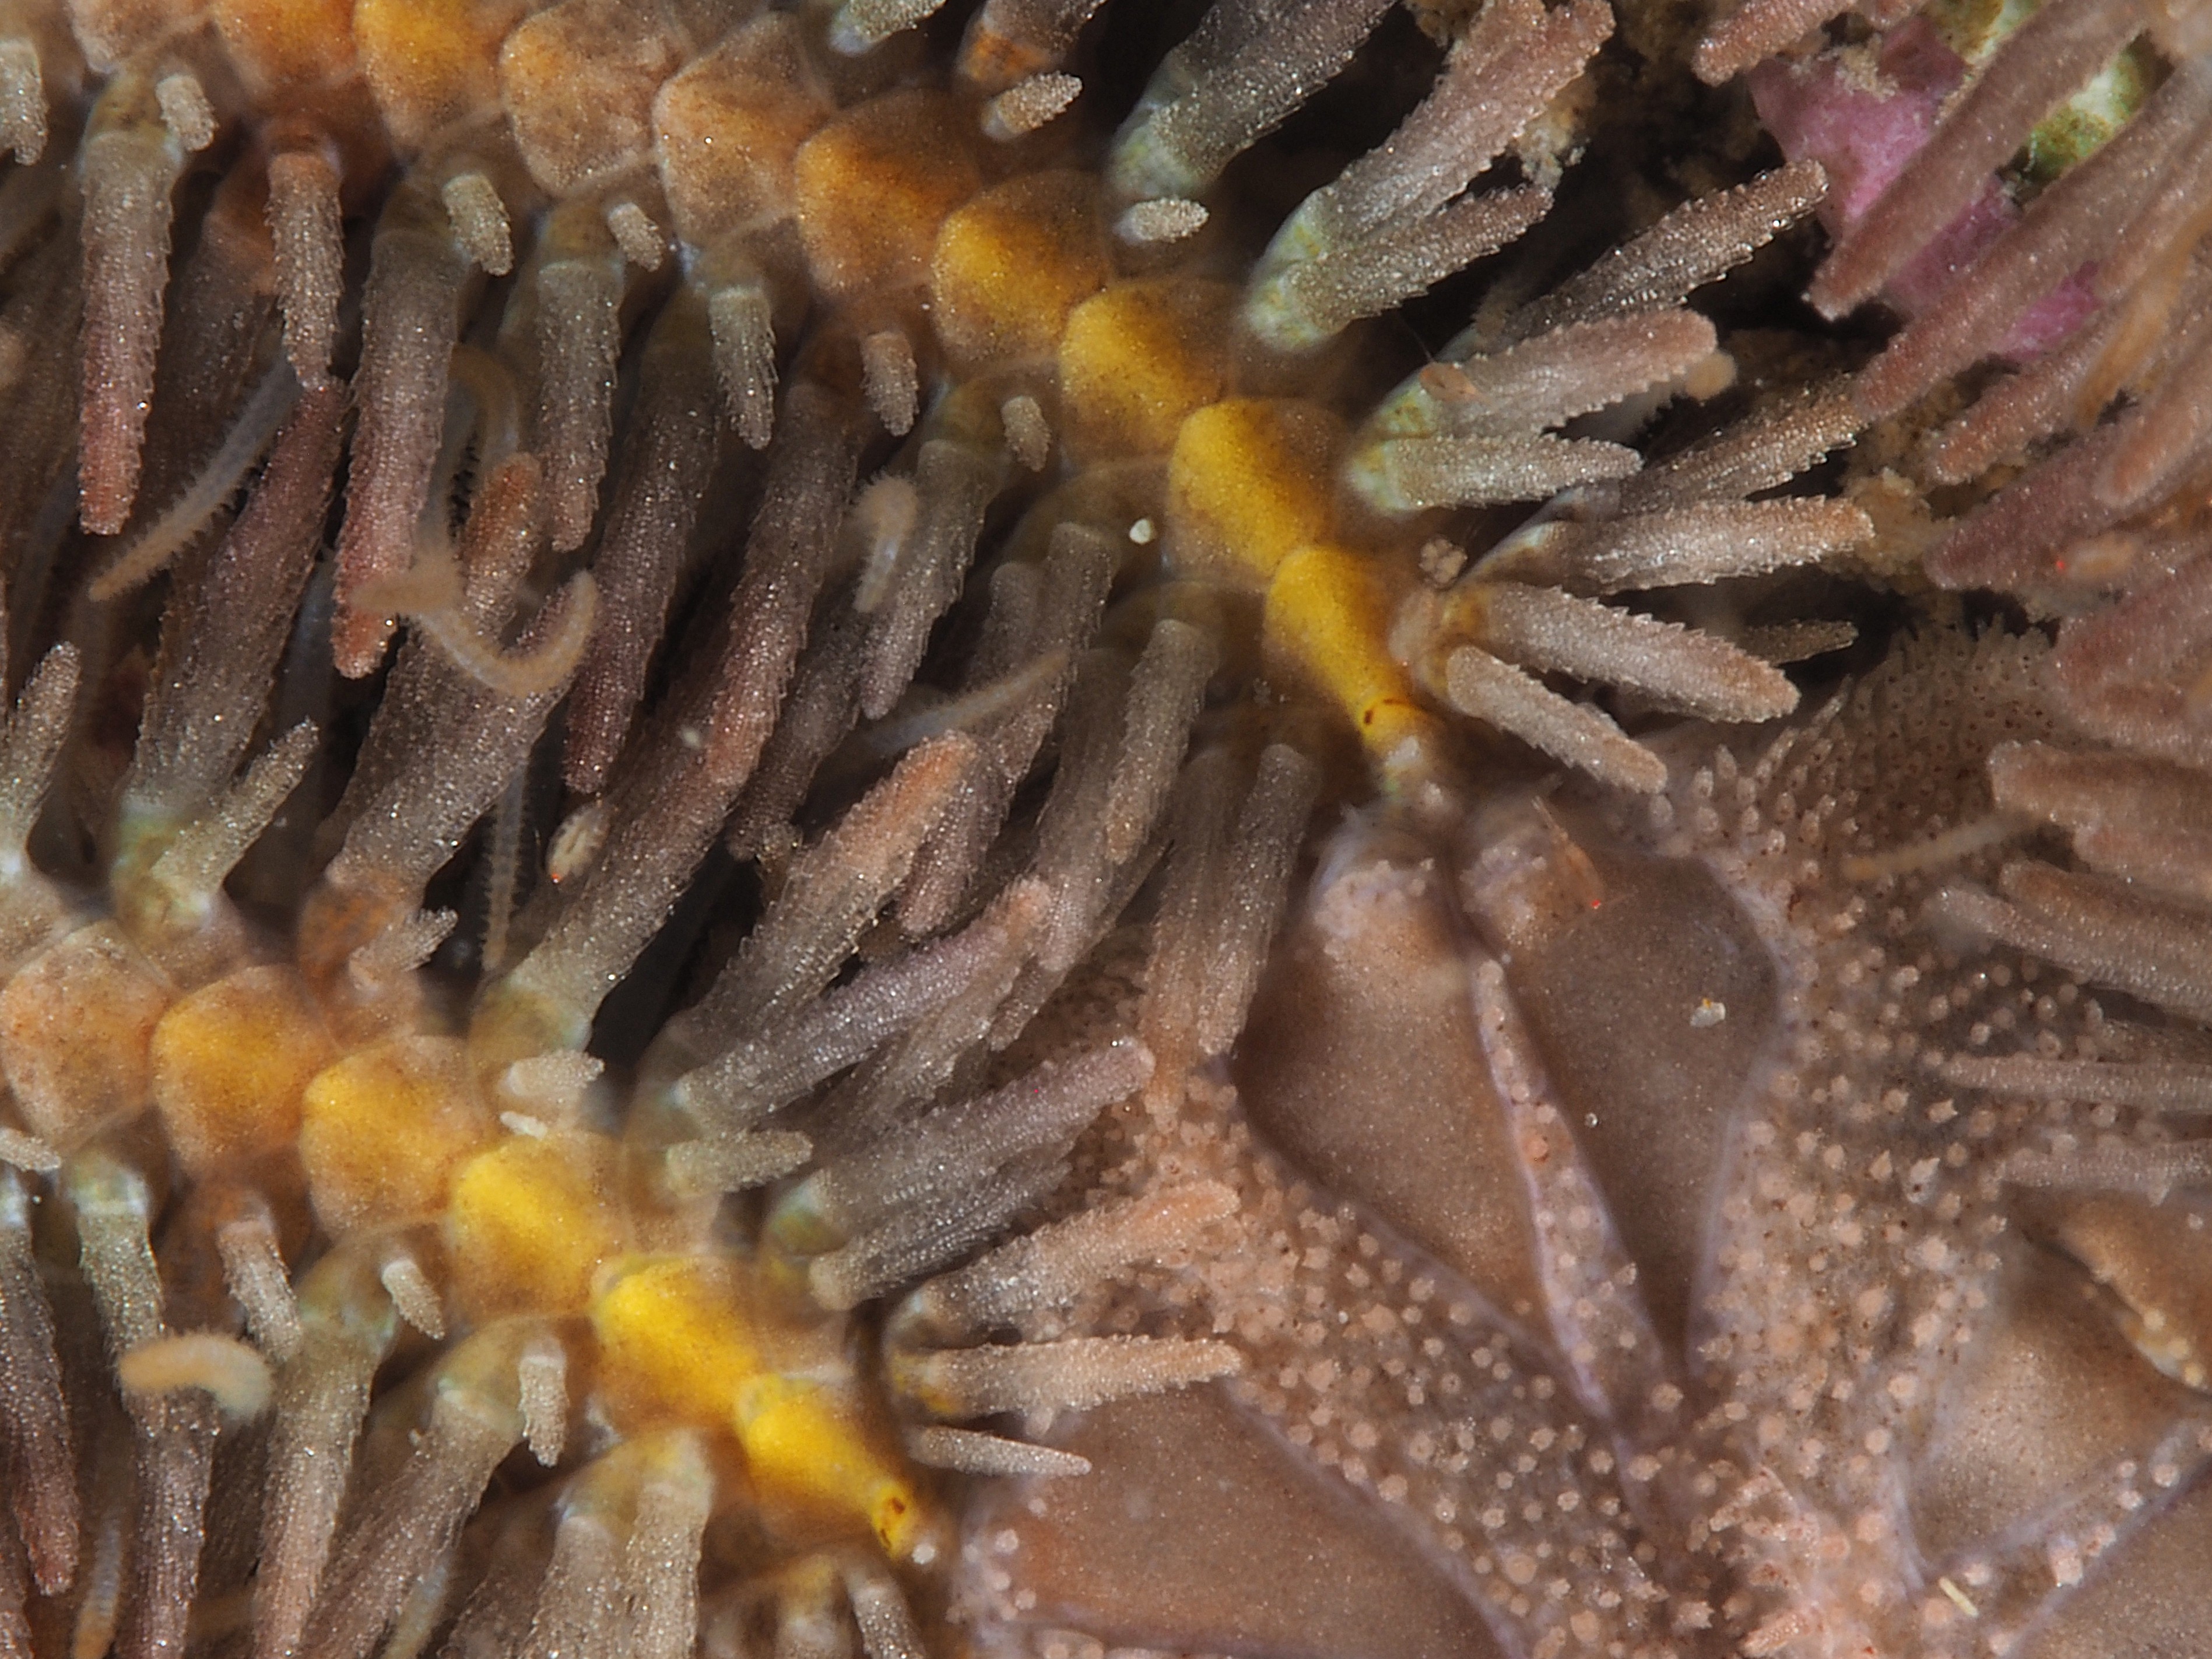
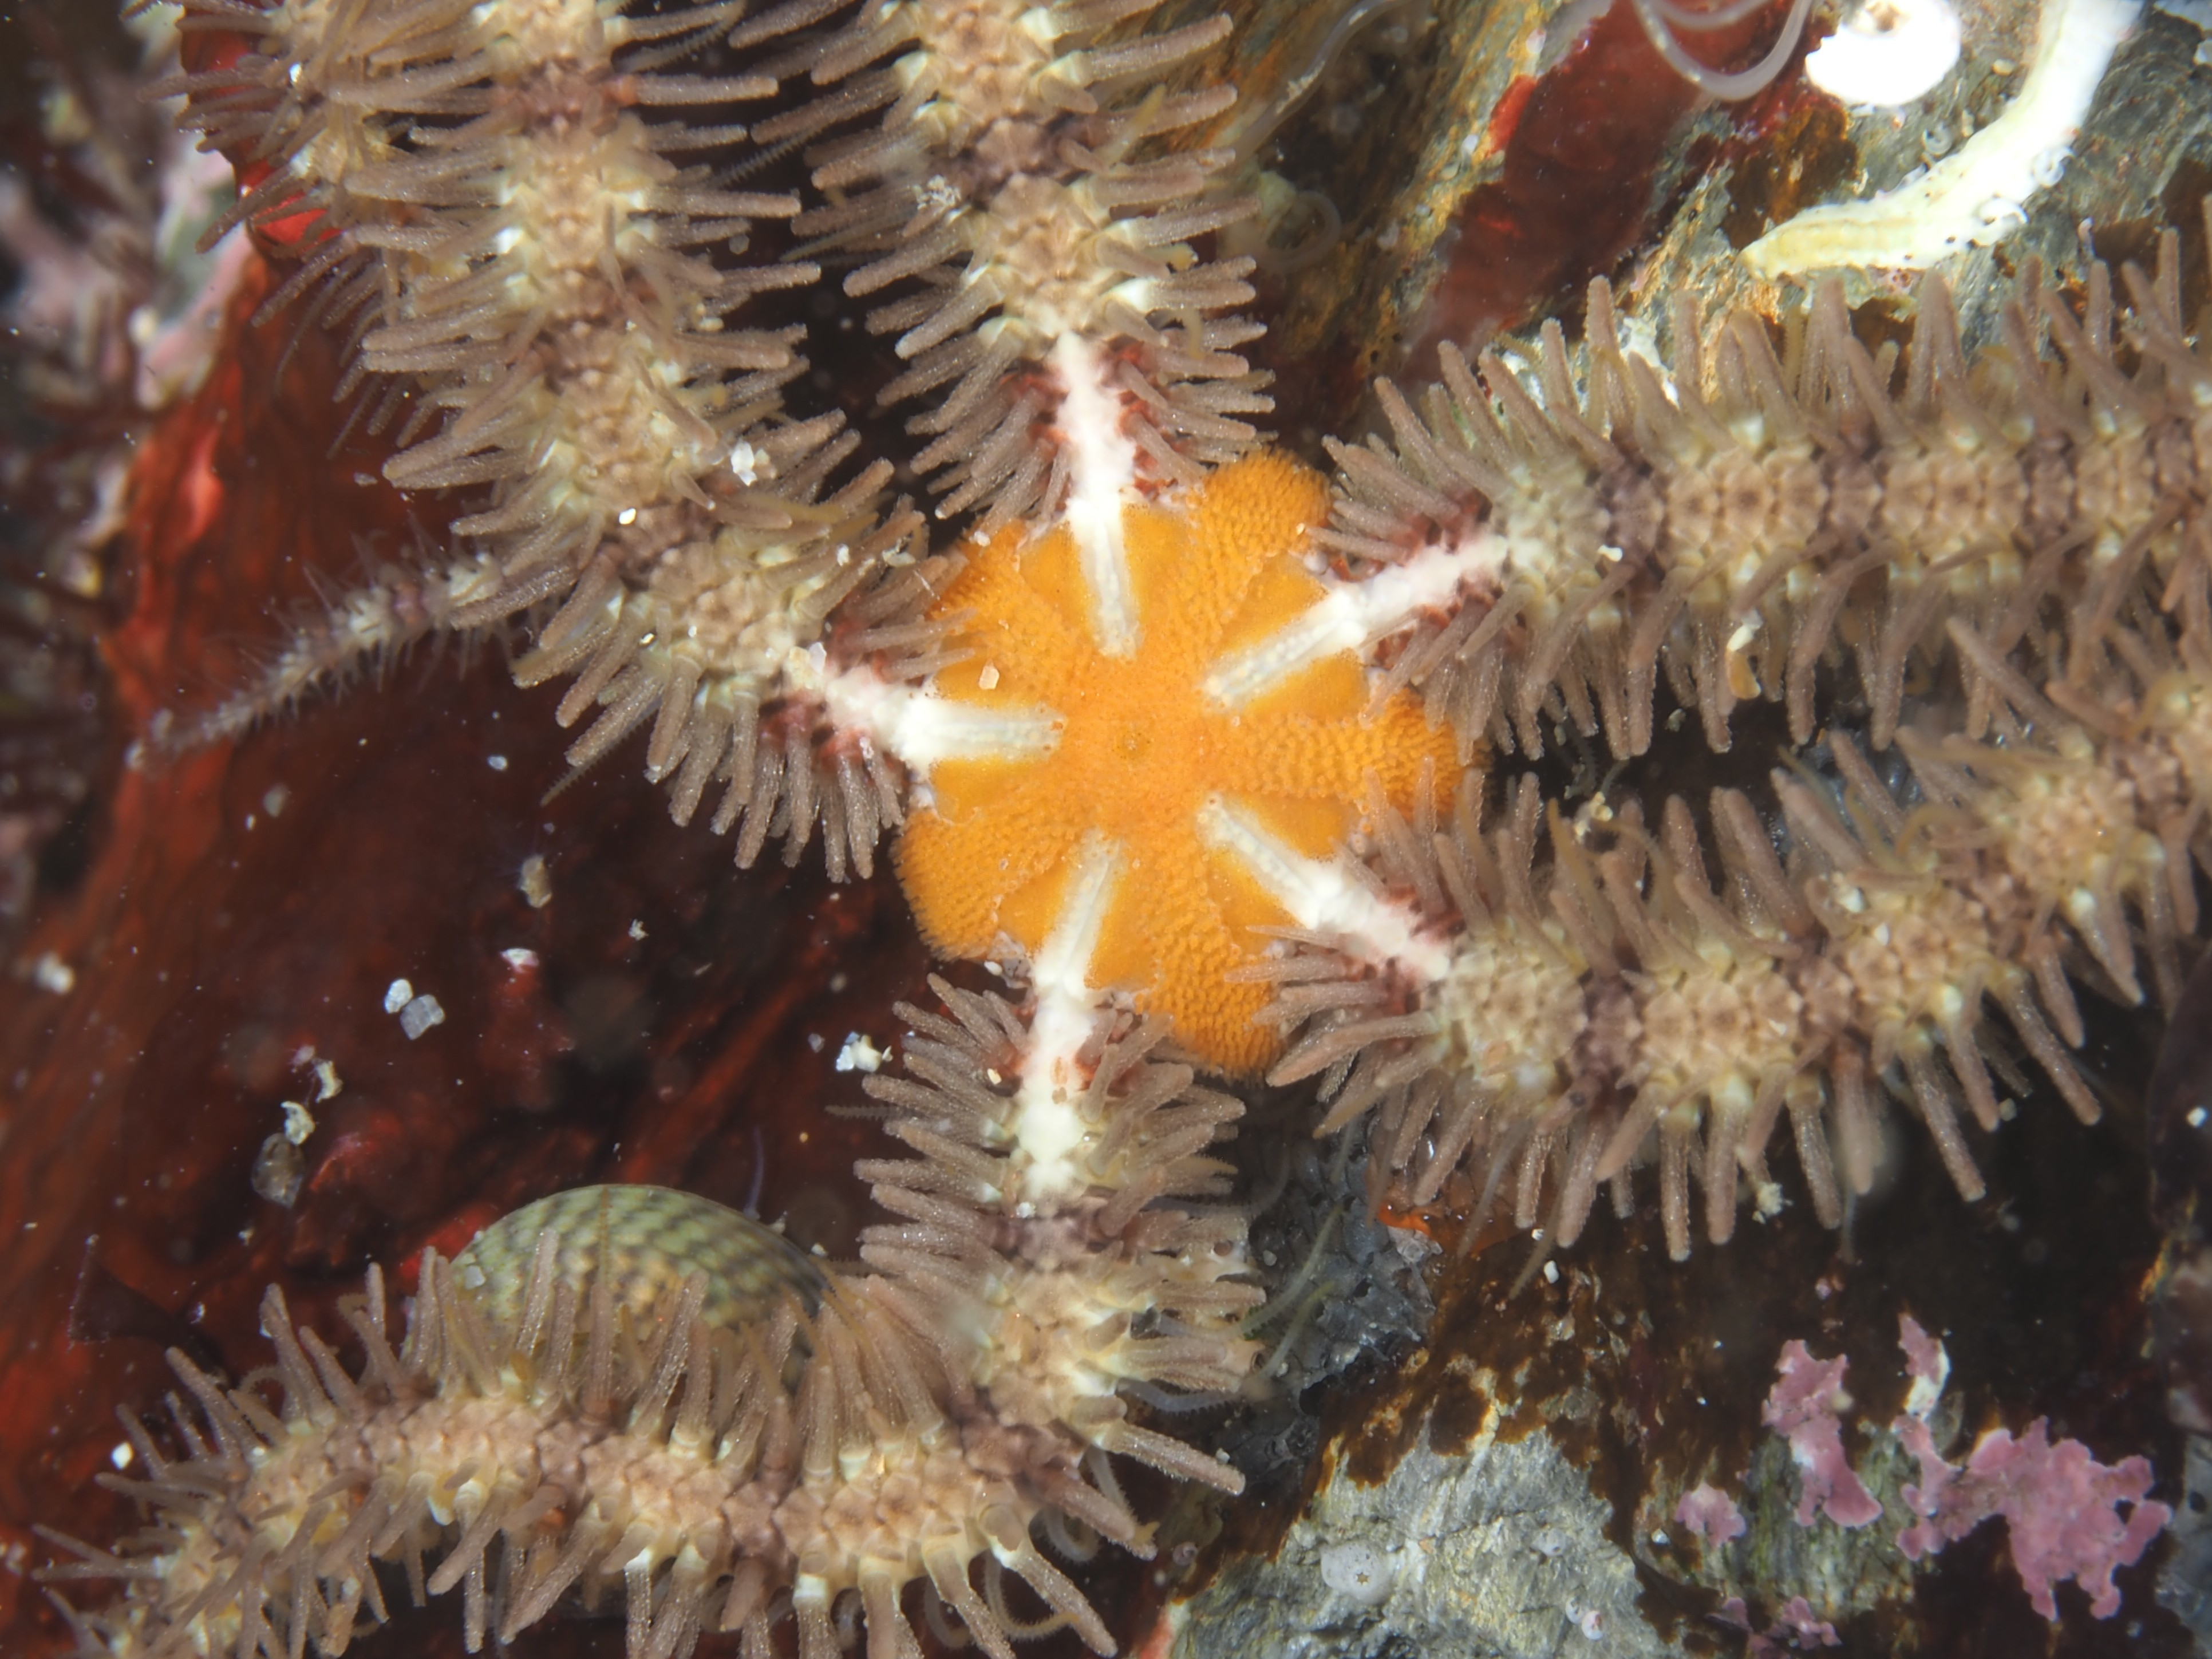
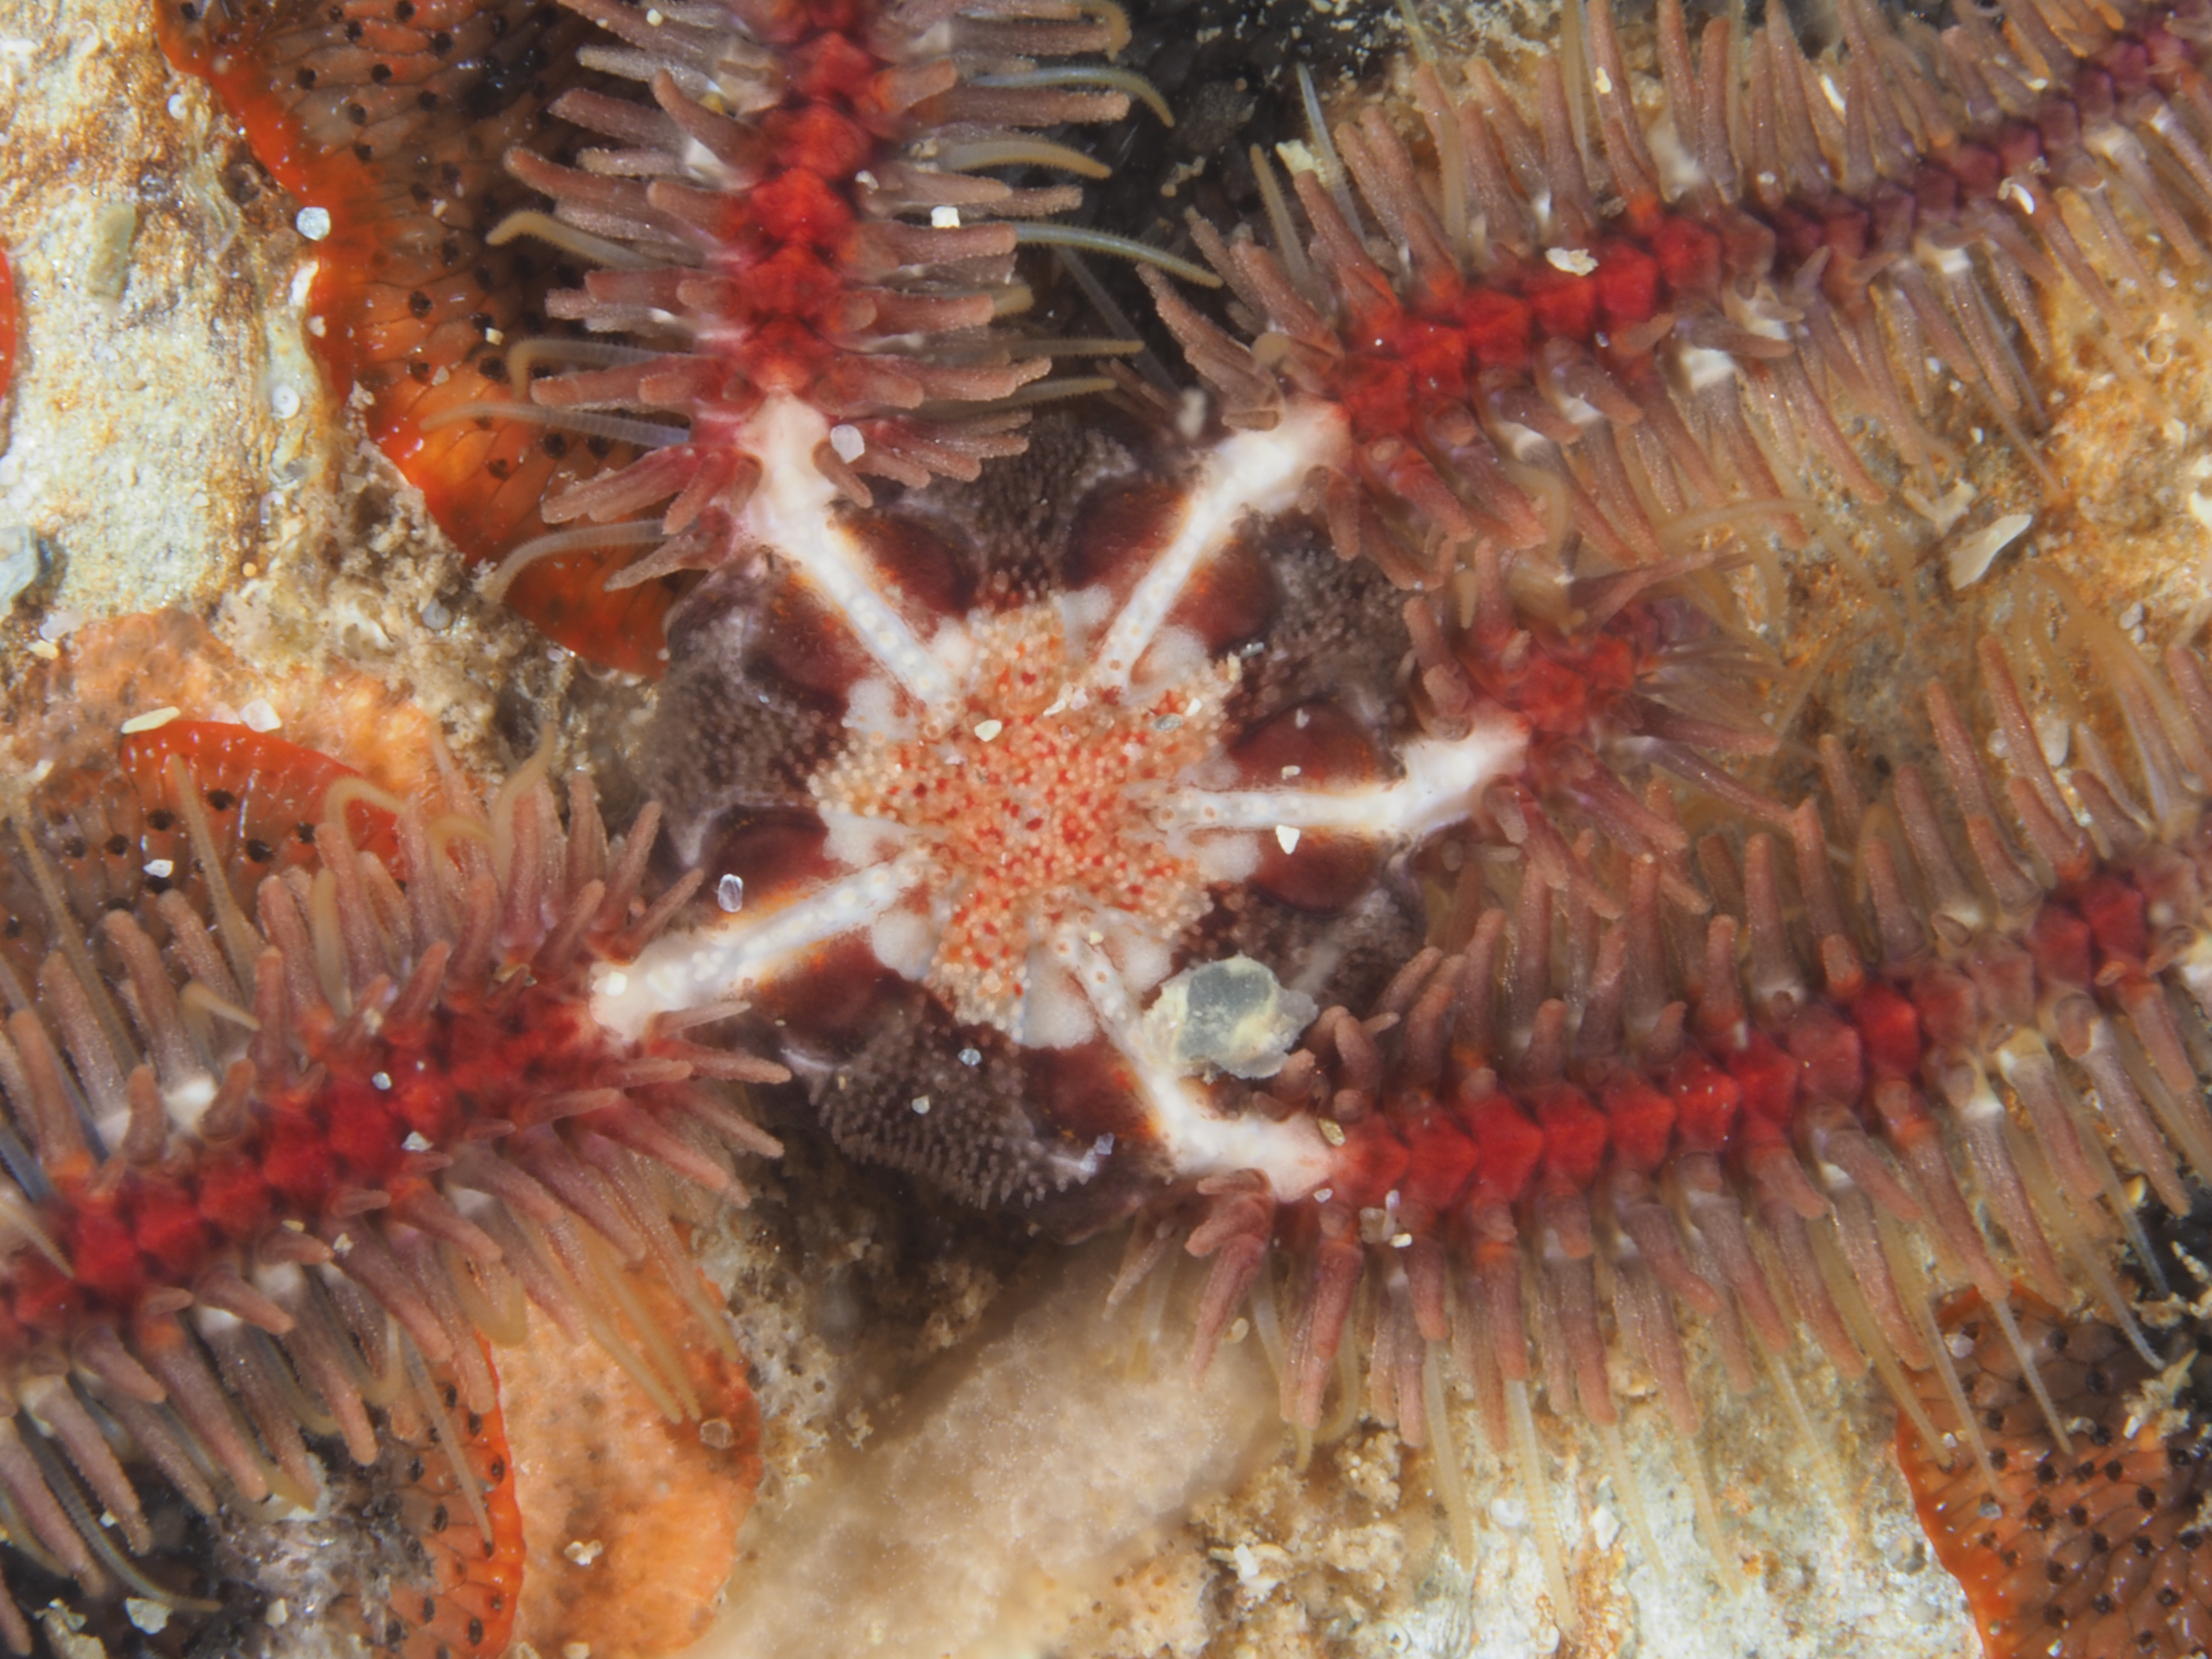
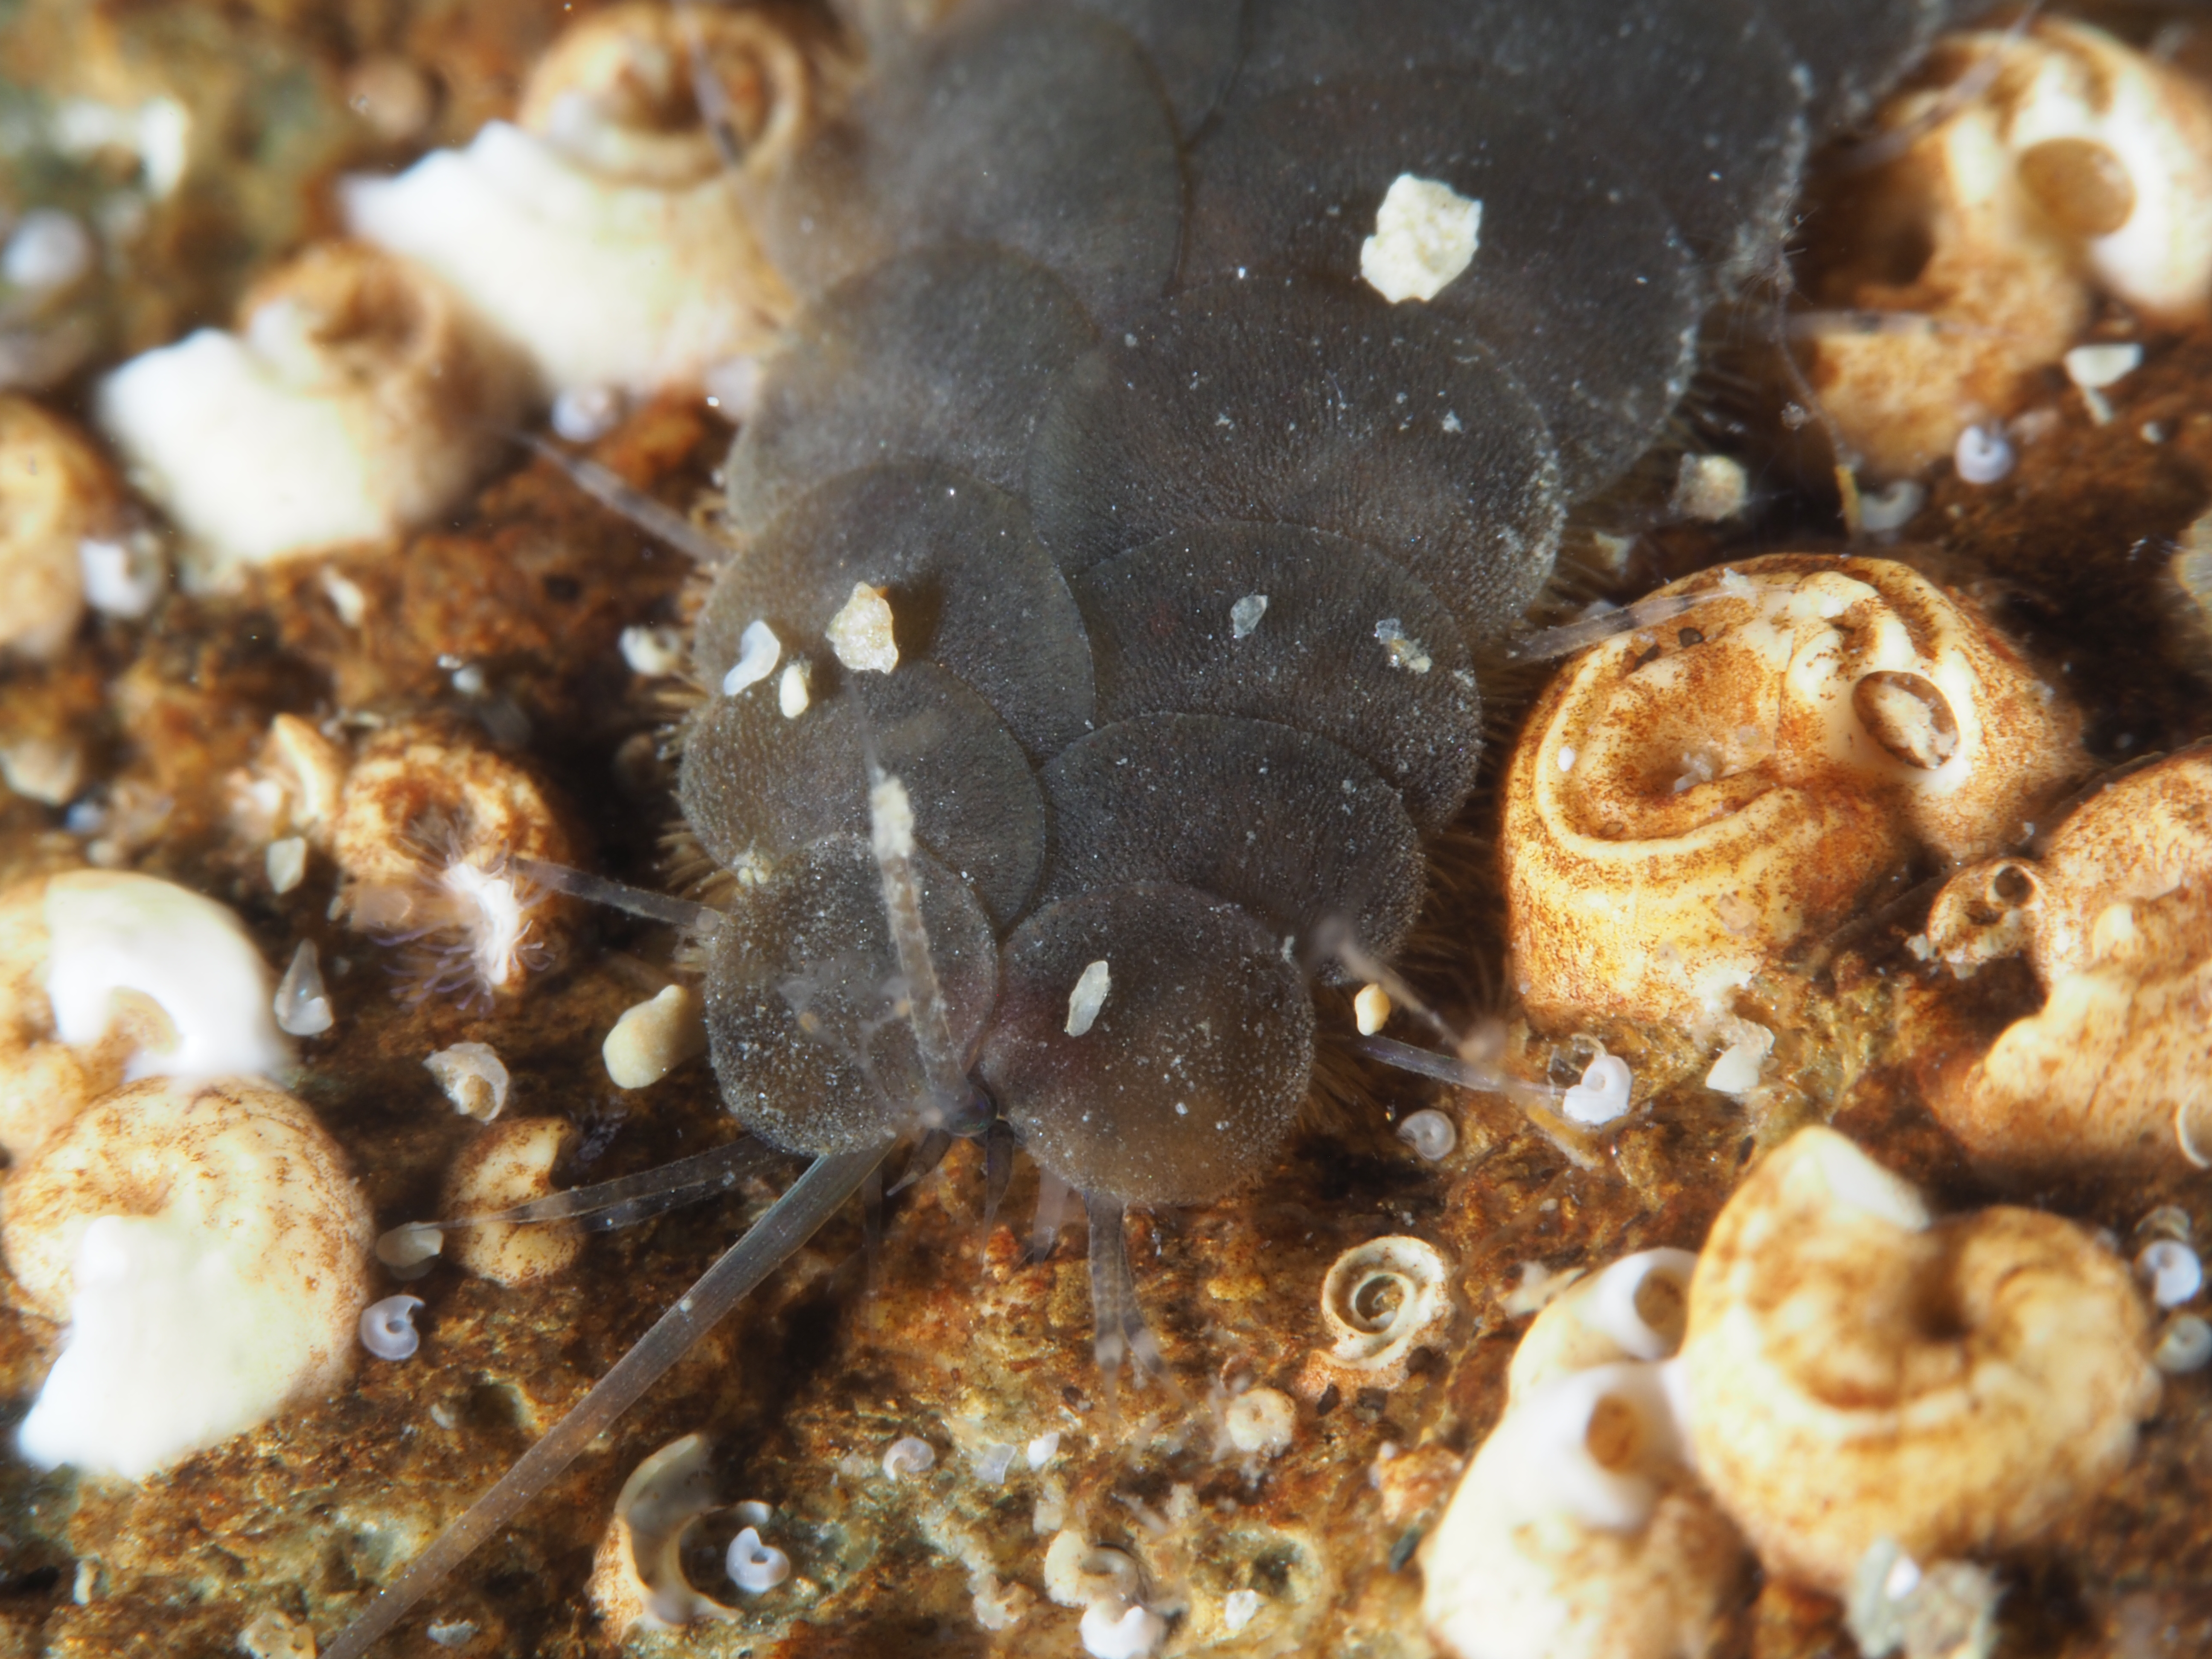
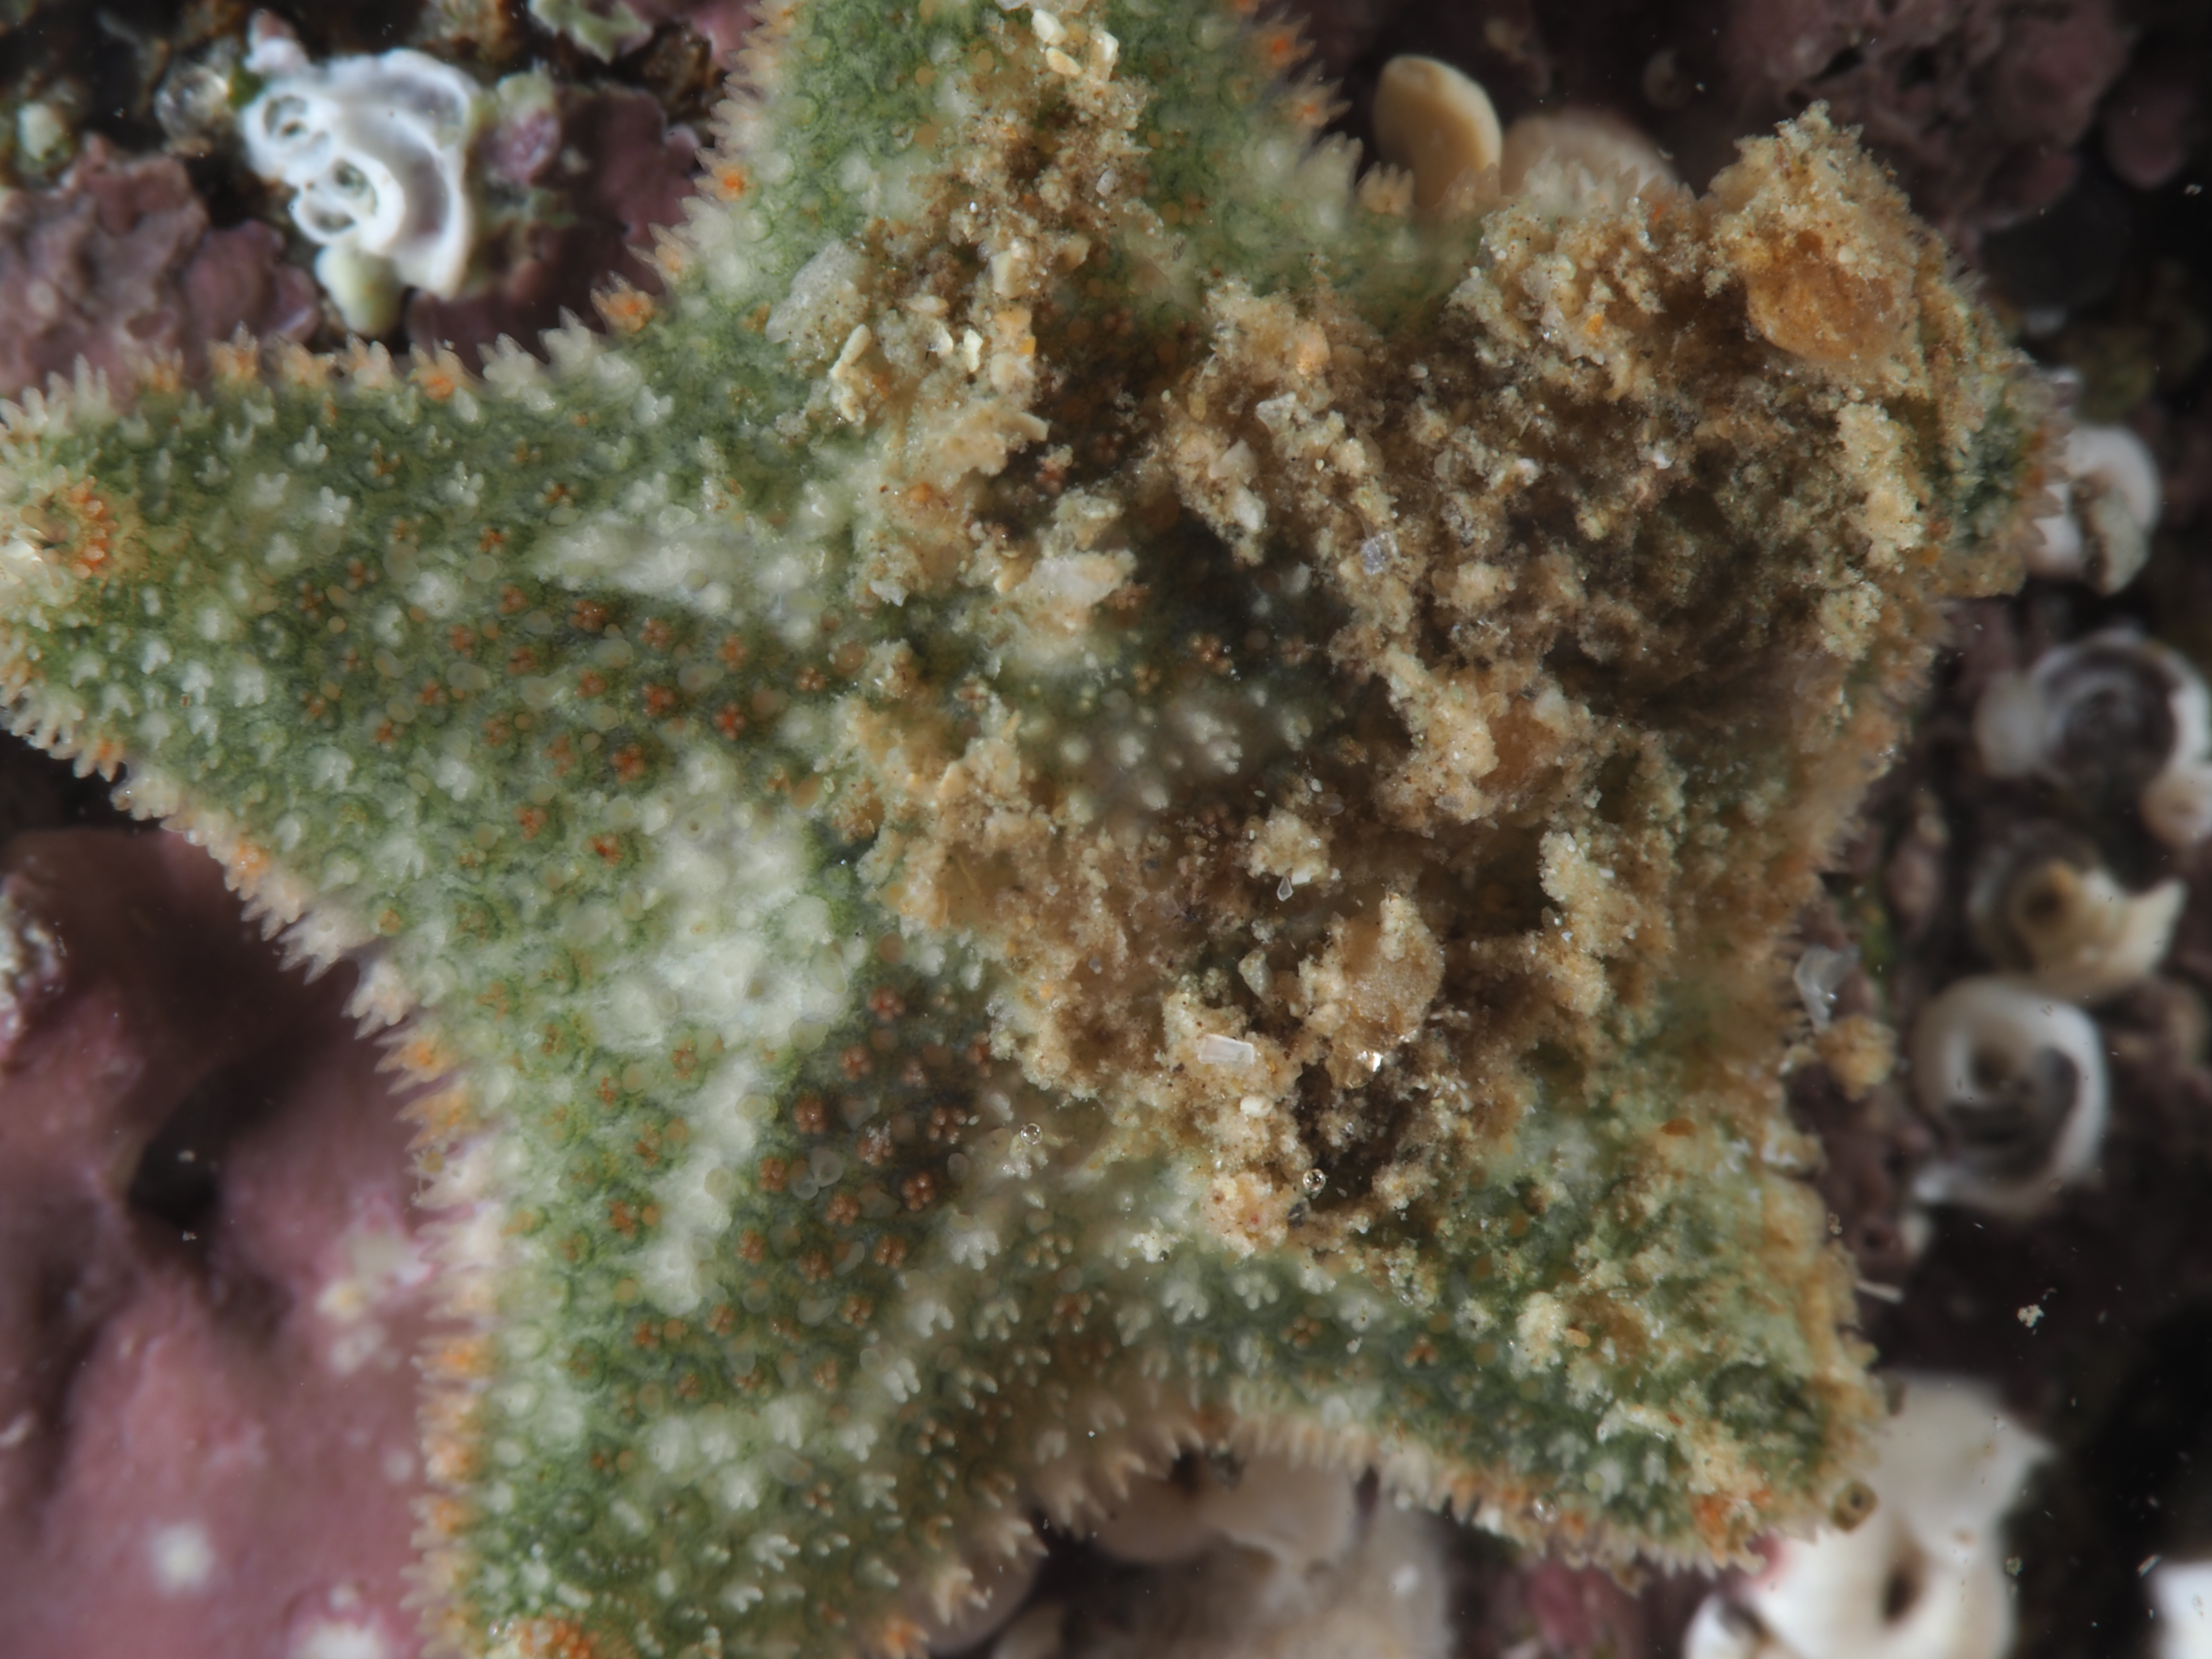
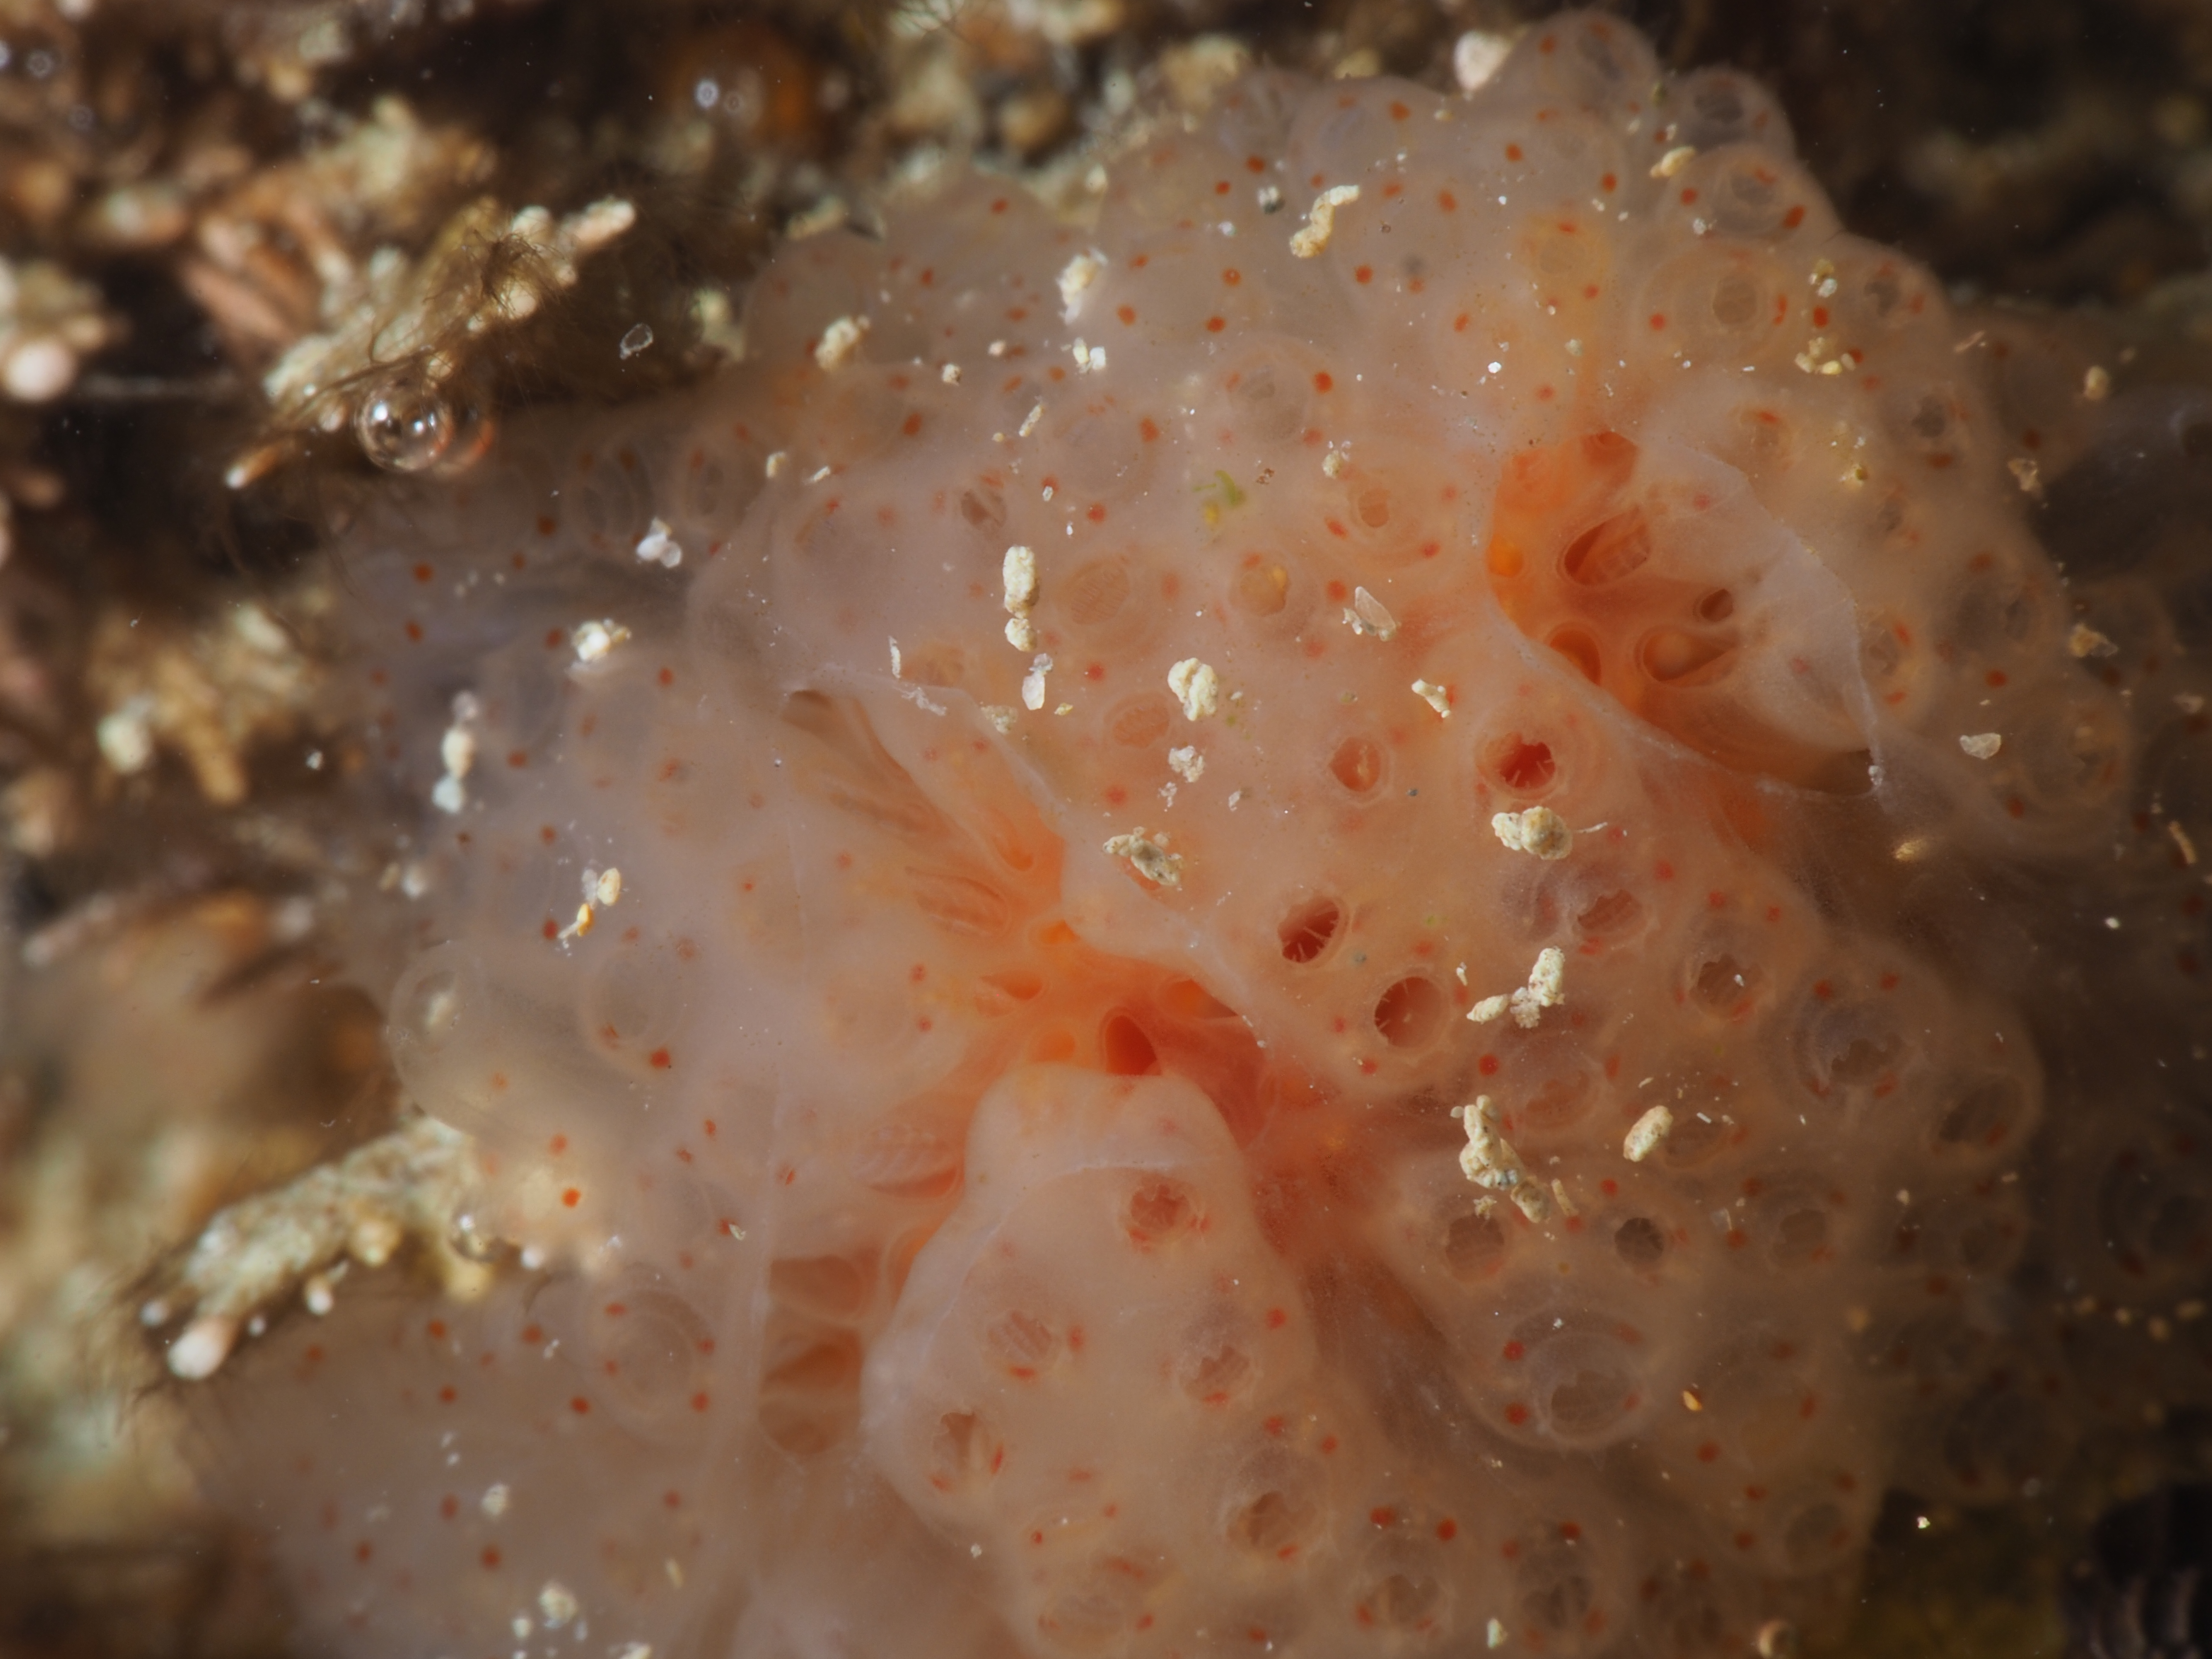
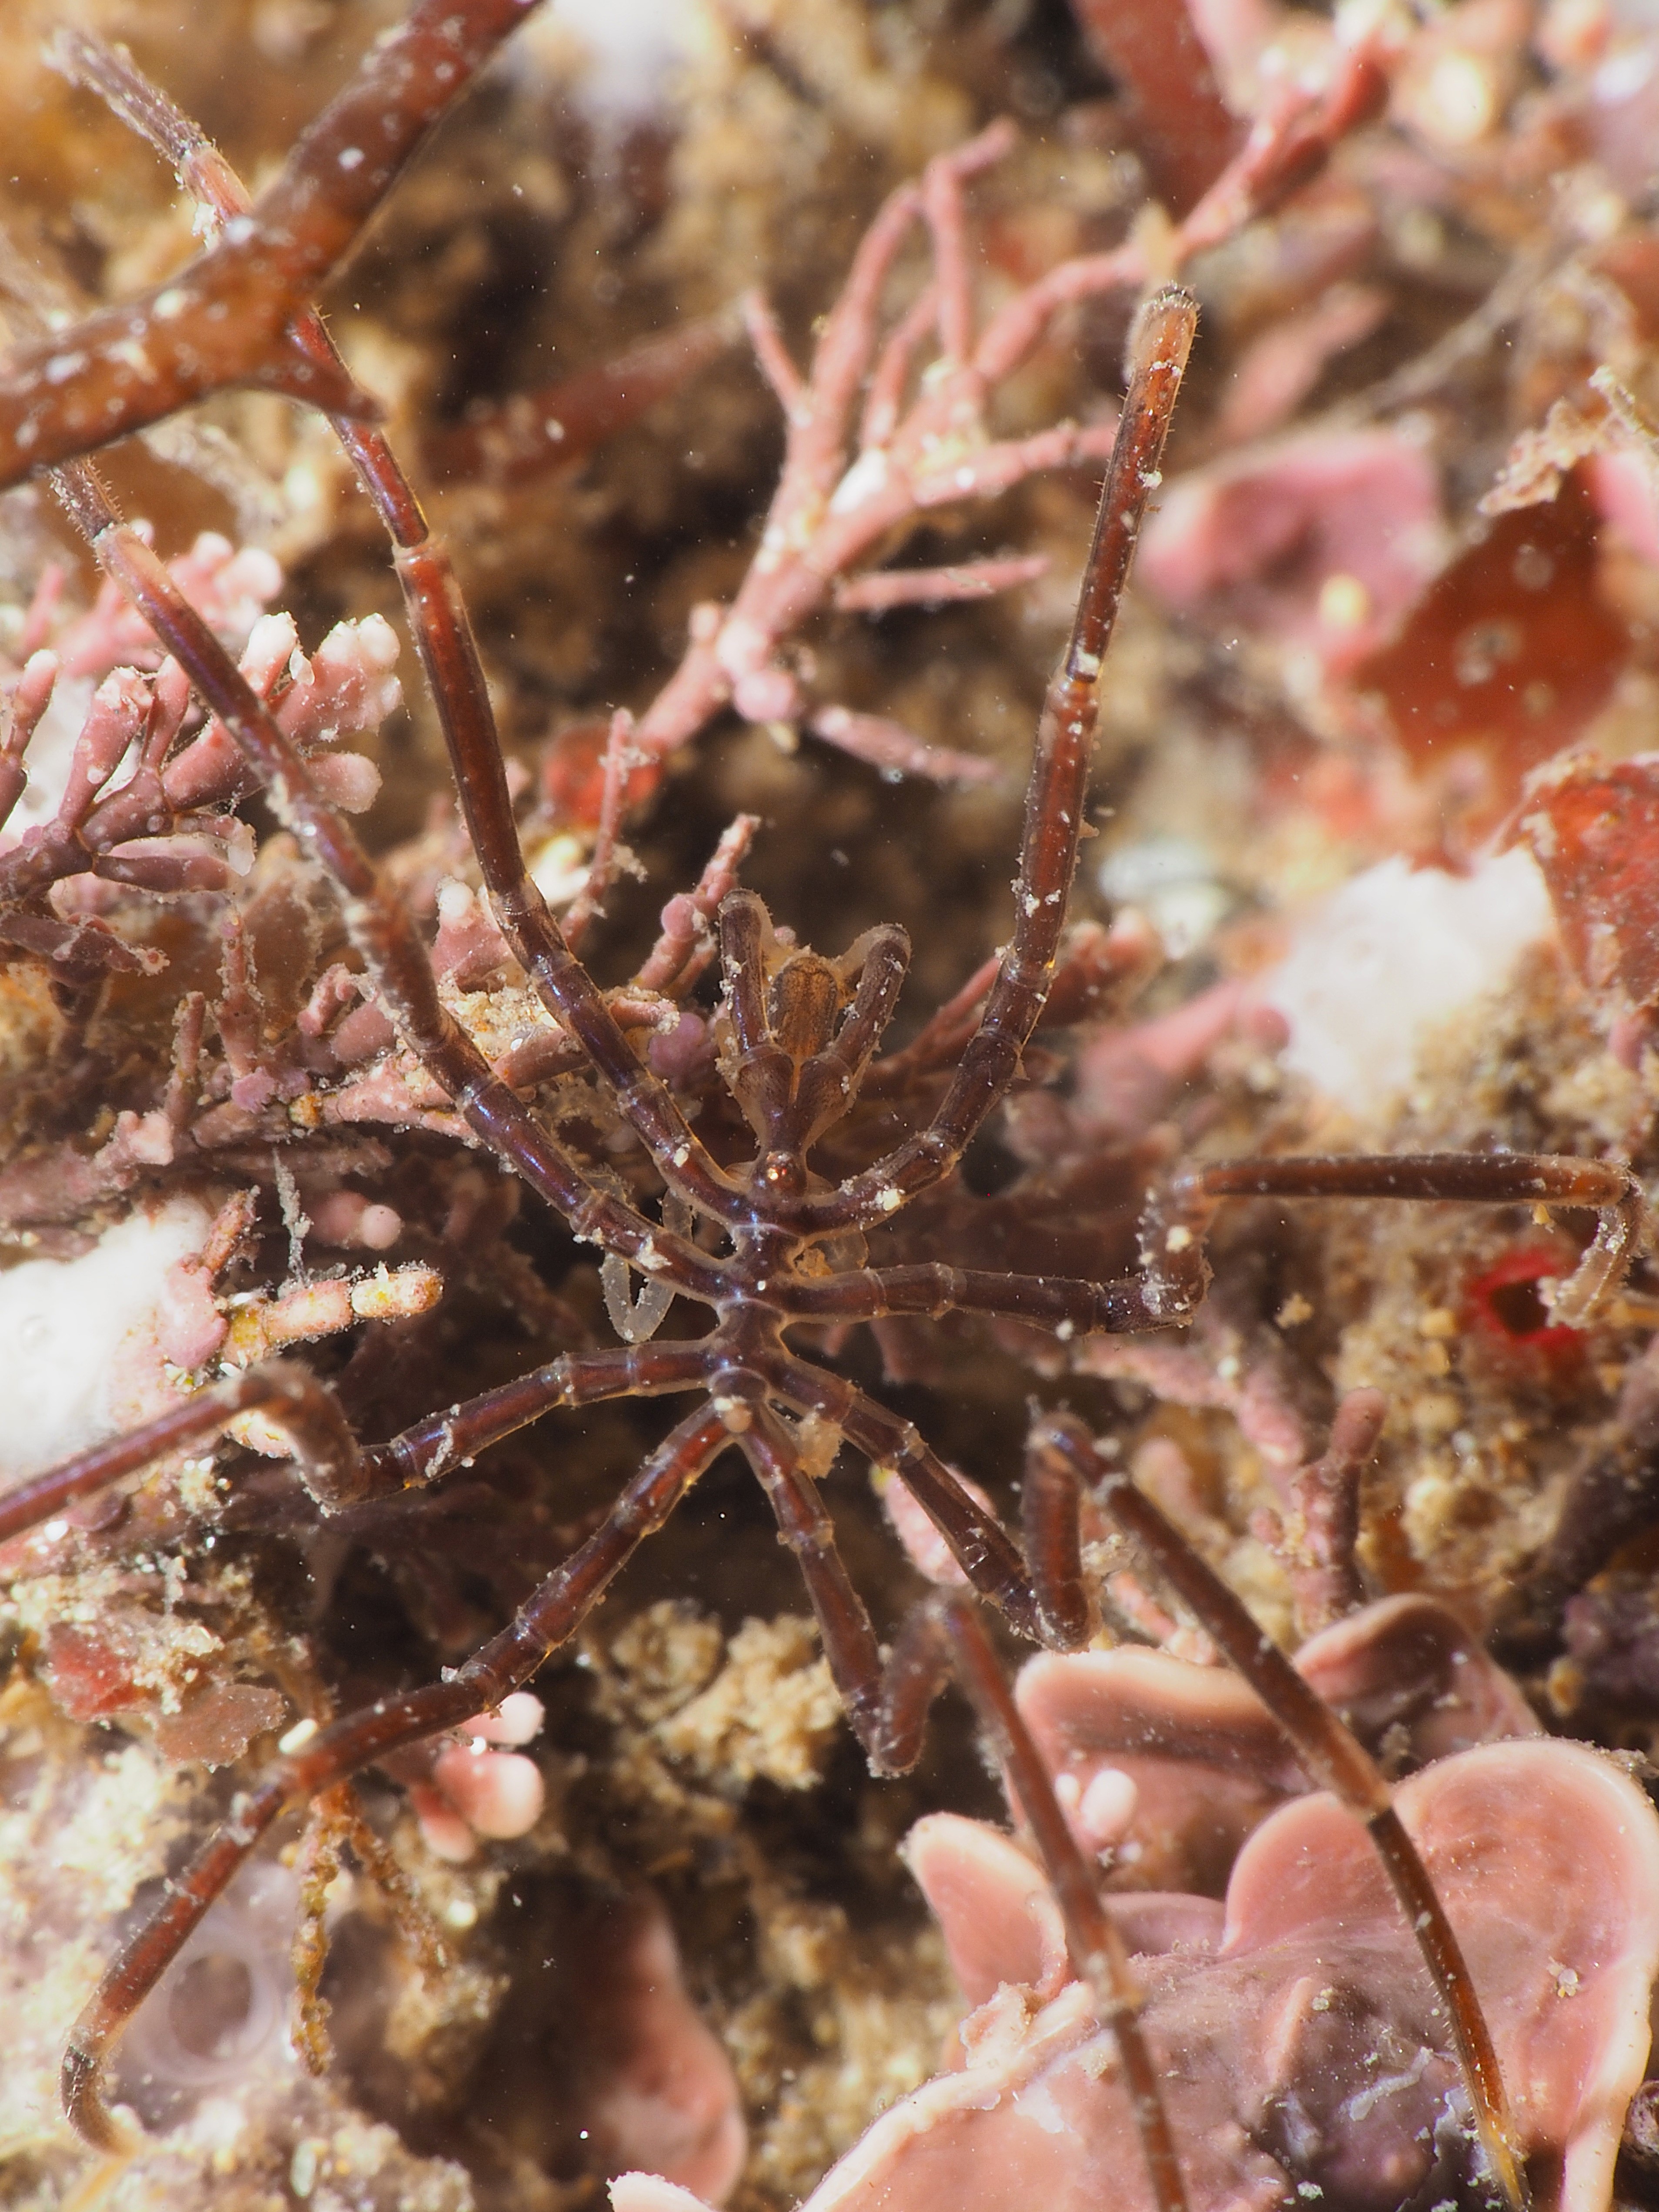
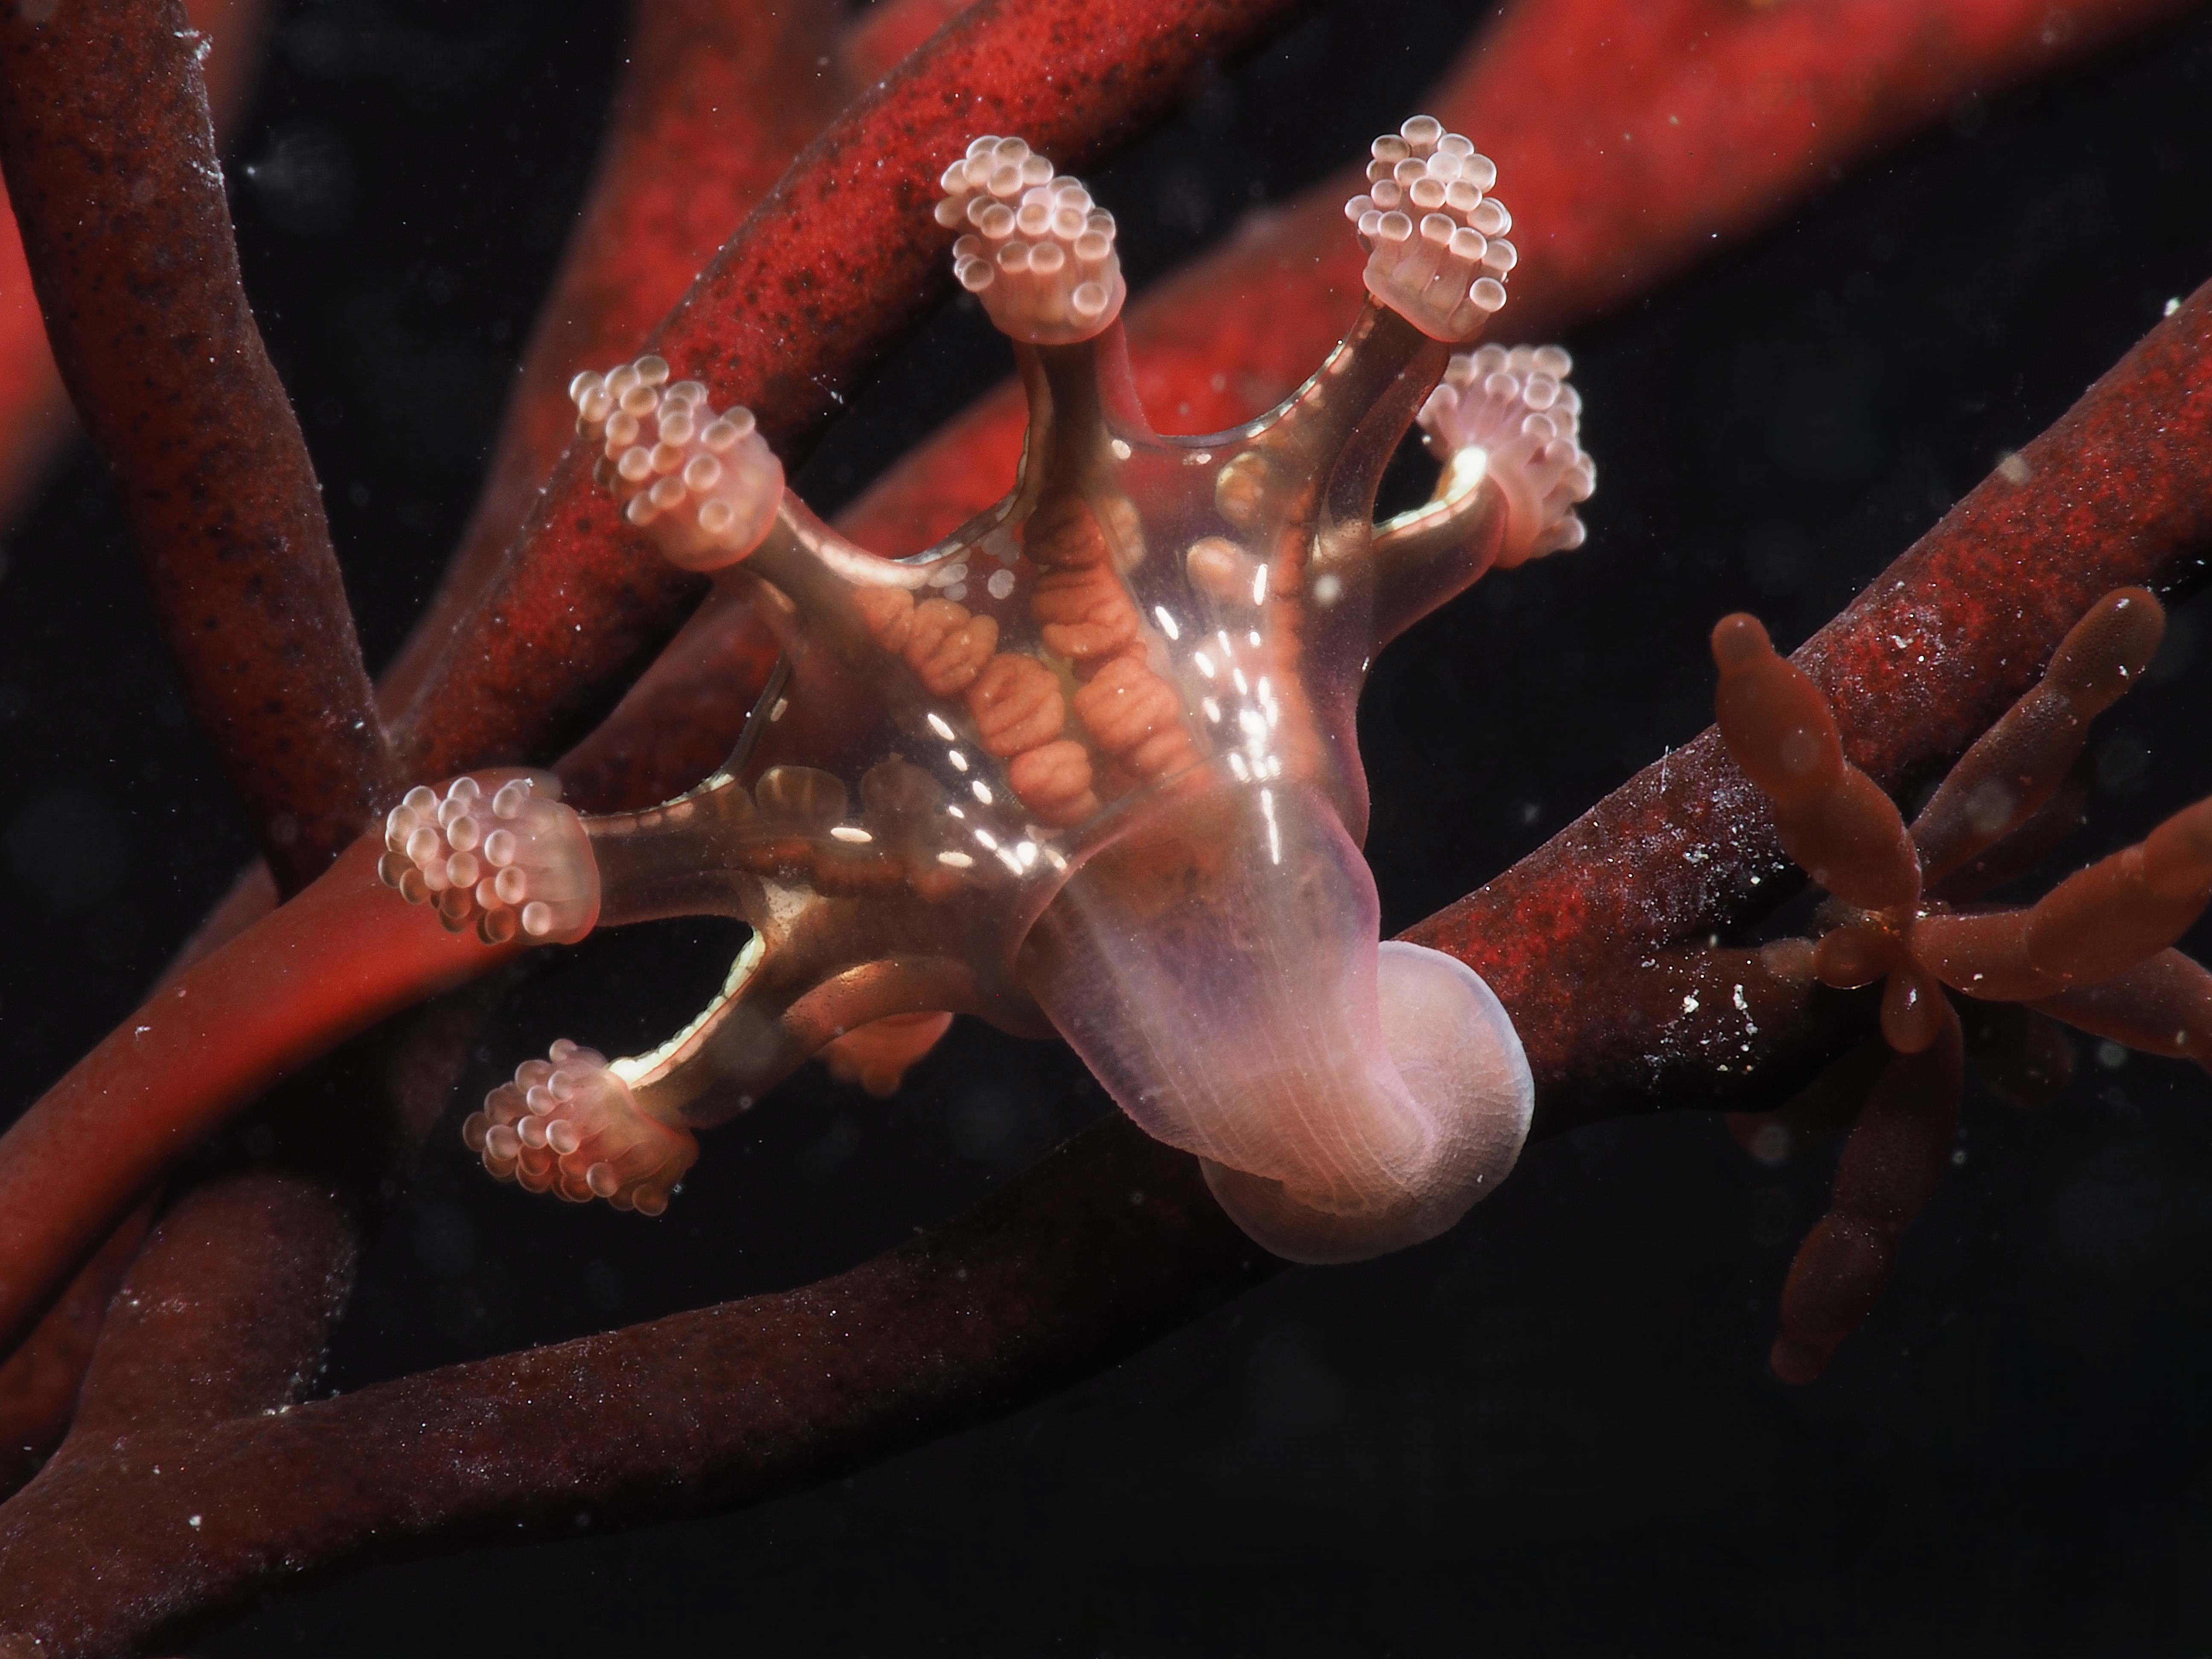
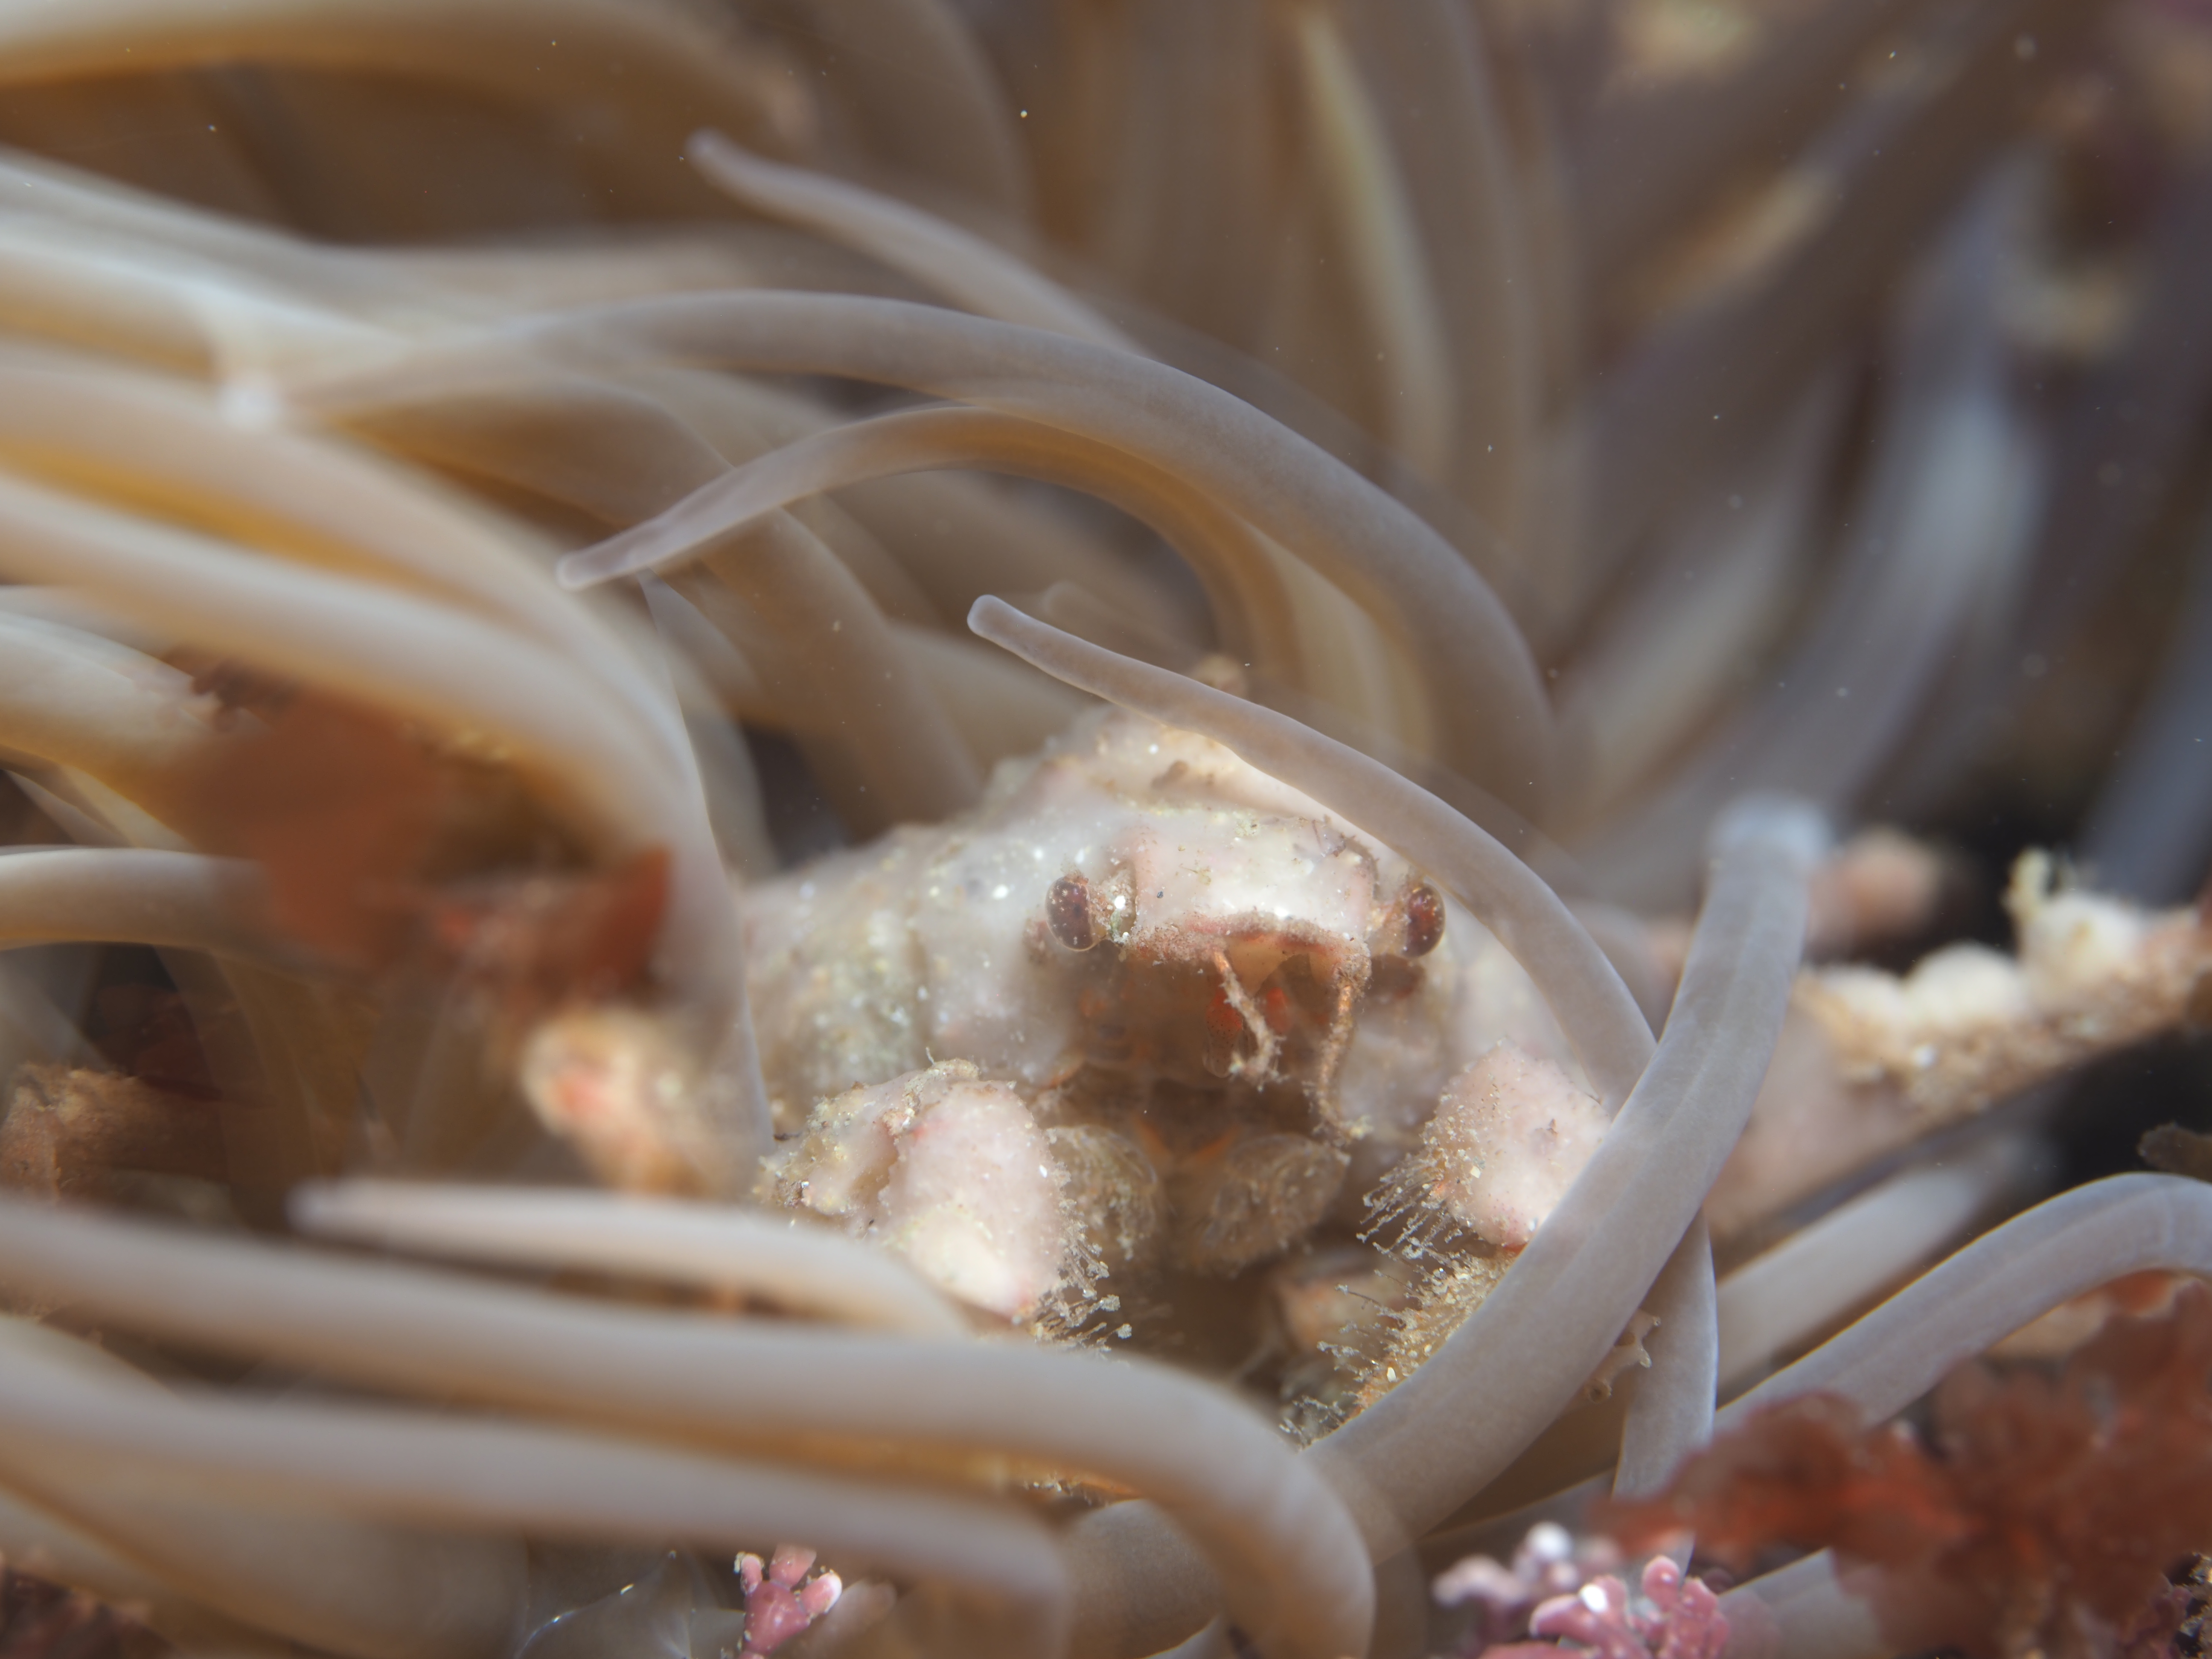
Many other critters were found too and I took shots of a selection. First, a Sea Spider, all legs and crawling away. A tiny mat of colonial tunicate that looked like a persian rug on drugs. A quick shot of the ubiquitous (if you know where to look – on kelp fronds) blue-rayed Limpets and a stalked jellyfish. Finally, I spent a lot of time taking shallow-depth-of-field AND slow shutter-speed photos of a scorpion spider crab in a snakelocks anemone to get some sort of ‘artistic’ shot. It did not really work, but it was fun nonetheless and I will have a go at it again. After almost 2,5 hours in the water I stumbled back to the car to get changed – an afternoon well-spent!

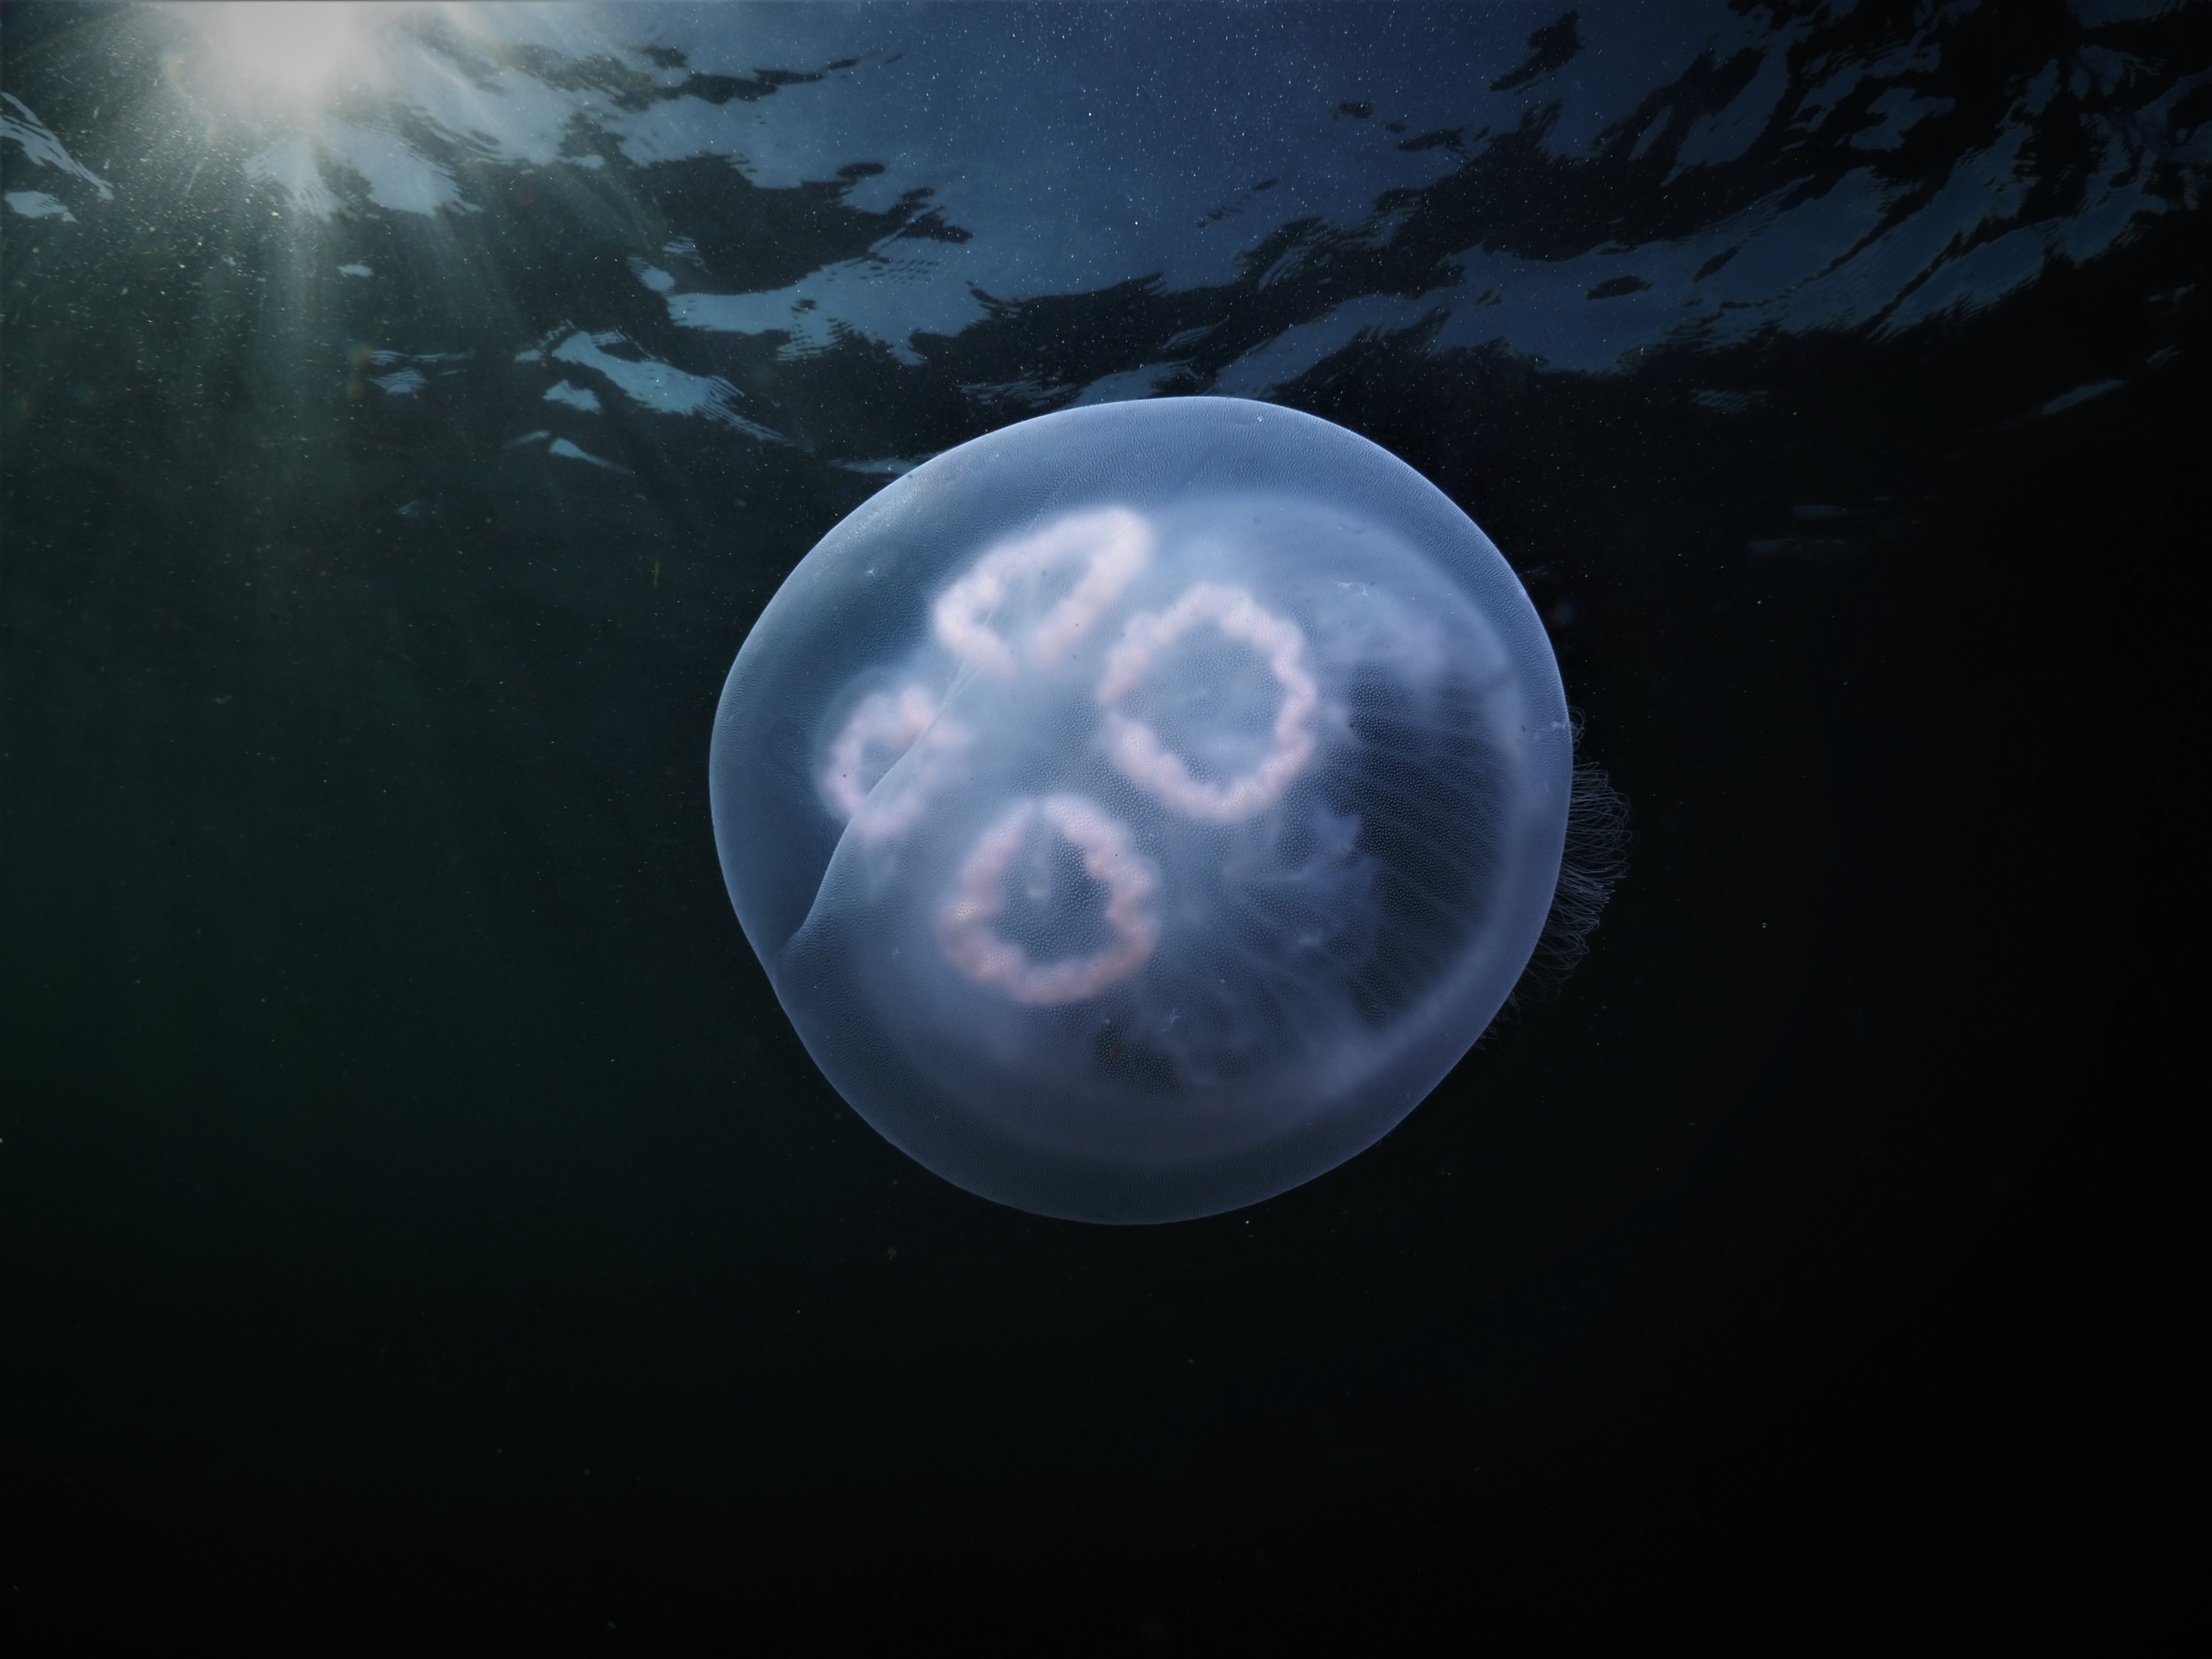
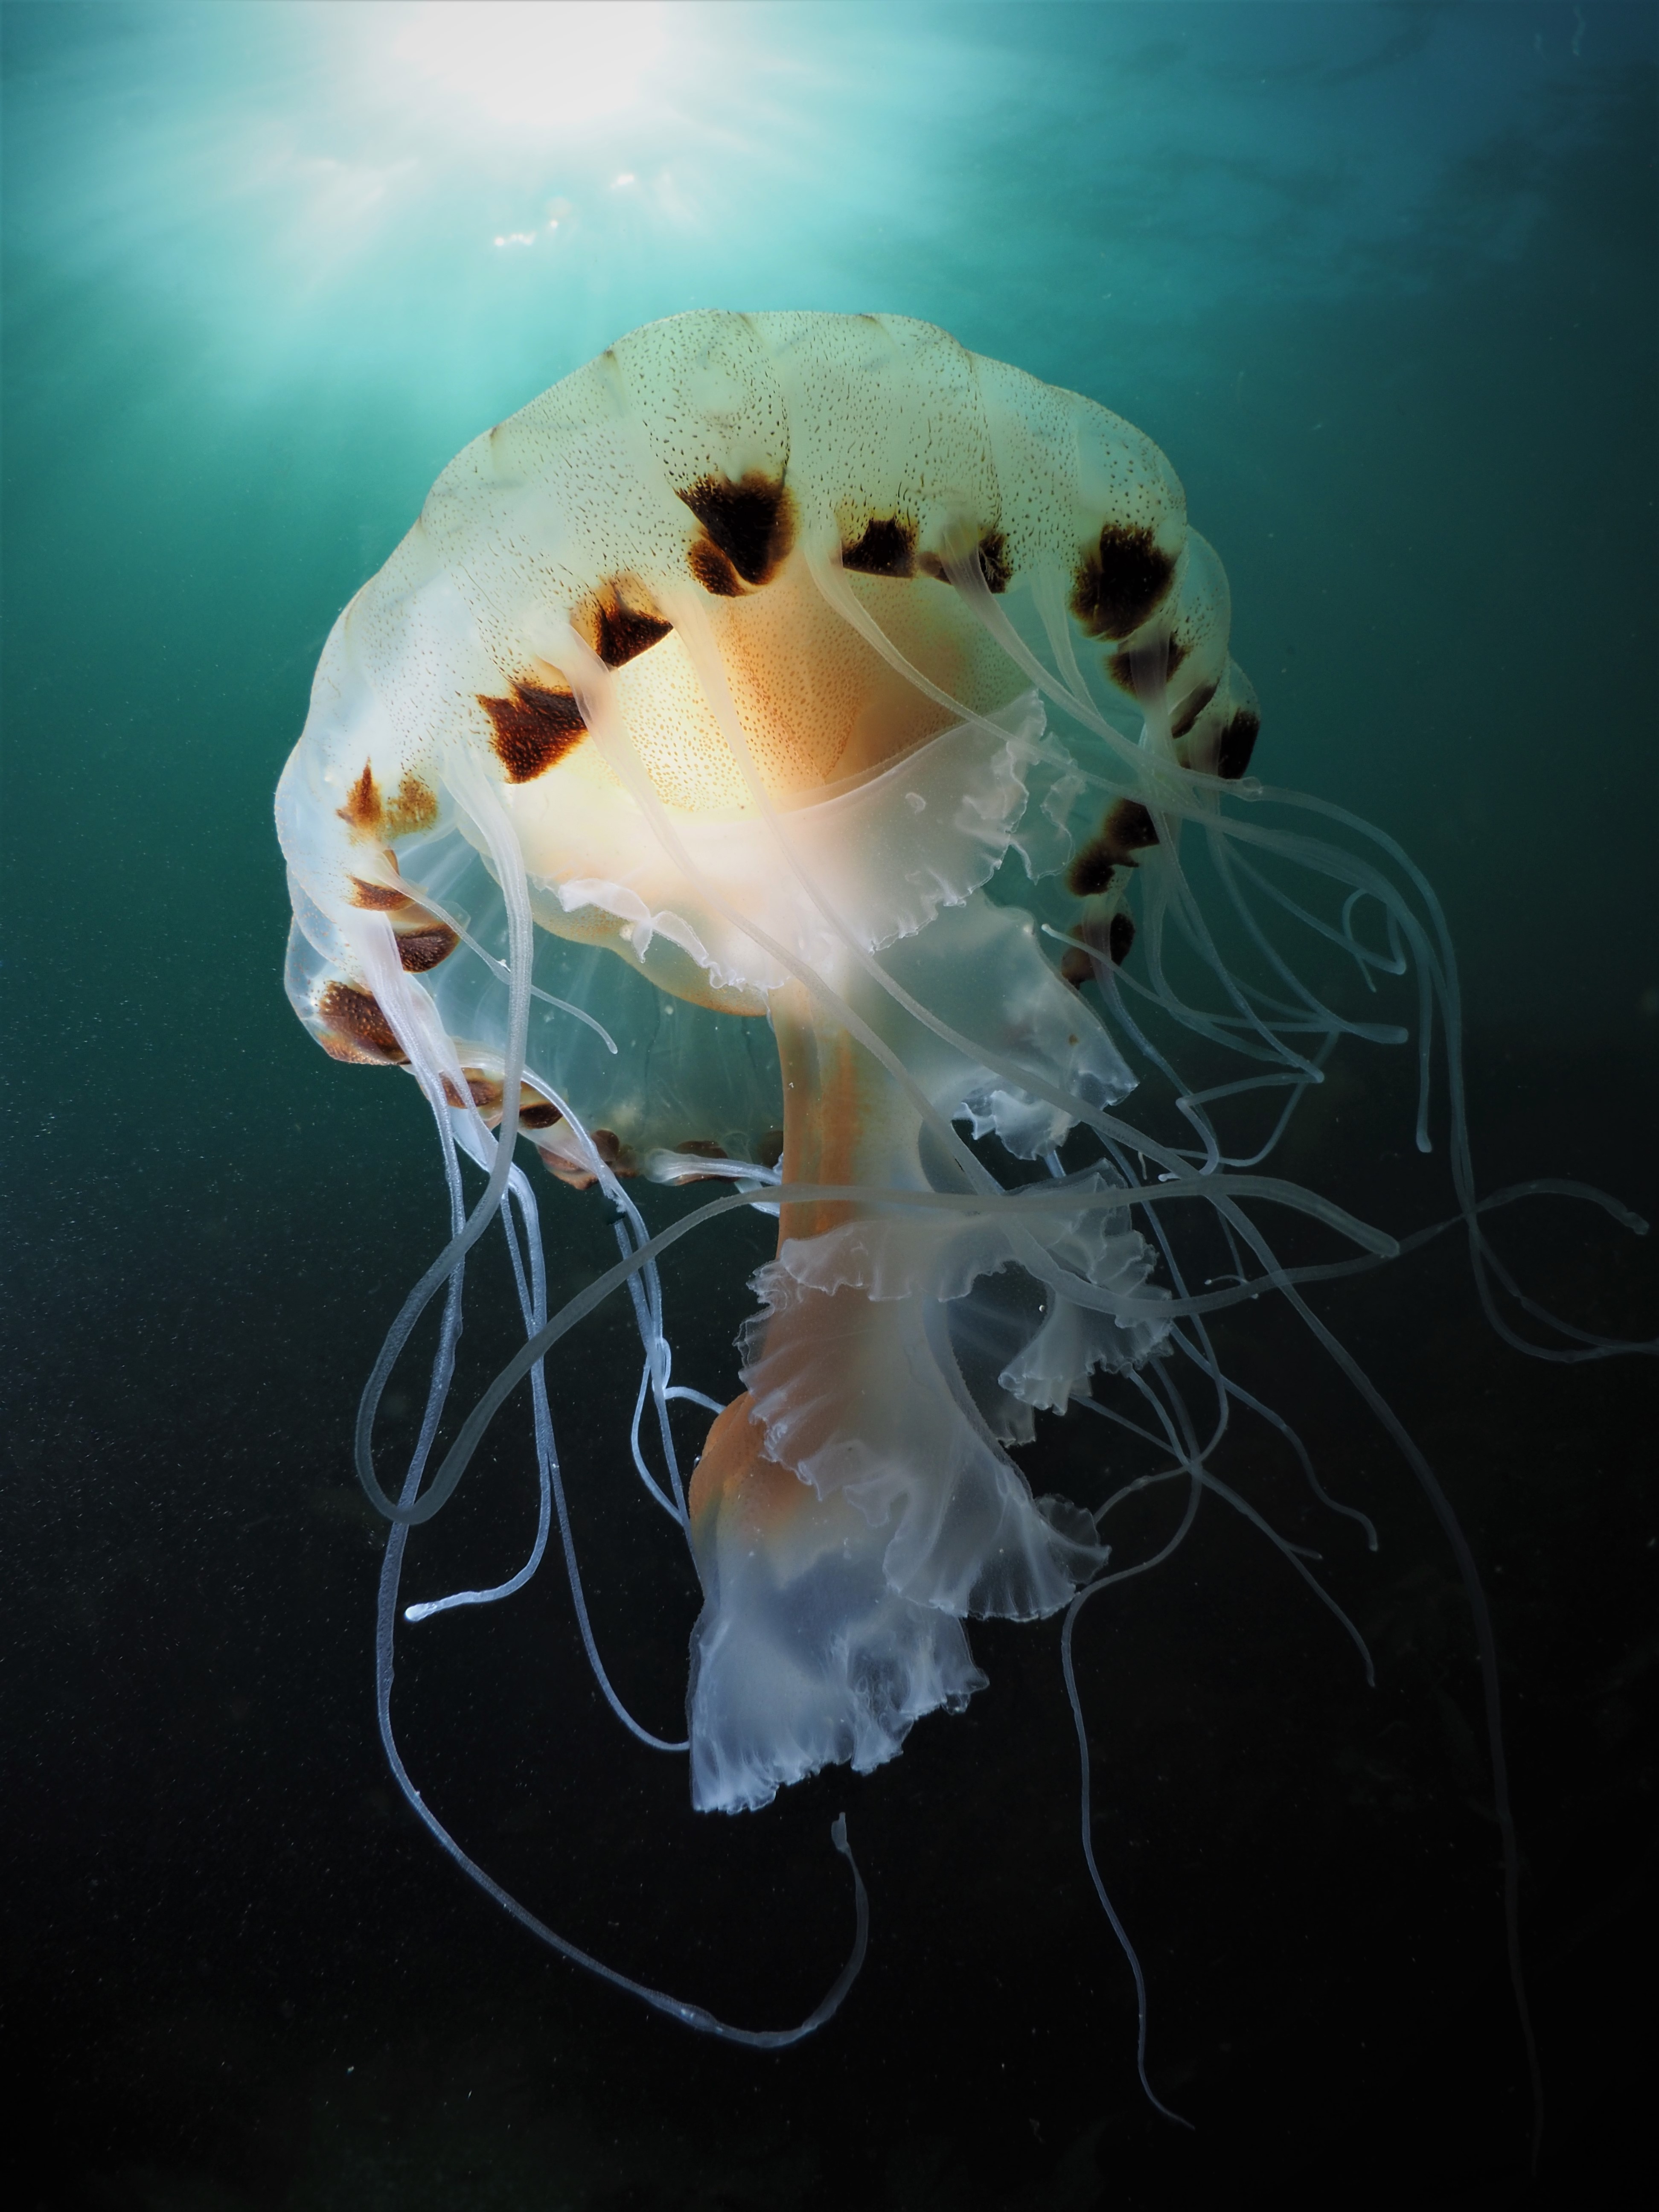
It is the time of year where the rock pools look less attractive (for an example see this old post) and jellyfish appear in the sea beyond. As they are pretty and slow moving, they make for excellent subjects and so I have ventured out over the kelp recently to look for them. I now have a reliable INON D-200 strobe (actually I have two such strobes, it is just that the second arrived 6 weeks ago but not its fibre optic cable…) which makes a huge difference in the types of shots you can take. Photos taken using natural light only can be pretty (see for example here for previous attempts) but a strobe just opens a whole new range of possibilities. I was quite pleased with myself with the shot above of a Compass Jellyfish that seems to float in outer space. Here, the strobe lights up the jelly (which is really close in front of the camera) but it cannot light the ocean behind. Using a fast shutter speed, the ambient light (that would make the water blue) is not let into the camera, resulting in a black background. An exception is the bright sky, which is visible in Snell’s Window, and which looks a bit like a planet against the black background. Of course, even with using a strobe you can choose to let in ambient light, leading to more conventional shots such as the one below (however the jellyfish is a bit further away and not very nicely lit up by the strobe):

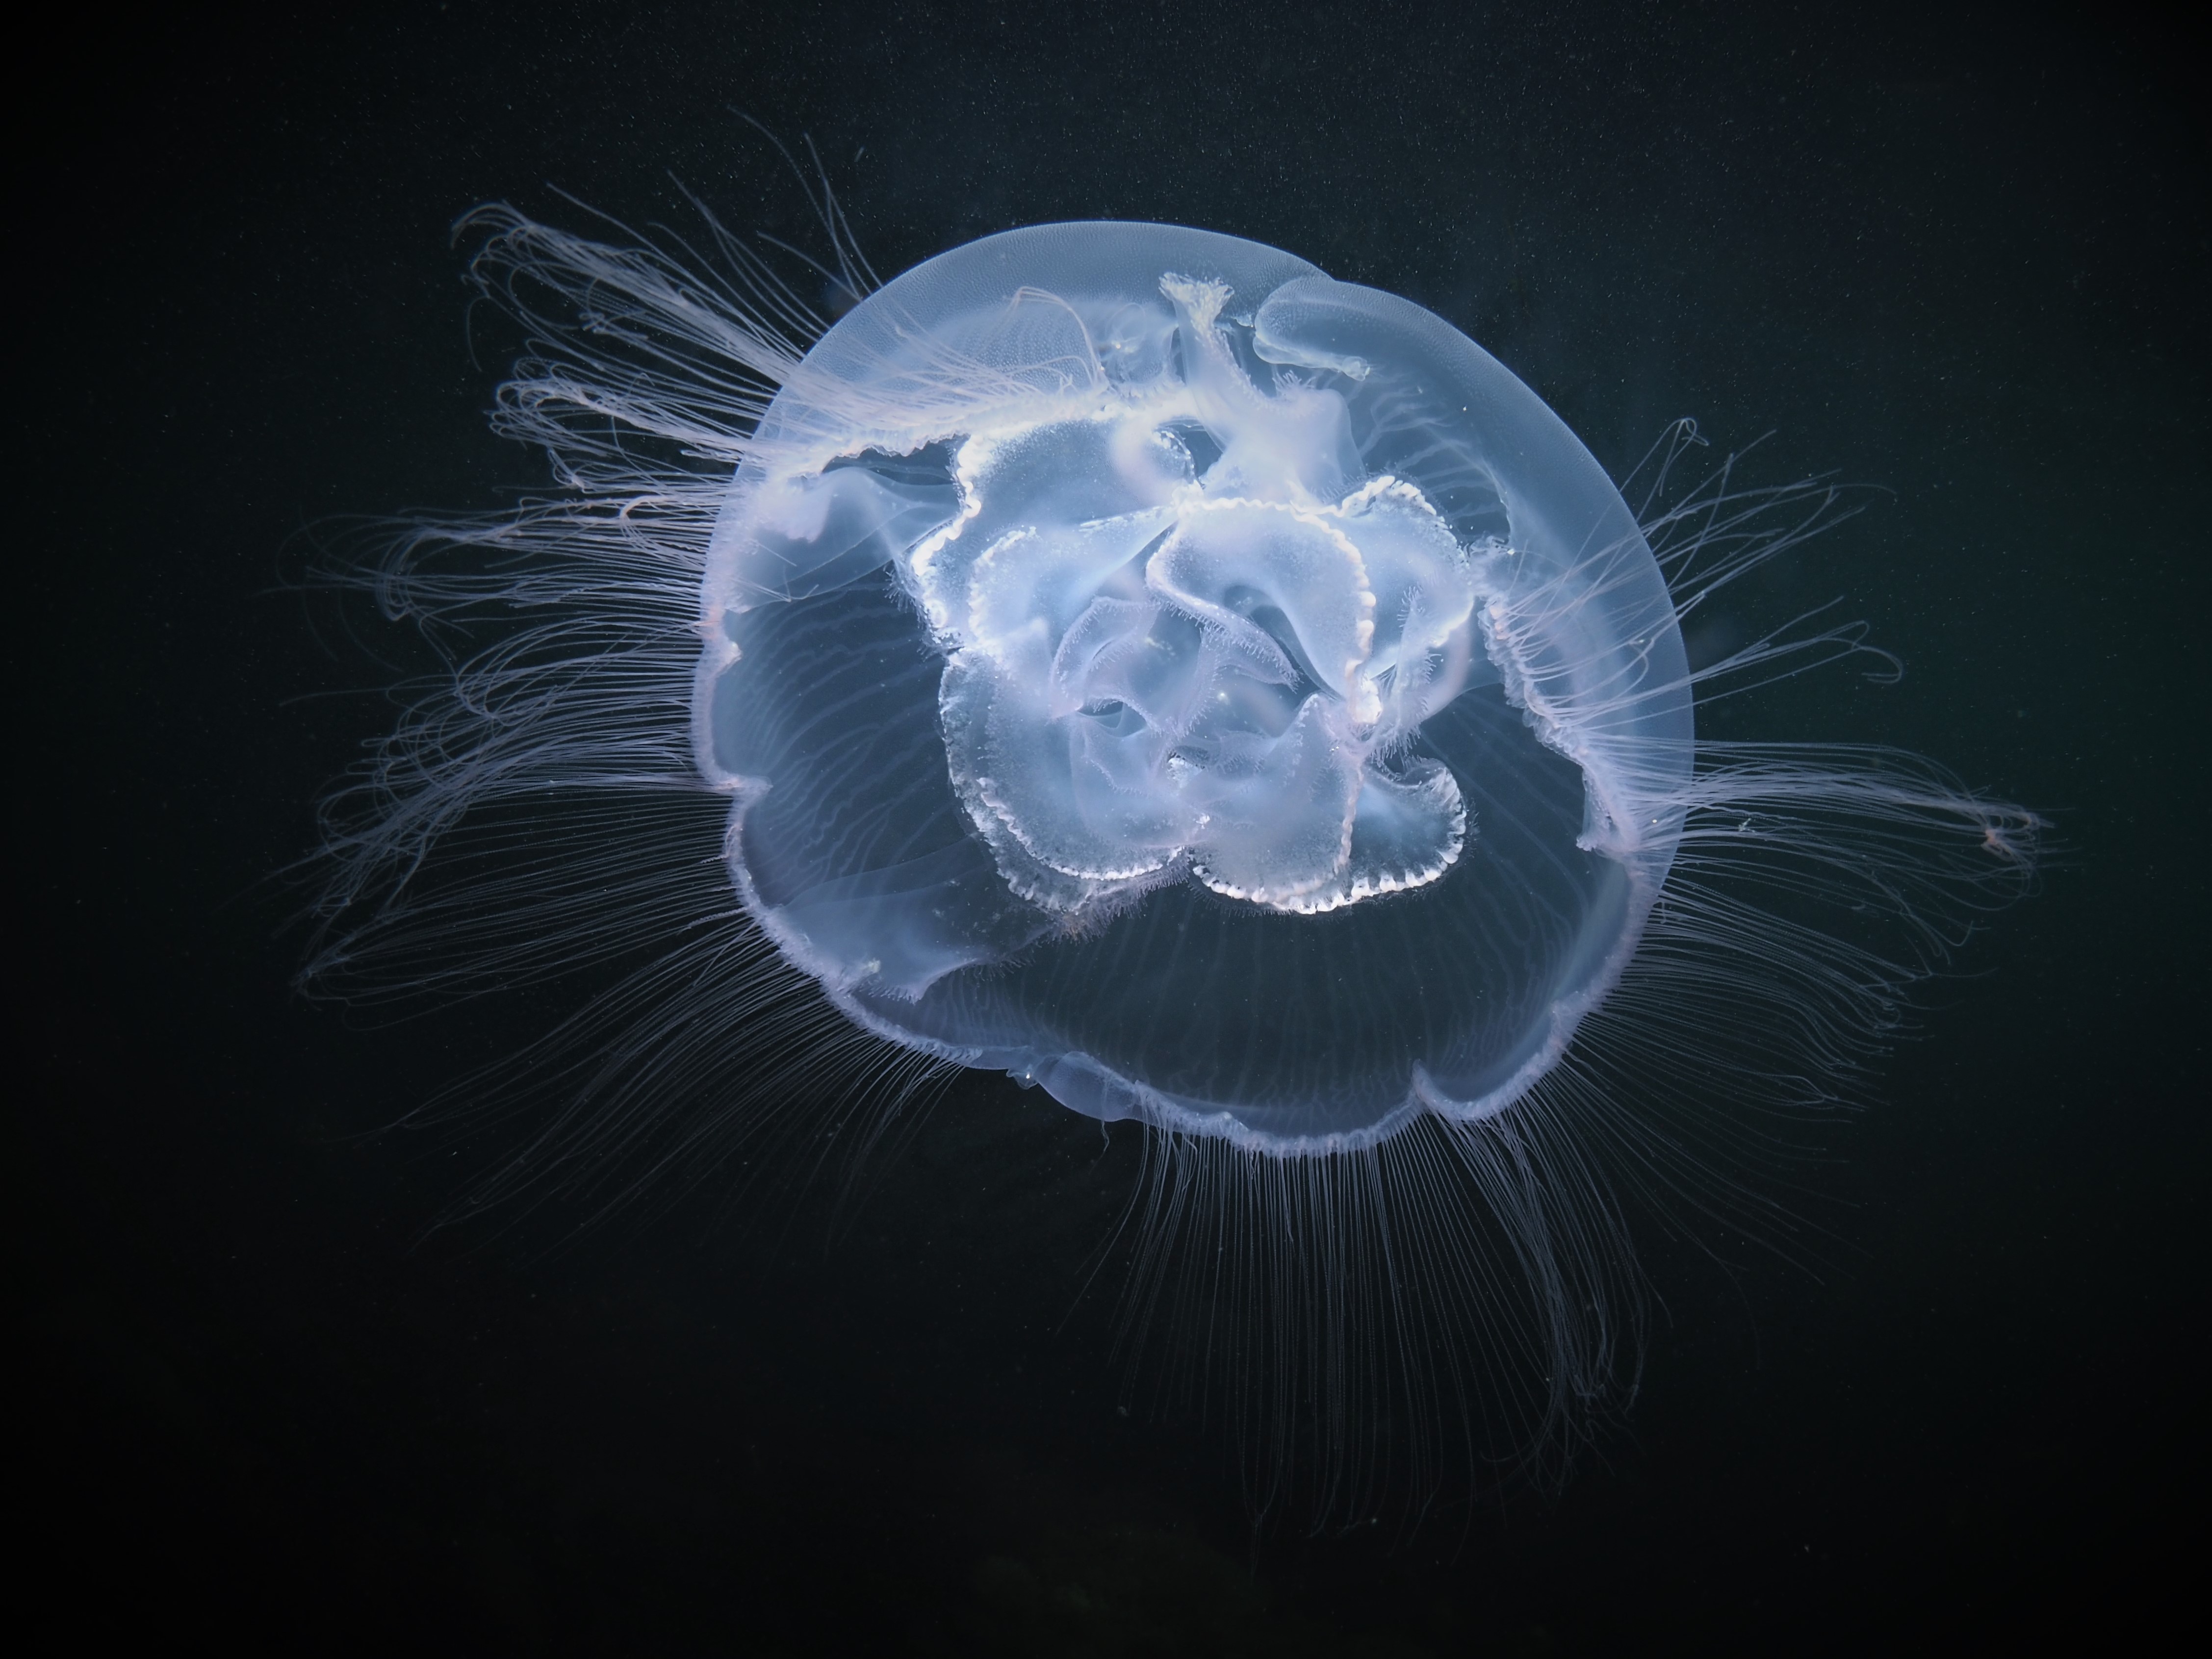
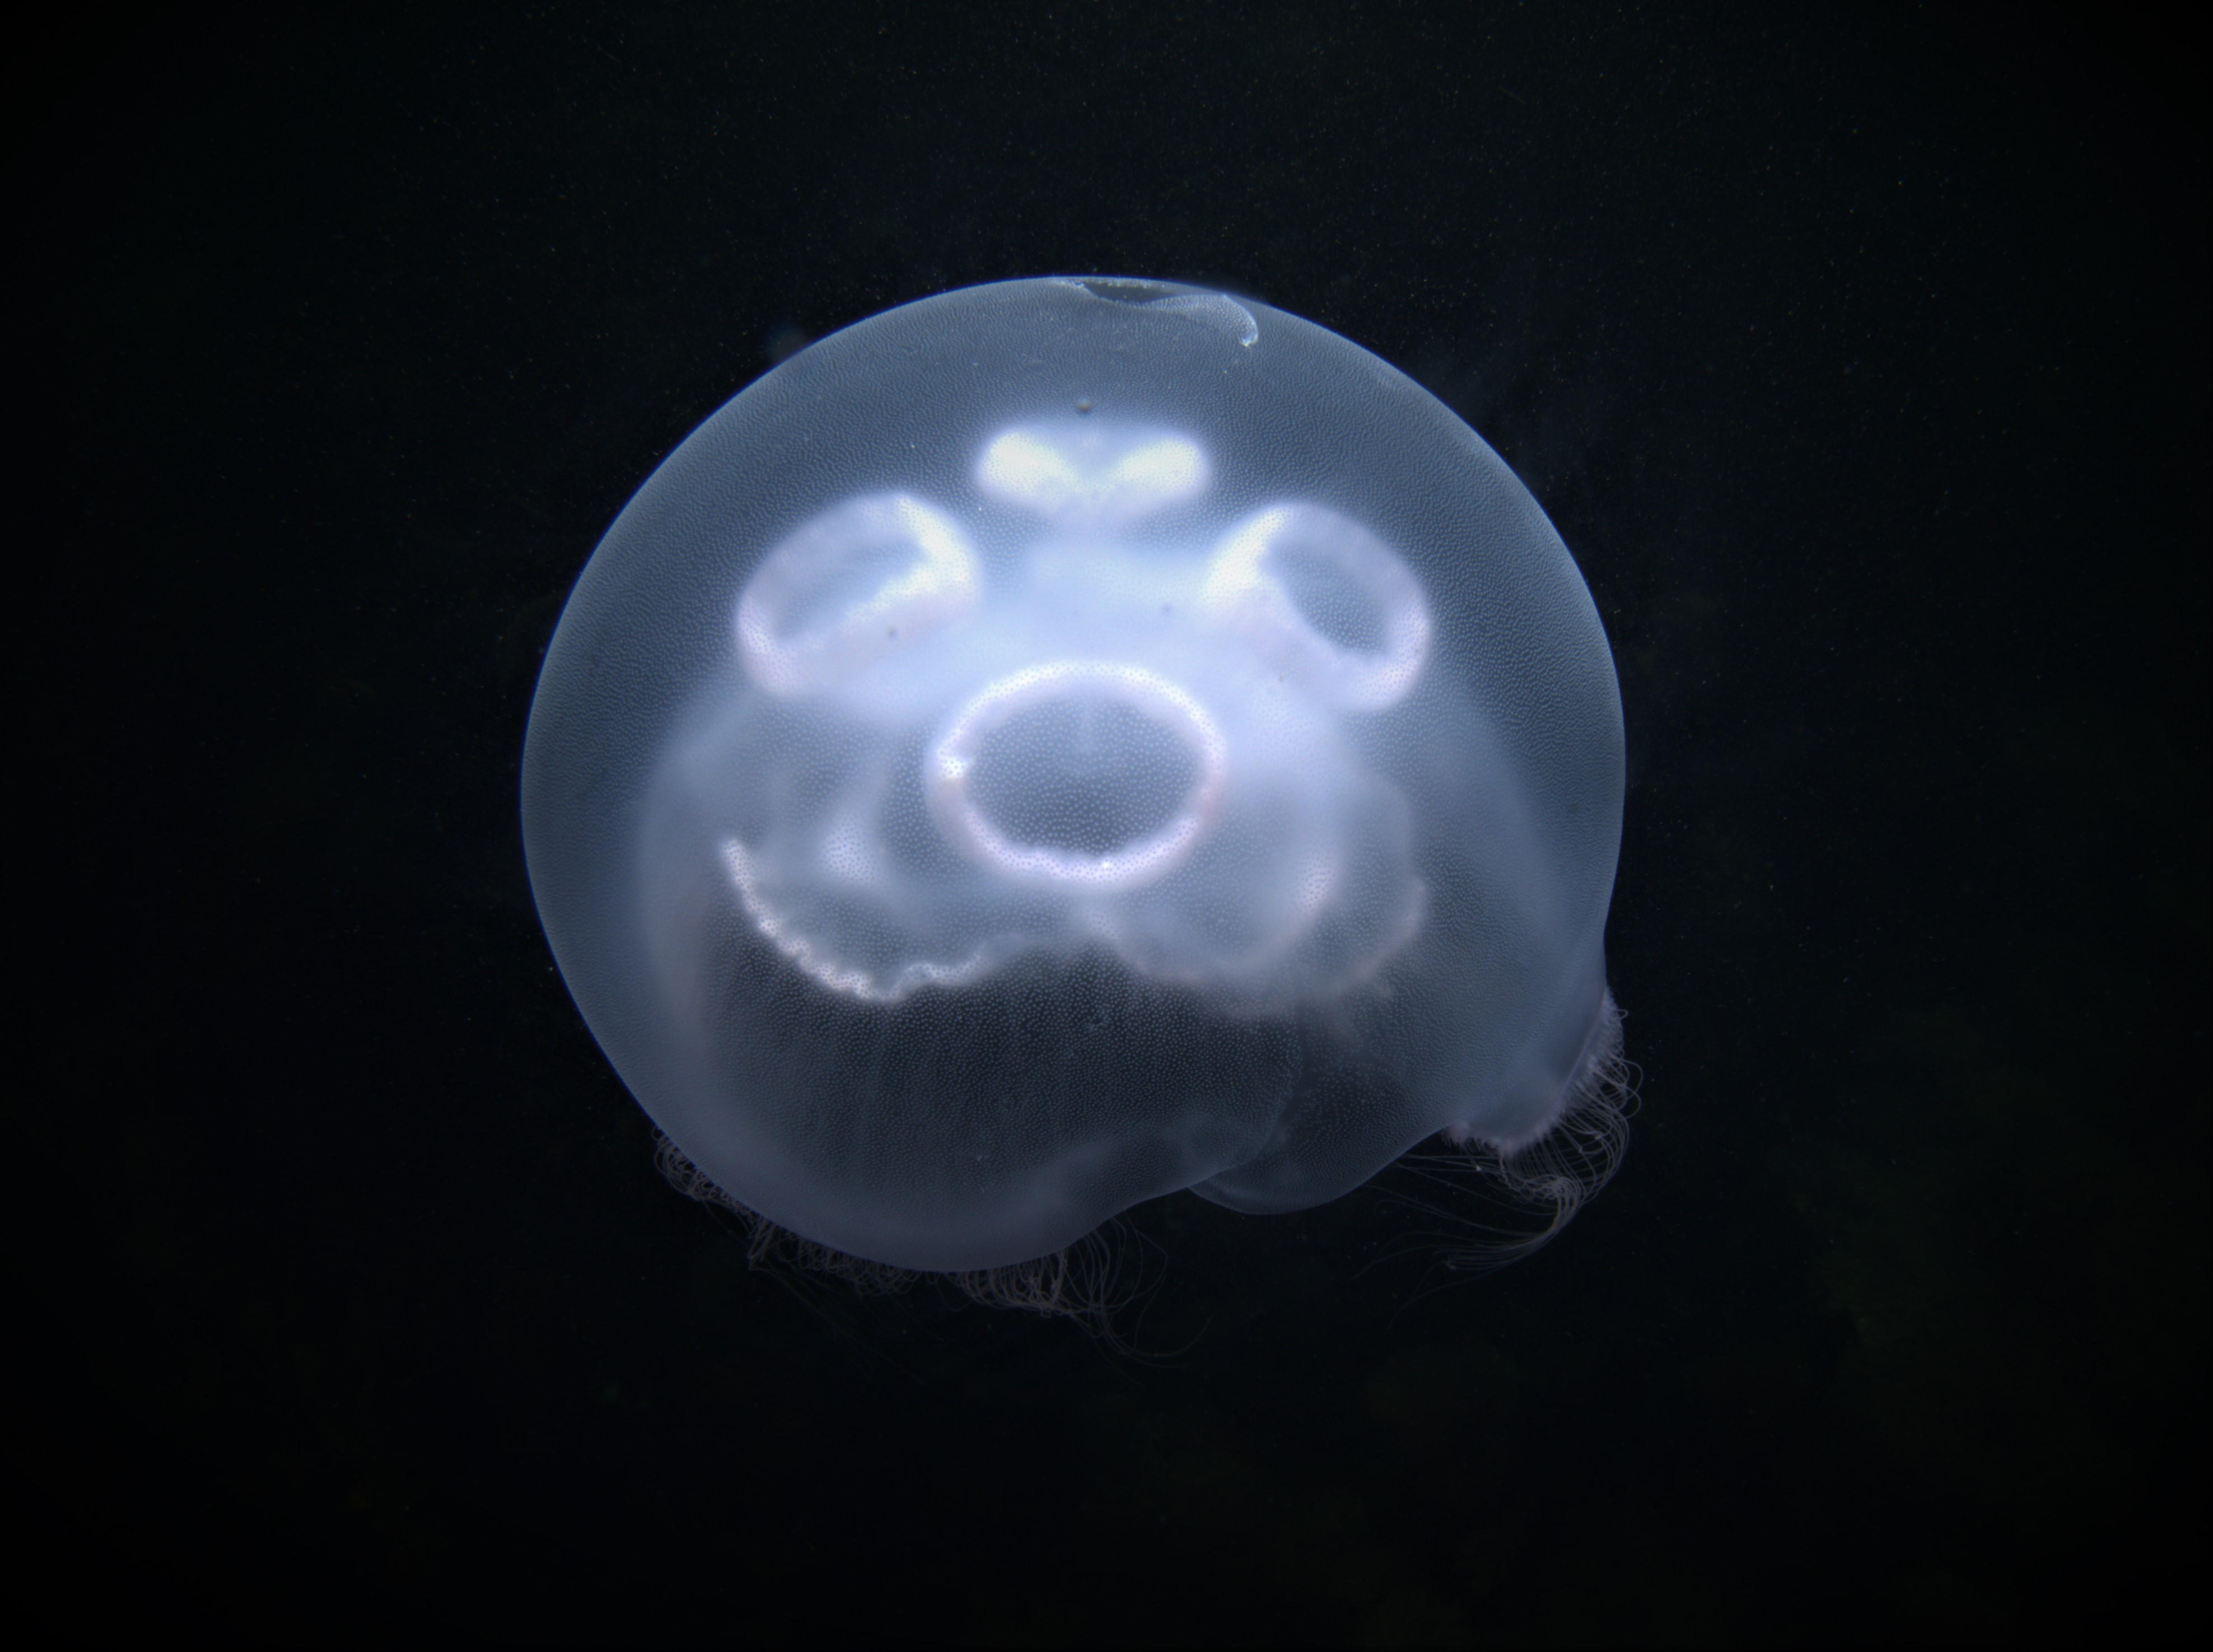
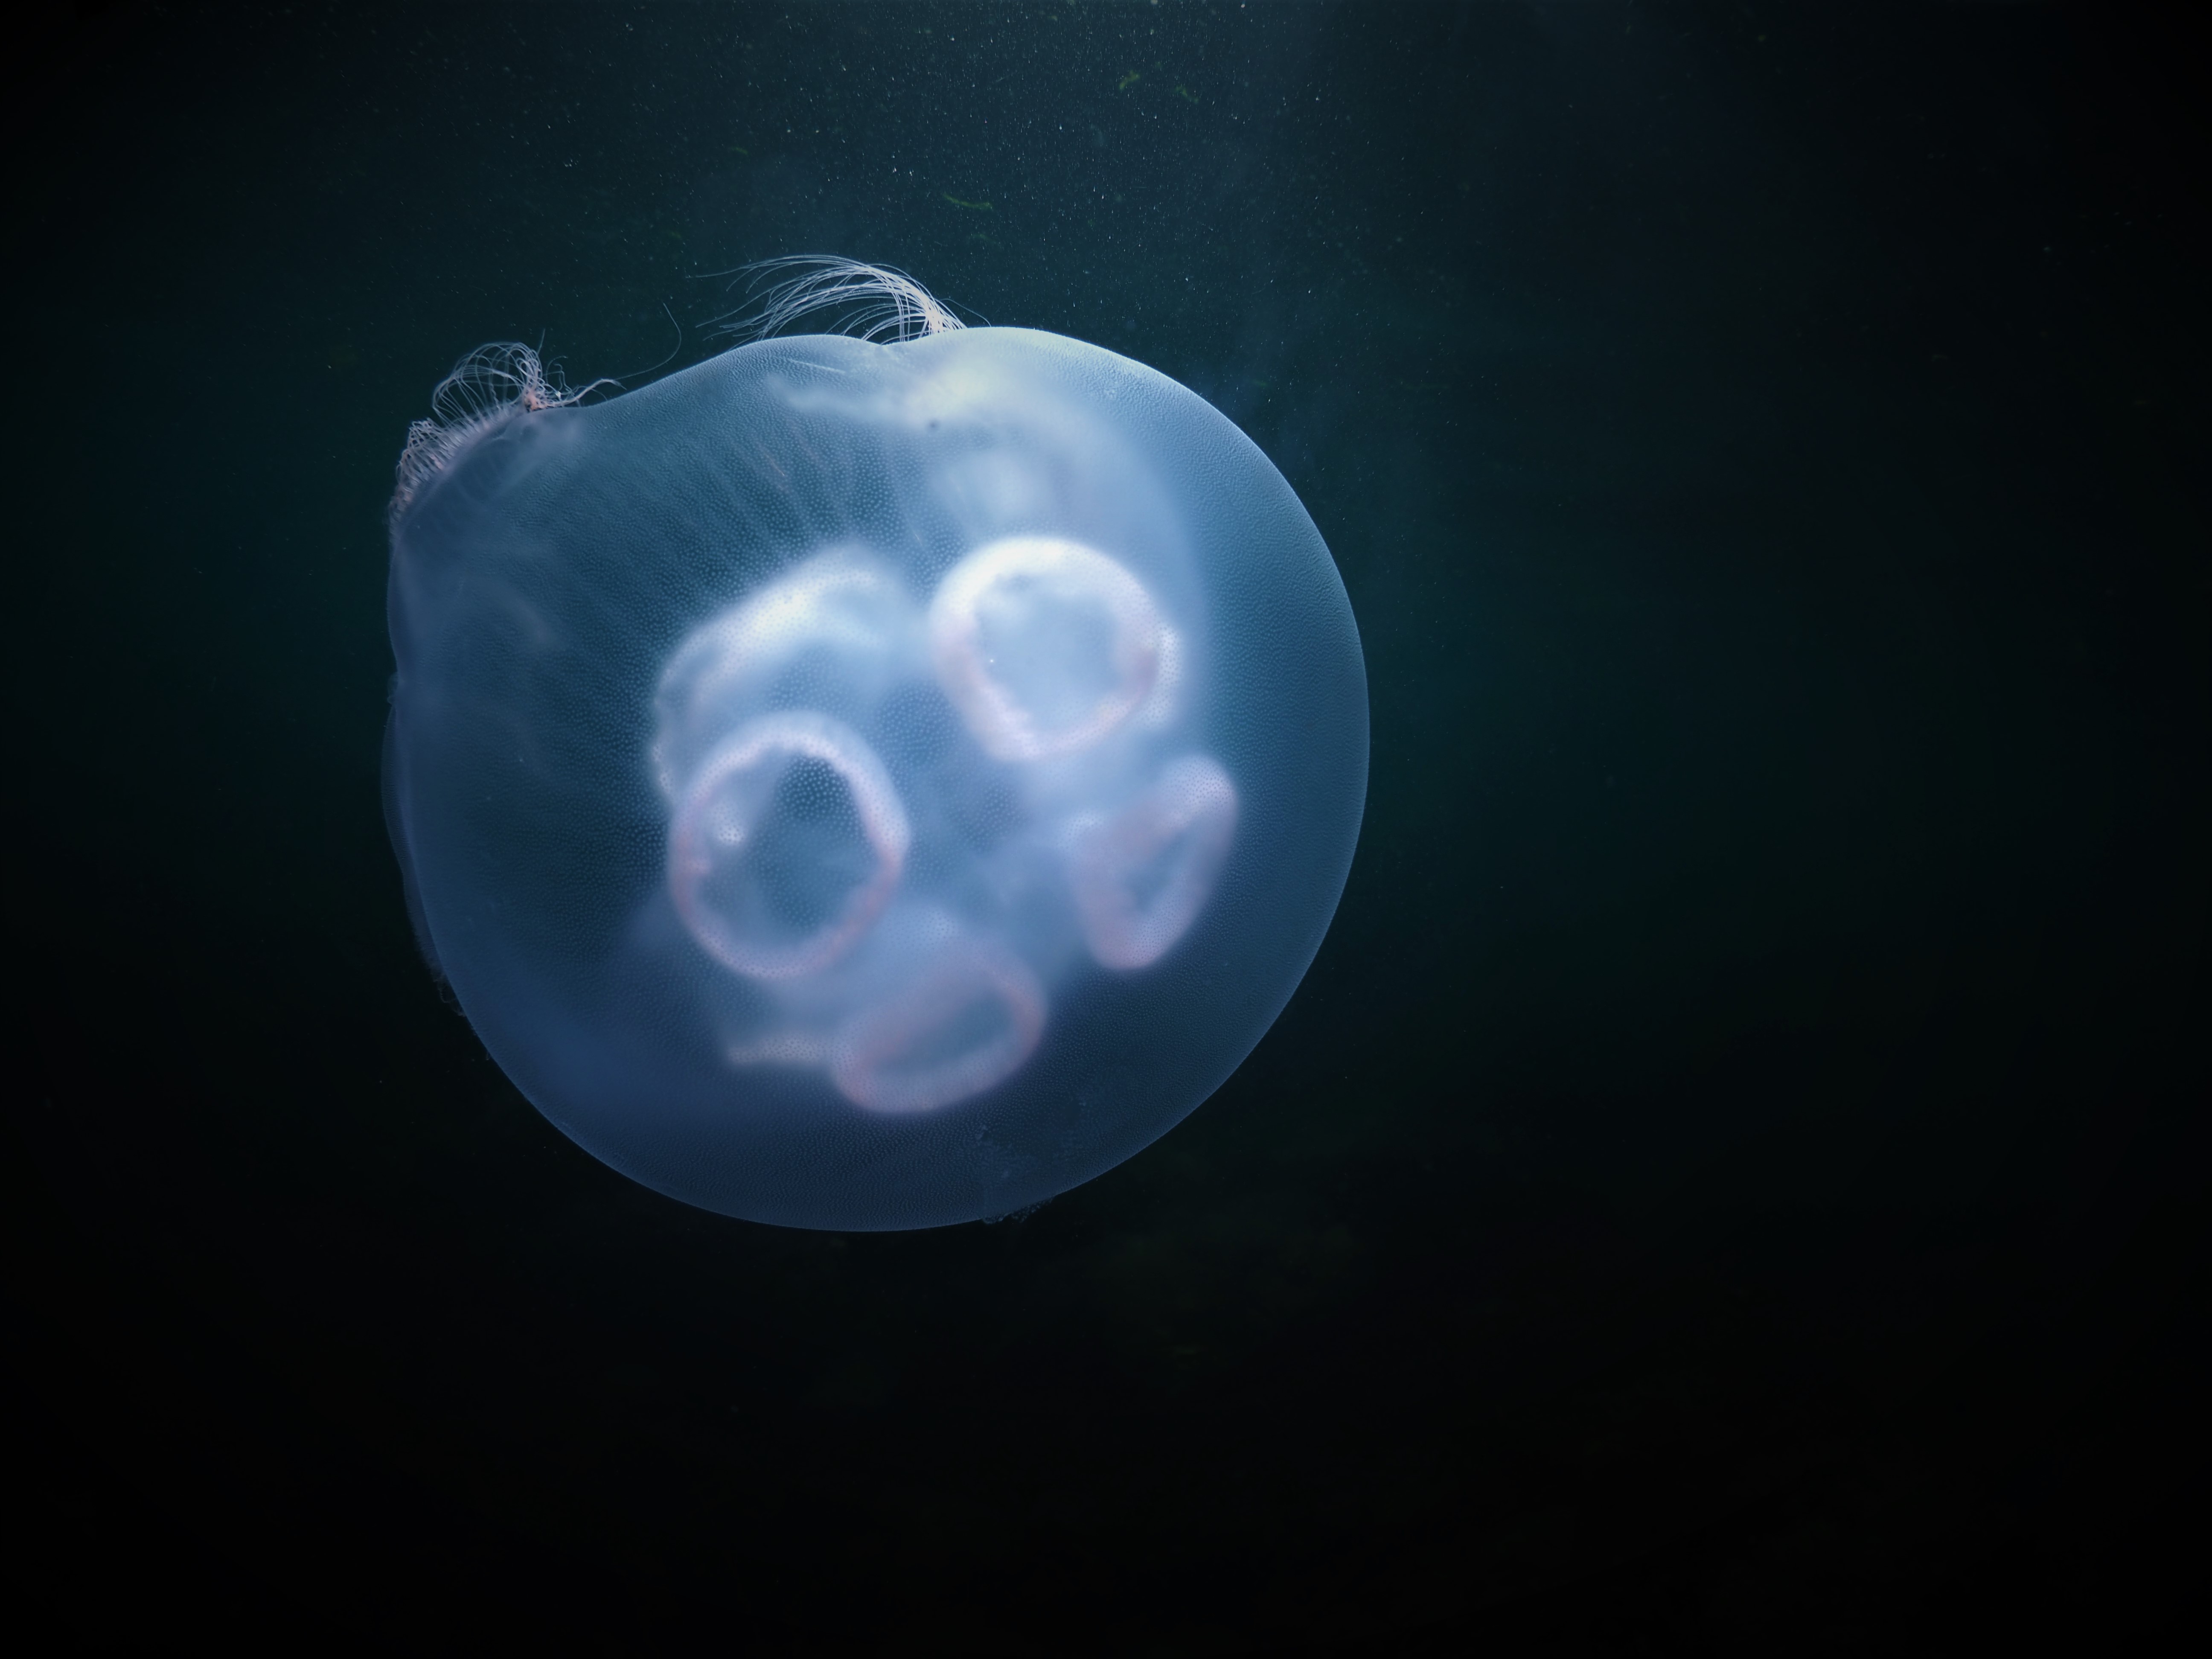
By pointing the camera downwards and getting rid of much of the sunlight, the fast shutter speed black background effect is even stronger, even on a sunny day. An example is the Moon Jellyfish below. Btw, I have touched these photos up with the generic Windows photoviewer (a poor man’s Adobe Lightroom) whch performs quite well. It is however tricky to get rid of some of the backscatter (particles in the water that light up because the strobe is incorrectly positioned, illuminating not just the subject but also the water in between subject and lens). This effect can be seen above the jelly in the second photo even after editing in Windows Photo:
It is great fun to practice photography with these jellies. In principle one strobe is enough (and many pro photographers recommend to try shooting with a single strobe). However, there are situations where two strobes are clearly better, namely when a subject needs to be lit up from two sides. The photo below was taken with the camera turned 90 degrees with the strobe to the left side (notice the remaining backscatter after using the clone stamp tools in Windows Photo). Having had another strobe to the right would have avoided the shadows (but probably have added backscatter!):
Some more shots below. The visibility has been poor lately but I hope to be able to practice some more over the weekend.